 Many loving mothers want to knit clothes for their child, thereby doing something nice for both him and themselves. But not everyone decides to take on such work, doubting their abilities.
However, you should know that knitting new clothes for a baby is not such a difficult task. Especially if you do the work with crochet.
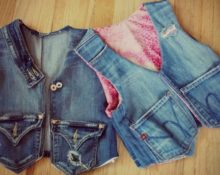
Start with the vest. It's a must have in your baby's wardrobe.
Let's figure out in detail how to knit a vest for a girl.
What you need for work
First, you need to carefully prepare, then the process of making a vest will be as pleasant as possible, and the result will be a pleasure.
Materials and tools
- Yarn (different for each vest model).
- Hook.
- Pattern appropriate size on paper.
- Scheme pattern.
- Tape measure.
Choosing the right yarn
Since we are going to knit a baby item, we should take the softest, most pleasant-to-touch yarn made from wool or cotton.
Important: natural fibers are preferable as they are hypoallergenic and do not cause irritation.
It is easy to find in any craft store. Many manufacturers make yarn specifically for children's clothing.
As for color, it is a personal choice between mother and daughter. The color may depend on the girl's age. For example, for a schoolgirl it is better to choose neutral tones, and for very young children - bright ones.
Taking measurements
To find out the parameters most accurately, ask the child to stand straight and not strain. Ideally, measurements should be taken over a thin tank top or T-shirt.
- Front length to armhole. Measure from the armpit to the desired sleeveless length.
- Hip and chest volume. If the girl is very small, then it is not necessary to take the girth measurement separately. At that age they won't be much different.
- Armhole height. Measure from your armpits to your shoulder. It is important that there are no bends.
- Finished product length. Measure from the neck to the desired length.
Crochet a vest for a girl
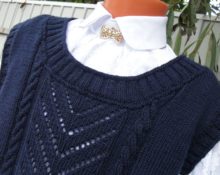
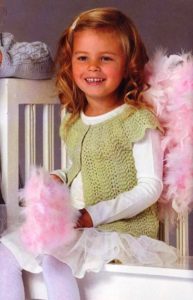
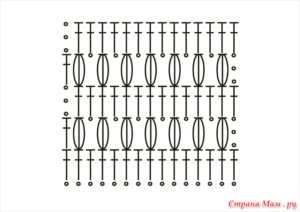
How to knit an openwork vest
It is better for beginning needlewomen to start with a simple pattern.
Advice. For work, it is recommended to use linen or cotton threads.
These clothes are suitable for a cool summer evening.
Let's consider knitting a vest for a six-year-old girl.
Back
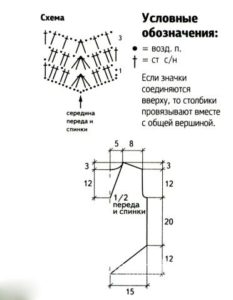
- Based on the diagram attached below, let's start from the back.
- Take a chain approximately 40 cm long and mark the middle.
- Repeat the first and second row three times.
- Then knit the second and third row.
- From the beginning of knitting, leave 2 cm unknitted at a distance of 20 centimeters on both sides. This is necessary for the armholes.
- In height, steps should be taken another 12 cm.
- For the shoulder bevel, we do not knit one repeat in each row on both sides.
- Knitting the back should be completed after six rows.
Before
- We knit the front in the same way, only with a neckline.
- When you start working, you need to divide both sides into equal parts and then knit them separately.
- Leave one unknitted repeat inside, thereby creating a V-shaped neckline.
Assembly
Now that the parts are ready, they can be assembled.
- Shoulder and side seams need to be sewn.
- Next, tie the edges, neckline and armholes with a series of stitches. The finishing method is also called the “crawfish step”.
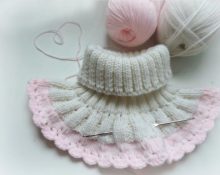
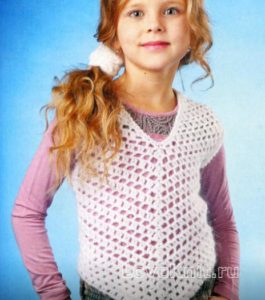
How to knit a raglan vest

Kids will be warm and comfortable in a raglan vest, especially if you tie it with a hood.
For this model you will need 2 skeins of yarn. This model is knitted from acrylic, you can also use cotton.
The originality of raglan
The features of raglan are that The parts are not knitted separately. From the neckline, both the front and the back, and the elements connecting them - the upper part of the sleeve - are made.
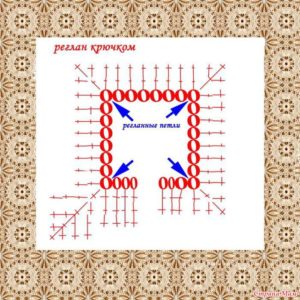
Thus, we will knit 4 parts at the same time. In the diagram they are shown as four parts of a square. However, in reality, they are not equal. In a vest, the same number of loops will be needed for the back and front. The same number of loops will go into 2 sleeves.
Important: when knitting, you will need 4 additional loops, which will be used to increase loops and increase each part of the product.
The initial number of loops should form a chain that is equal to the circumference of the child’s neck.
Calculation example. To encircle the head, a chain of 24 loops was knitted. To them we add 4 loops for an increase. This means we start work with 28 loops.
Divide 24 loops into 3 parts.
- Back - 8.
- Before – 8.
- Sleeves – 8 (right – 4, left – 4).
Completing of the work
The vest shown in the photo is knitted with the pattern shown in the diagram.
The pattern can be used for the entire product.Or you can, as in the sample, apply it only to the upper part of the vest. In this case, the pattern ends at the armhole line; below, the work is done in columns.
Don't forget to tie all the pieces when you're done.
Tips for Crocheting a Vest
- At the end of the work, the product should be steamed.
- Best for children choose cotton yarn.
- It is not recommended to use mohair or other fleecy threads. Especially if the product is intended for children.
- To ensure the correct choice of yarn, you can conduct testing. To do this, apply the skein to the child’s face. If it does not cause any unpleasant sensations, itching or tingling, the threads can be used for knitting.
- For children with allergies, it is advisable to avoid yarn of animal origin. Linen and acrylic are more suitable.
- The presence of eco-yarn in the store’s assortment is a good find. Since it is made from plant materials.
Have you already imagined a vest that will please your beauty? Don't delay, grab your hook and start knitting! Handicraft will definitely bring you pleasure, and its result will delight the owner of the vest!
 0
0