Many people have more than one pair of old jeans in their wardrobe. Let's figure out what we can sew from them. We suggest giving it a second life and making a vest. Wash and iron your jeans before work. This will make it possible to cut out parts without problems.
What will you need?
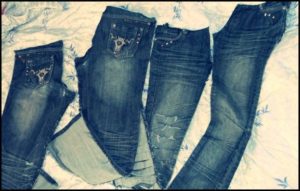
 old jeans;
- sharp scissors;
- sewing machine or needle;
- strong threads to match the material;
- tape measure;
- pins for fastening workpieces;
- decorations for decorating a vest;
- paper for making a template;
- a piece of soap or chalk.
How to rip open an old vest?
Instead of making a pattern, you can use an old vest. From the wrong side, carefully press along the seams. Place each piece on the ripped jeans from which you are going to sew a new vest.
Attention! Open all seams; stitched areas will be useful for increasing the size and hem.
What parts from old jeans will be used up?
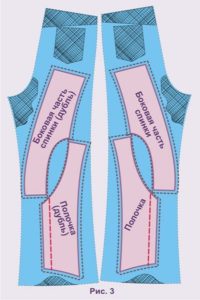 Take the back of the jeans where the pockets are as a base.Give the correct shape. To ensure tight contact between the template and the material, press down with your hands and pin with pins so that the product does not slip. If you choose complex styles, then the whole ripped jeans will be used for the pattern, and if not, then only half.
Features of the cut
Method one. Trace each piece with a piece of soap, remembering to leave 1.5 cm at the seams for stitching. Then carefully, slowly, cut out the blanks separately.
Method two. If you're using paper, just cut out a hexagon to start with. Next, apply it to the material and trace the lines with cutting soap. You will need two of these hexagons.
Sewing steps
For the first method. Sew the finished pieces together. Use a sewing machine or by hand. For hand sewing, use a thimble as the denim fabric is quite strong and you can prick your finger when piercing it.
For the second method with hexagons:
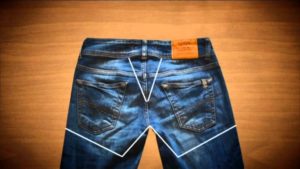
 From the lower part, from the thigh to the shin, cut out the harnesses. But first, take your measurements, covering your neck to the chest area of your body.
- Prepare the template according to your measurements and then pin it to the fabric.
- Step back two centimeters on the sides and cut out.
- Sew the harnesses along the fold lines, then sew them to the base of the vest.
- Cut out the back, equal in width to the base. Make sure the edges are straight. It’s better to pin it with pins to be sure, and only then stitch it thoroughly on a typewriter.

What to do with the pockets?
Pockets can be stitched and made into “fake” designs. Or make a decorative decoration that will give an emphatic, individual, stylish look to the vest.
What and how to decorate?
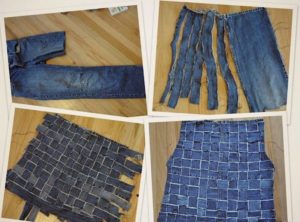 You can decorate with anything.For example, use the remnants of jeans and make long ribbons in the form of narrow tubes and sew them in the shape of a pocket (overlay method). Or make appliqués according to fashion. Just don’t choose primitive figures. Hand embroidery on the pockets looks original. Decorate the back according to the chosen style.
We suggest using rhinestones for women. For men, a more masculine theme will look nice. For example, any wild animal with an open mouth. On the back side of the vest you can sew leather decor such as inserts. Do not over-decorate, as this may ruin the appearance of the new product.
The vest is ready, now let the new thing hang down to give it shape. Hang on a hanger for a couple of hours. Then you can wear it and be proud that you sewed it with your own hands.


 old jeans;
 From the lower part, from the thigh to the shin, cut out the harnesses. But first, take your measurements, covering your neck to the chest area of your body.
 0
0


