Knitted clothes are a great way to keep warm in cold weather. A handmade item allows you not only to update your wardrobe, but also to significantly save your family budget. After all, you put a piece of your soul into the creation of a product, demonstrating to your loved ones your care and love. Another reason for knitting may be the fact that such things do not go out of fashion. And the vest is one of the most striking examples of this. After all, even the craftswoman who picks up knitting needles or a hook for the first time can make it.
Knitted vest for boys
Despite the simplicity of its creation, the vest is a very necessary, stylish and beautiful piece of clothing. With its help you can warm the outfit of your child of any age. By knitting using various techniques and patterns, you can get items of different styles. Another name for a vest is a sleeveless vest. To create this item, you can use three types of tools: knitting needles, crochet hook or Tunisian crochet hook.This article will focus on the crochet method.
This garment can be crocheted in a single piece or in separate fragments, which are subsequently connected to each other.
The first method is easier to make and is great for beginners. You just need to purchase the necessary materials and choose a model that suits your desires.
The second method is more time-consuming and will require more effort and patience from you. And also special attention, because when connecting individual elements into one part it is much easier to make a mistake. But in this way, you can create bright clothes using yarn of contrasting colors. The main condition is that the shades are in harmony with each other.
A sleeveless vest is similar in characteristics to a sweater, but unlike it, it is simpler in execution and requires less thread.
What is needed for knitting?
To make a vest you will need to take the following measurements:
- Chest circumference: measured in a circle through the widest part of the chest, armpits and shoulder blades;
- Neck circumference: measured at the lowest point;
- Distance between sleeves (measured across the shoulder blades from one shoulder to the other);
- Length of future clothing (measured along the back).
You can use the one shown in the figure as a basic pattern, making adjustments to your measurements.
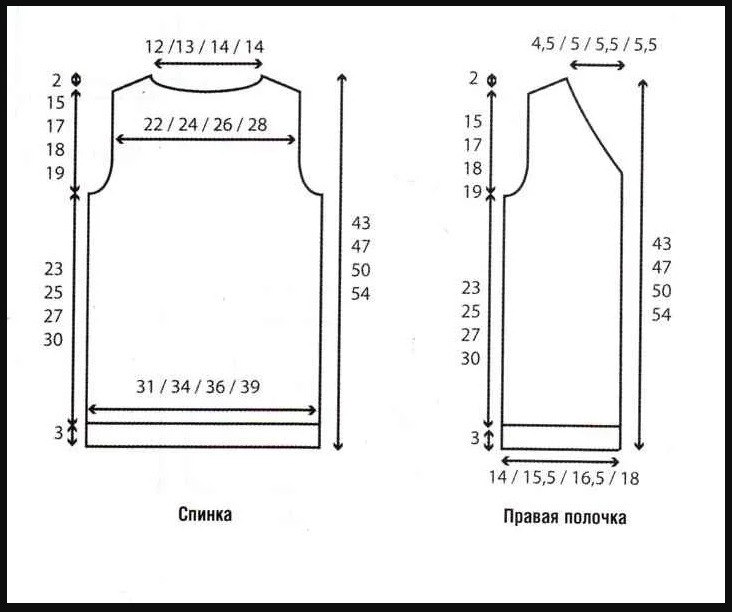
You can also use a sweater that fits your figure well as a basis.
Important! To avoid overtying, apply parts to the pattern or sample more often during the manufacturing process.
In addition to the pattern, you will need a hook of the right size and a sufficient amount of yarn. Choose knitting material according to the season of use. For summer options: linen, silk, viscose and cotton. For winter: wool, mohair, alpaca and angora.The demi-season option is acrylic.
Which model to choose?
One of the most important stages of preparatory work before starting knitting is choosing a suitable model. The first thing you should pay attention to is how well it meets your needs. Namely, compliance with the following parameters:
- Seasonality. For example, for cold weather it is better to choose a densely knitted fabric, and for a summer evening a light openwork weave;
- Color. If this item will be used in a strict, formal setting, for example, for a school uniform, then choose a plain, dark-colored yarn;
- Your boy's age. The older the child, the more restrained colors should be used in clothing.
Let's look at an example of knitting several different patterns.
Knitting a sleeveless vest for a baby up to one year old
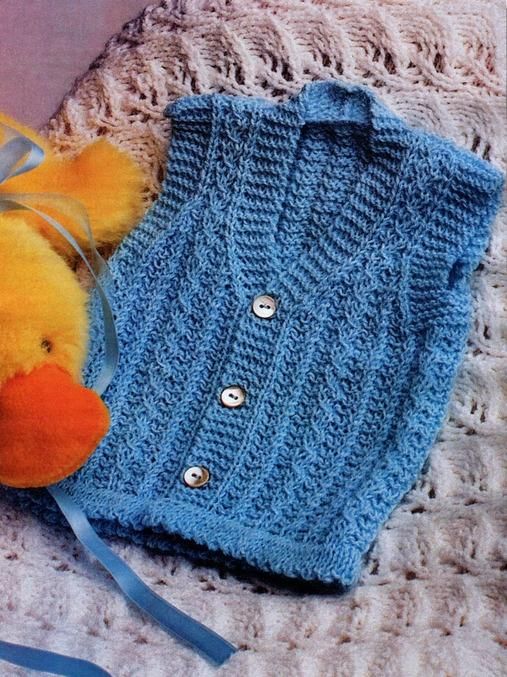
Clothing for babies should be bright and catchy, so choose yarn in bright colors. Also take into account the fact that the baby does not know how to dress himself, so take this condition into account when choosing a model. It is advisable to use types with fasteners on the front or shoulders. You can also make a wide neckline.
Another good option is a vest with a wrap:
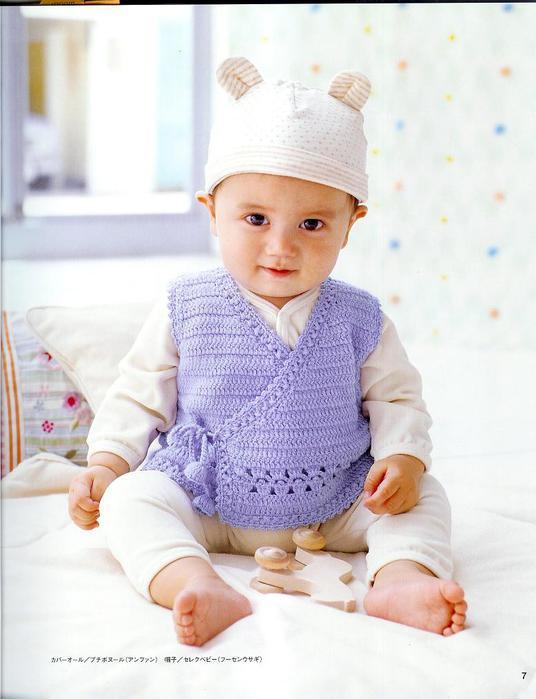
This option is ideal for ages 3-6 months. For knitting you will need baby yarn with parameters 300 g\100 m and a 3.5 hook.
The work is carried out in the following stages:
- Build a pattern according to the sample;
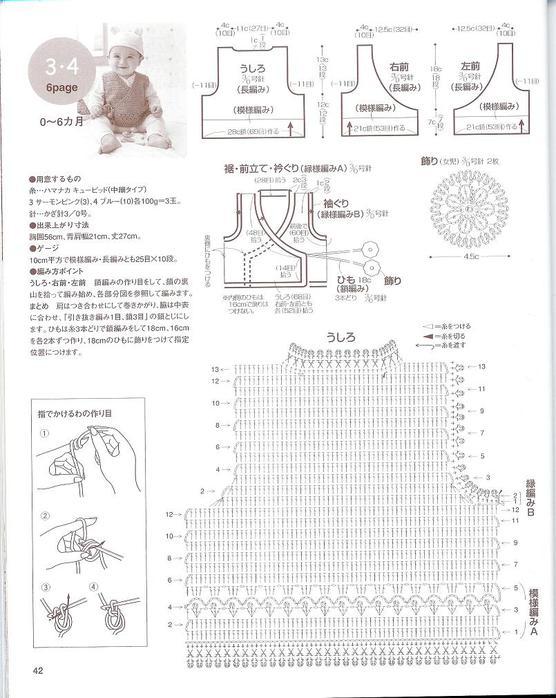
- Make the rear part according to the given diagram;
- Knit the two parts of the front;
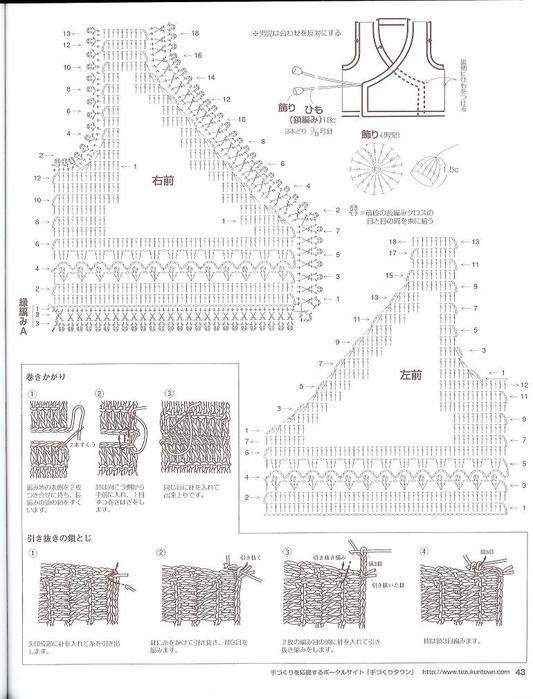
- Sew shoulder and side seams;
- Tie the bottom, trims and neck of the product in a circle as shown in the diagram;
- Tie the shoulder floodplains (see diagram);
- Tie ties and bells for decoration.
Instead of ties and bells, you can use purchased braid and decorative beads.
You can also knit this spectacular vest:
For this embodiment, you will need acrylic yarn in two colors and a little black to decorate the bear's face, a hook, two buttons for fastening and a pair of black buttons for the eyes.
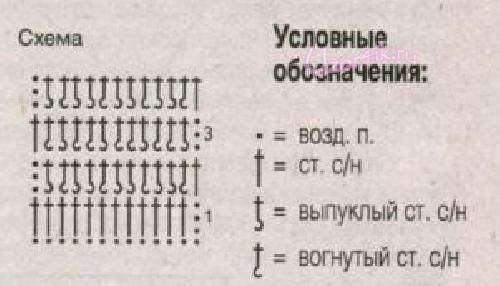
Use blue yarn to knit 5p. elastic band pattern.
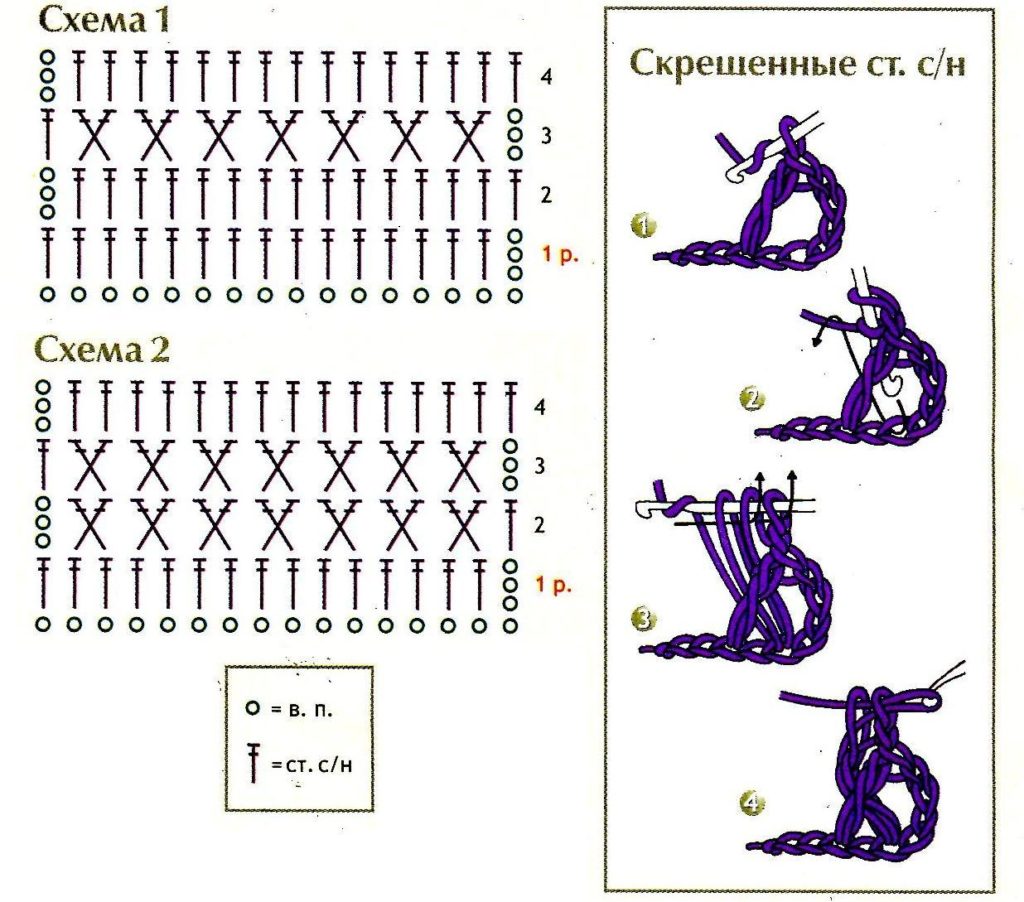
Then continue work according to scheme 2:
Complete the back and front pieces and sew them together along the side seams. Tie the top edge with blue thread. Sew buttons for fastening.
Tie and sew the muzzle onto the front piece. Instead of a knitted decoration, you can use a ready-made applique.
Vest with a hood for a boy
This model will serve as excellent protection from cold winds. Unlike a sweater, it guarantees your fidget more freedom of movement. And the hood will serve as an alternative to the hat, which the younger generation does not like to wear.
The model we offer is perfect for a summer evening.
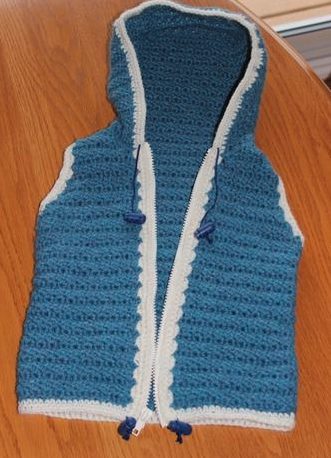
For knitting you will need cotton\polyamide yarn with parameters 400g\100m, hook No. 4 and a detachable zipper 25cm long.
Operating procedure:
Create a pattern according to your measurements.
Back:
Cast on a chain of the required number of chain stitches. Knit in an openwork pattern according to the pattern.
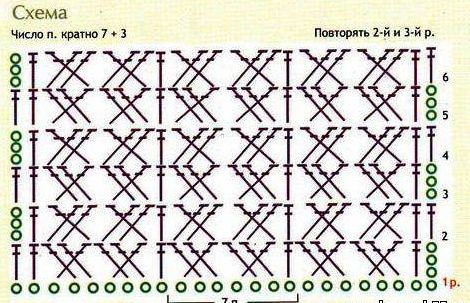
Make decreases to form shoulder flaps and neckline.
Before:
Made from two separate parts.
Cast on a chain of air loops and knit a piece of the required size using openwork according to the pattern. While knitting, form the shoulder pads and neckline.
Knit the second part symmetrically.
Hood:
After completing the shoulder seams along the edge of the neckline, continue knitting the hood in one piece.
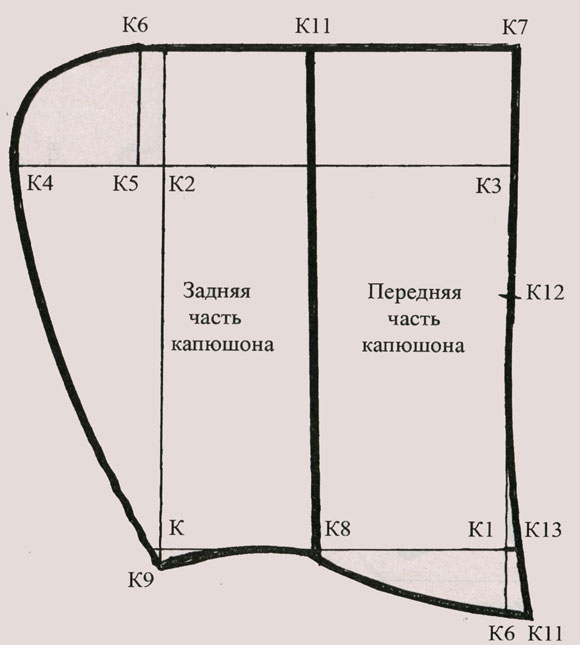
Or knit two separate parts using the basic pattern, making calculations based on your measurements.
Assembly:
Sew shoulder seams. Knit the hood if it is made in one piece. Sew side seams. If the hood is made as a separate part, then sew the elements and sew it into the neckline. Tie the edges of the shelves and hood as follows: 1 row sc; a series of CCHs; row sc. Sew in a zipper. Tie the shoulder armholes in a “crawfish step”.


 0
0