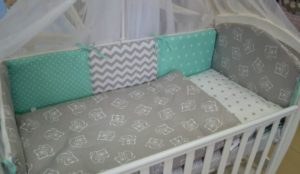
 Every mother tries to breathe kindness, warmth and kind energy into everything she does for her baby. In addition, sewing bedding for a child is much more economical than buying it in a store. And the money saved is better spent on healthy food, toys or entertainment.
Master class on how to sew bedding for a crib
You will need
 To sew children's bedding we need:
- natural material (preferably cotton, satin or flannel);
- tape measure;
- several pins;
- sharp scissors;
- meter ruler;
- a piece of dry soap or chalk;
- threads in the color of the fabric;
- iron;
- sewing machine.
Determining the size of the set for newborns
 The best option so as not to miss the size of the future bedding set is to try on an old sheet, pillowcase and duvet cover.
If this is not possible, then we measure the child’s mattress and write down the length and width. We do the same with the pillow and duvet cover.
Before starting sewing, we first wash the purchased material to check its shrinkage and clean it from dust and dirt, and then iron it well with an iron using steam mode.
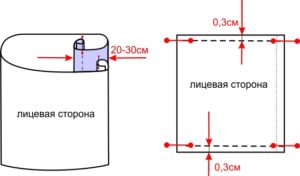
You can roughly “throw in” in advance how many centimeters the material will sit by measuring a piece of fabric to 10 cm more. Or you can first decatenate the material on a small piece of fabric the size 20–30 cm: wash it, iron it and try it on. This way you can mathematically calculate how much the piece of fabric chosen for sewing will sit.
Choosing material
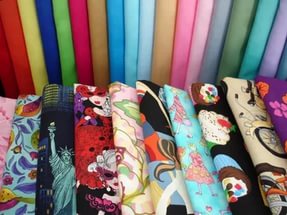 We use satin to sew the baby's set. This is a natural material with a noble natural shine and pleasant texture. Due to the high density and special weaving of the fabric threads, its service life will be long. Such linen will not tear or wear out for a long time.
You can take a piece of calico for sewing. Such material will be rougher, but also quite wear-resistant. But you shouldn’t use chintz for sewing bed linen. It has a low density and will wear out quickly. In addition, it becomes deformed after washing.
To sew linen for a baby's bed measuring 120 by 60 cm, it is recommended to purchase a cut of 300 by 150 cm.
Making cuttings
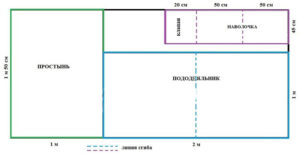 We begin to cut out a sheet, duvet cover and pillowcase with a flap from the material. To do this, mark the following parameters on a piece of material:
- Sheet. Size: 100 by 150 cm
- Duvet cover. Size: 200 cm by 100 cm
- Pillowcase. Size 45 by 120 cm.
To save as much as possible on material, it is better to use the attached cutting diagram. This will make it easier to apply dimensions. We outline the contours using chalk and a ruler, and cut out the blanks with scissors.
Sewing sheets for a crib
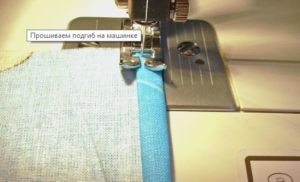 After the blank for the sheet is cut out, we move on to sewing.First of all, the edges of the product are processed so that the threads do not fray. Only side cuts where there is no factory edge are processed. When cut correctly, the top and bottom of the sheet will produce factory edges, and the remaining sides should be hemmed.
Attention! If the edges are made roughly and unsightly by the manufacturer, then they are also hemmed.
Bend the ends 0.5 cm and repeat the same operation again. We'll get a double hem around the edges. It is pinned with needles or “gimmicked” with threads. We sew the resulting hem on a sewing machine, first one edge, and then “pass” the second.
Advice: If the child is very active, it is recommended to make the sheet with an elastic band so that it does not bunch up while he sleeps or plays in the crib.
Sewing pillowcases for a crib
- We take a cut piece of fabric onto a pillowcase, fold in the raw edges (like on a sheet) and stitch it on a sewing machine. At the corners, a fold is immediately made on both sides; these places are stitched with one line.
- After this, the material is folded along the fold so that the “face” of the material is inside. The valve is bent so that its tip lies on the other side. We make a regular stitch with a machine, then turn the pillowcase right side out.
- Our pillowcase is ready. All that remains is to iron it using steam.
Sewing a duvet cover
- We take the pattern that we prepared for the duvet cover. We make a double hem, “zhiulim” or fasten the raw edges with needles and stitch them on a sewing machine. We do this using the same system as with the sheet. But here it is recommended to process the edges so that the finished duvet cover looks better.
- We fold the hemmed duvet cover in half along the lines outlined in the cutting.We do this so that the front side “looks” inward. At the end we will get a rectangle with sides 100 by 95 cm. We sew the side of the duvet cover and its upper part.
- The lower part of the product is divided into three parts: two 40 cm each, one 20 cm. Take one side of the product and stitch it to the bottom. We leave twenty centimeters on one side. We don't flash them. This will be the hole into which we will later insert our blanket. We “pass” the remaining forty centimeters using a typewriter. At the end of each line, tacks are made.
- We turn our duvet cover inside out and iron it thoroughly. The duvet cover for the crib is ready.
We wash the resulting set, iron it and put it in the crib.
It is recommended to supplement bedding for a small child with soft bumpers.
We sew bumpers for the crib
This fabric device will help protect your baby from drafts, noise and impacts on the bed bars.
We will need a piece of cotton fabric, filler (sintepon, foam rubber).
Metering
To sew bumpers into a bed for a newborn, we will need fabric 550 cm long and 110 cm wide. The optimal thickness of the filler is about a centimeter. Before cutting out, wash the material, let it dry and iron it thoroughly.
Pattern
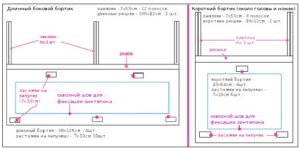 We mark the material in accordance with the proposed pattern. Although, in fact, you can measure the crib and immediately mark the measurements taken on the material. We first measure the baby’s crib, because its size may be non-standard.
Sewing
We sew, sewing in the frill at the same time. In this case, we leave one edge of the product unsewn. If desired, you can omit the frill. For the frill, choose a harmonizing color (you can use ribbon) or just take the leftover material for the frill.
Cutting out the filler
We mark the foam rubber (sintepon) with a felt-tip pen or pencil. We cut out the drawn pattern using scissors. Remember: the size of the filler should be slightly smaller than the fabric part, about half a centimeter on each side.
Filling the side
For the convenience of filling the headboard, you do not need to cut the foam rubber exactly to the size of the part; you can cut it vertically into two parts. This will make it easier to insert it into the side, but the cover will need an additional seam.
The sidewall, like the headboard, is best divided into two pieces. It is easier to insert the filling into the side through the bottom unsewn seam than through the narrow side seams. We sew up the bottom seam of the side.
Advice: To make it easier to use, it is better to sew the bottom seam of the side panel on your hands. Such a seam is easier to rip open in order to change the filling or wash it.
We decorate the sides with ribbons. At the same time, such ribbons will act as ties that will attach the side panel to the rods. To make it easier to mark the places where the ribbons will be sewn, it is recommended to attach the part to the crib and mark these places with chalk. If the crib is not at hand, it is best to attach ribbons in the middle of the side and in the corners.
For convenience, you can sew a couple more separate halves, approximately equal to half of the large sidewall. Such pieces can be placed as a double headboard to create additional protection for a child's head or placed on the side of the crib. Alternatively, you can put them in the chest of drawers, and then use them for changing clothes or swaddling the baby in the crib.
Recommendations for creating a side
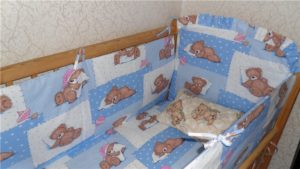 In fact, you can use the sides without a cover, but it is better to sew them separately. This way, you can eliminate problems that arise when cleaning the product.And if additional removable covers are put on the sides, then such a cover can be easily washed and put on again.
For covers, it is recommended to use materials with high density. It can be satin, calico or teak. The material and colors are selected depending on the wishes and preferences of the parents themselves.
It is better to take the material that does not require delicate washing, dry cleaning and special care. It should wash off easily. It can be ordinary chintz or fabrics with water-repellent impregnation.


 0
0

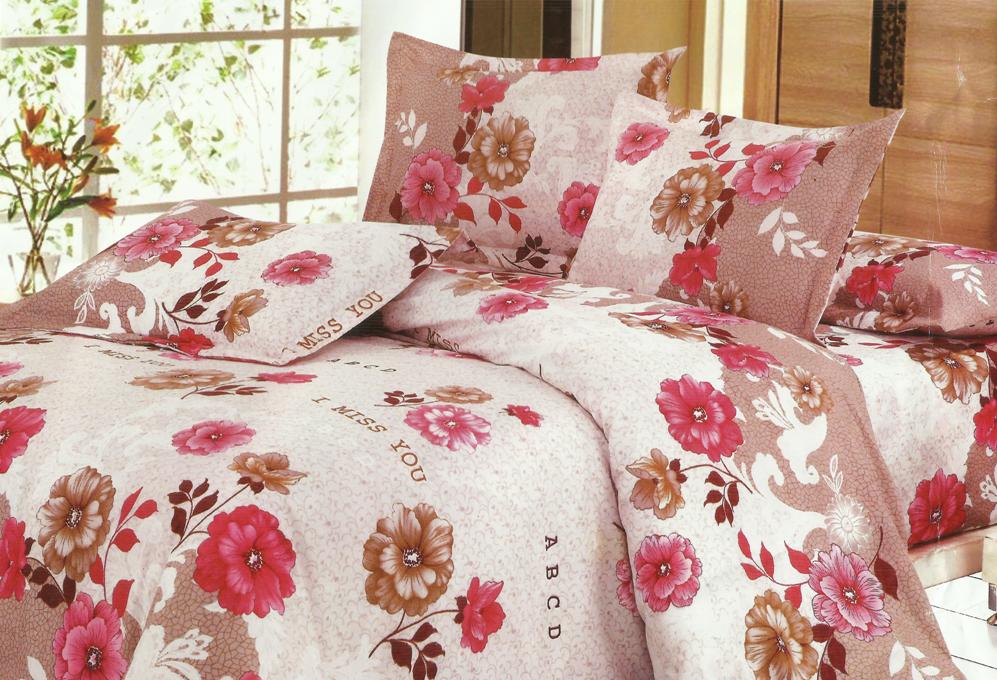

When sewing bed linen, cotton fabrics are not cut, but torn! Then there will be no distortions. Cotton fabrics have a printed pattern and factories do not ideally place a roll under printing. Therefore, to avoid distortions, the fabric is torn both longitudinally and transversely, and yes, in 99 cases the integrity of the pattern will be shifted on the transverse thread, but there will be no distortions and your bed will be even.