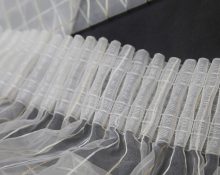
Braid, or curtain tape, is a strip of fabric with loops and cords. You can sew it to the curtain fabric yourself; you don’t need any specific knowledge or skills for this. You don't have to make a pattern either. All you need is patience, basic skills in working with a sewing machine (it’s enough to learn how to make regular straight stitches), correctly selected tools and materials. In this article we will tell you about all the intricacies of this process.
How to sew braid to tulle
Remember: you cannot sew ribbon to a piece of fabric. First, we sew the tulle (either on our own or in a studio), and when everything is ready, we decorate it with braid.
All work can be divided into several stages:
- Selecting braid and tools.
- We prepare the car for work, sew on the tape.
- If necessary, iron, hang the tulle and enjoy the result.
Let's look at each of these steps in detail.
Which braid to choose
Curtain tapes come in different widths. The narrowest option is 1.5 cm, the widest is 10 cm. For thin fabric, it is better to buy braid up to 6 cm wide.Anything larger is only suitable for heavy curtains.
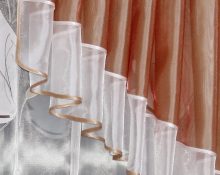
Important! If you want to create original patterns from folds, you need to choose a wide braid.
The next criterion is transparency. Curtain tape can be thick, translucent or transparent. The thinner the fabric, the more transparent the tape should be. Otherwise, it will be visible from the front side.
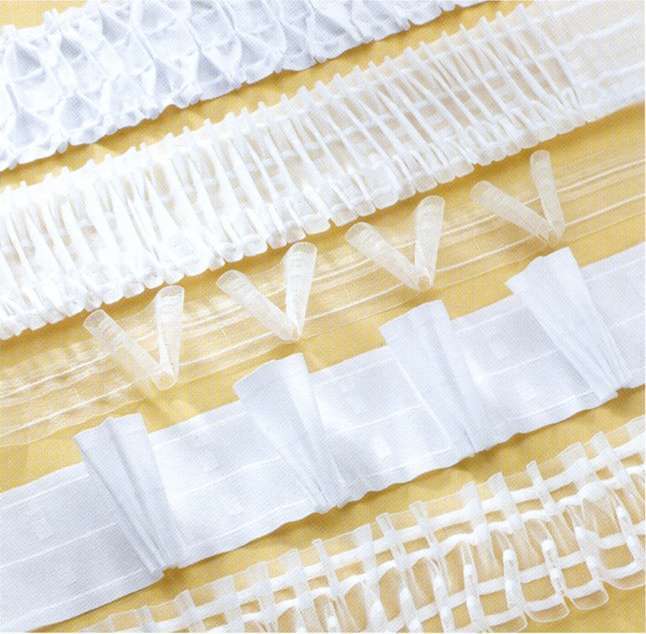
The location of the cords also varies. Most often they are threaded evenly, but there are products with intricate patterns of cords, which are necessary to make original folds on the tulle (for example, waves).
Finally, the tape can be glued or sewn to the curtain. Adhesive products are not durable, they are suitable for light curtains. They are attached using a hot iron.
The second option - sewing tape - is more reliable. This braid can be sewn to any curtains.
Once the appropriate option has been selected, you need to decide how much curtain tape to buy. It’s simple here: the braid is sewn along the entire width of the tulle plus 10 cm at the hem (5 cm from each edge). This means you need to measure the width of the tulle and add 10 cm to this number.
But what if the tulle is not ready yet? Then we focus on the width of the cornice and take into account the so-called assembly coefficient, that is, the number and size of folds on the canvas. In the standard version (for moderate folds) choose a braid with a coefficient of 2, for more complex draping methods - 2.5. The coefficient is usually indicated on the packaging.
To understand how much tape to buy, you need to multiply the width of the cornice by the drapery coefficient and add 10 cm to the result.
Tools and materials
In addition to tulle and ribbon, you will need:
- sewing machine;
- threads and needles;
- large needle with a wide eye;
- pins;
- threads for basting (although not all craftswomen do basting).
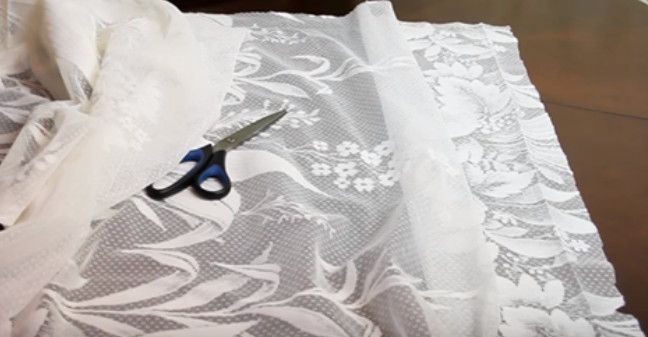
To sew the tape neatly, you will have to lay it out on a flat surface so that nothing gets in the way. It is convenient to do this on the floor, after removing unnecessary objects.
How to sew: step by step instructions
If everything is prepared, you can start working. First, we thread the machine and make a test stitch on a piece of the same material from which the tulle is sewn. Check the stitches. They must be the same in length and width.
The process of sewing braid to tulle consists of several steps:
- Pull out the cords along the edges, thread them through the eye of a large needle and secure them in this form on the tape. This will help avoid accidentally sewing the laces to the tape.
- If you are sewing for the first time, lay the tulle on a flat surface and attach the braid to it. This way the “front of work” will be clear.
- If the top edge of the tulle is not hemmed, bend it 1 cm and fix the hem with an iron. If desired, you can make an estimate.
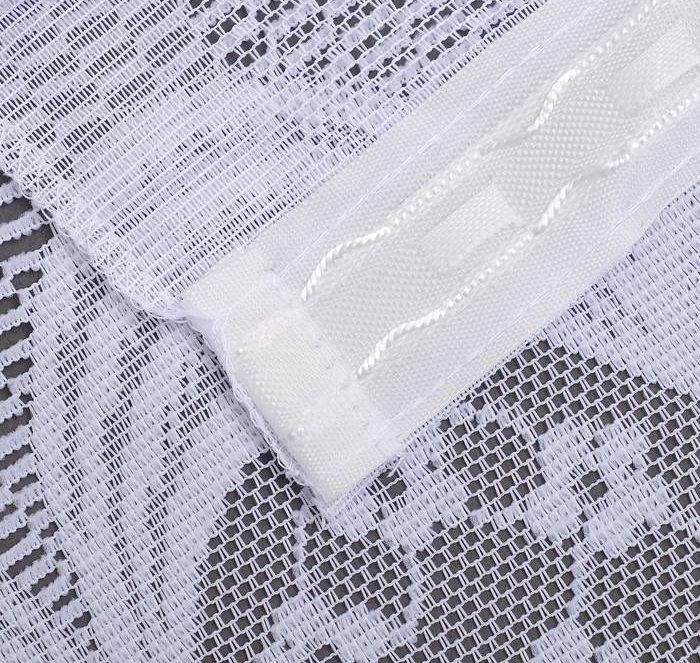
- We retreat 0.5 cm from the top edge and put a ribbon on the tulle. Make sure that the braid lies flat without gathering, and that the cords are not stretched.
- Now you can baste or pin the braid with safety pins.
- We make machine stitches. There should be as many of them as there are cords on the tape.
- We cut off the edges of the tape. They should be a couple of centimeters shorter than the tulle, first we make a full hem on the fabric, then a small piece of tape and stitch it. Make sure that the cords do not get caught in the hem, otherwise you will have to unravel and sew again. Just to avoid such a nuisance, we secured the cords to the needle.
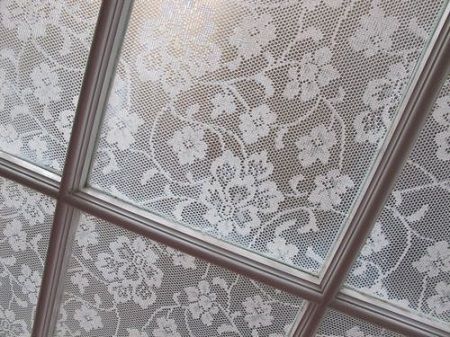
How to hang tulle correctly
Perhaps one of the most important and enjoyable activities is tightening the curtain fabric to the required width. Try to make even folds.To do this, you can lay the tulle on the floor.
Advice! Do not cut the ends of the cords, it is better to tie them in a knot. When it's time to wash the curtains, simply untie them and loosen the folds: this makes ironing the washed tulle easier.
The tulle is attached to the cornice using loops. There are two options here. If the design allows, it is better to first insert the hooks and then hang the curtain fabric on the curtain rod. For the canvas to look beautiful, the distance between the hooks should be no more than 5-6 cm. The final touch is to place fasteners on both edges of the cornice. This is necessary so that the curtain fabric does not “jump off” from it.
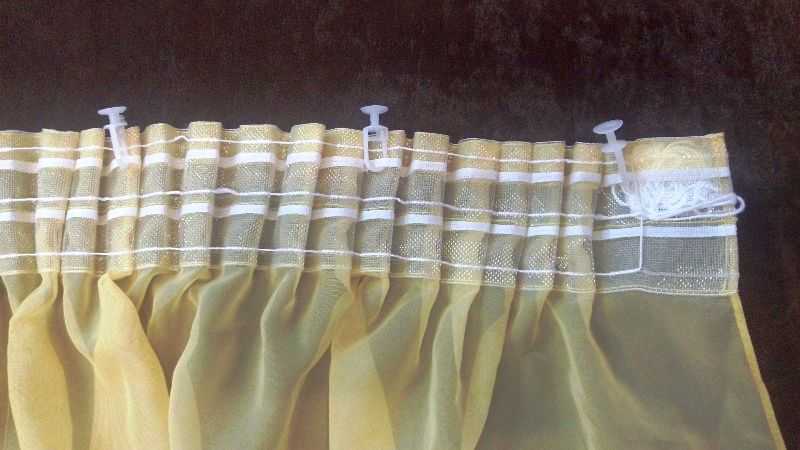
The second option is to hook the fabric onto hooks directly on the cornice. This is inconvenient, but the essence of the work is absolutely the same: we take into account the distance and install fasteners.
Video instruction
 0
0