A handbag is one of the most important women's accessories, which is designed not only to complement an interesting image, but also for a woman's convenience. That is why the bag should be as practical and beautiful as possible.
Many women who have experience in sewing prefer to sew their own bags. In this case, you can make an ideal product that will suit both the design and other parameters. If you have already decided that you want to do this process, then you cannot do without a lining. How to properly sew it to a bag? You will learn about this in this article.
What you need to sew a lining to a bag

First, let's decide on the necessary tools. It is very important to purchase everything you need in advance so that there are no hiccups during the process and nothing distracts you from the task.
Important! Pay attention to the variety of lining fabrics. The modern market offers a wide range of products that can confuse an inexperienced beginner.Before purchasing one or another option, study the features of each type of fabric and determine which one can best meet your needs.
So, for work you will need:
- lining fabric;
- sewing supplies;
- overlock;
- decorative elements as desired;
- chalk or pencil;
- rubber;
Decorative elements, be it ribbons or any lace that can be found in the house, may be needed in order to disguise an unattractive seam after finishing the work. This may be useful for those who do not have much experience in this type of activity. In addition, even an experienced craftswoman can make a bad seam.
How to sew a lining into a bag: instructions
First, turn the bag inside out and place it on the lining fabric. Now you need to outline it with chalk or, possibly, a pencil if the lining fabric is a light shade.
Important! Please note that you should definitely add a few centimeters on each side to the resulting image. For example, the width is usually 2-3 centimeters, and the length is about 4-5 cm. This is necessary so that the lining can stretch and not only fit the required amount of things into the bag, but also so that it does not lose form.
The next step is to cut out the resulting lining. If the bag has pockets, then they are also cut out at this stage. Of course, sewing on a lining with pockets is somewhat more difficult than without them, but if you are careful and careful, then everything should work out the first time.
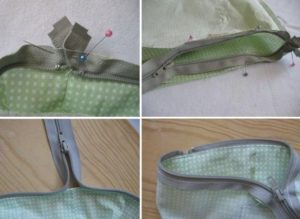
Now overlock the edges of the pockets and stretch the elastic along its entire length. Then you need to carefully sew it on. After this, you can sew the pockets to the base of the lining.
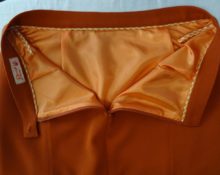
So, now we apply the resulting part to the bag and sew it on.Don't forget to leave allowances.
The final step will be to mask the seam, if necessary. In addition, a cute ribbon or lace will undoubtedly make your bag even more interesting and original.
Thus, there is nothing difficult in sewing the lining to the bag. You don’t need a lot of additional materials for this; everything you need will probably be found in every housewife’s home. The process does not take much time, but you will be pleased with the long-term and high-quality results.
If you sewed the part onto a new bag you made yourself, it will take on a finished look and be ready for use. And if the lining was needed for a finished product as a replacement for a torn old one, then you can safely put things in your purse without fear that the necessary little things will end up in the depths of the bag, falling through the holes.
 0
0