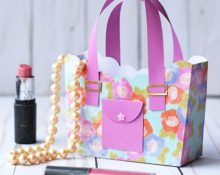
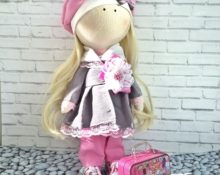
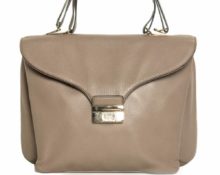
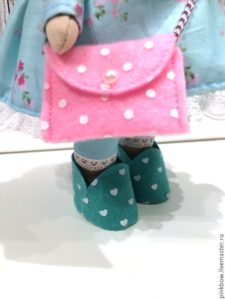
 No one will argue that any girl’s favorite toy is a doll. Moreover, the doll should have many different outfits that create a certain image. And the outfit should be complemented by all kinds of accessories. One of the important attributes of a doll's image is a handbag.
You don't have to be a needlewoman to sew an elegant little thing. There are many types of bags and ways to sew them that girls can do with their own hands.
Let's look at how you can make a handbag for a doll yourself.
Materials and tools for manufacturing
Front side
For the front side you can use such materials.
- The remaining piece of fabric.
- Faux suede.
- Genuine leather (you can use old gloves).
- Denim (you can also use an old item).
- Any other dense material.
IMPORTANT! When choosing a material, it is necessary to take into account the degree of rigidity of the material.
Since the size of the handbag is miniature, to make it easy to work, the material should not be hard or difficult to work with.
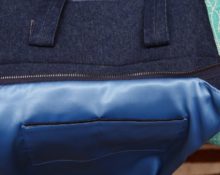
Inner side
To make it look like a real bag, you need to make a lining. The lining fabric can be cotton fabric with a small pattern.
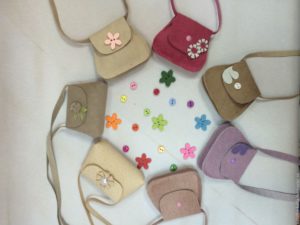
Decorating elements
To decorate your handbag you can use:
- guipure;
- lace;
- braid;
- beads;
- beads and glass beads;
- paper flowers.
Accessories
To make a clasp, you can use one of the following items:
- duct tape;
- fastening button;
- button;
- clothes hook.
IMPORTANT! You can use a clothes hook to fasten the strap to the doll's shoulder or arm.
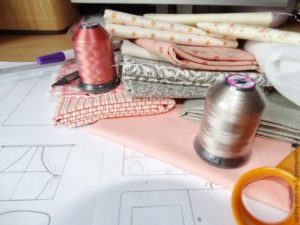
For work
- Pattern.
- Glue if the handbag is made of suede or leather.
- Scissors.
- To transfer the pattern onto the fabric you will need a ballpoint pen, pencil or chalk.
- Sewing needle and thread of the same color as the material.
Details and pattern of the bag
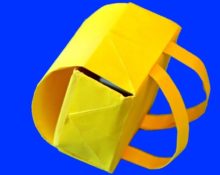
The handbag can be anything in shape and size, depending on your imagination. We offer a pattern for a handbag with a semicircular bottom.
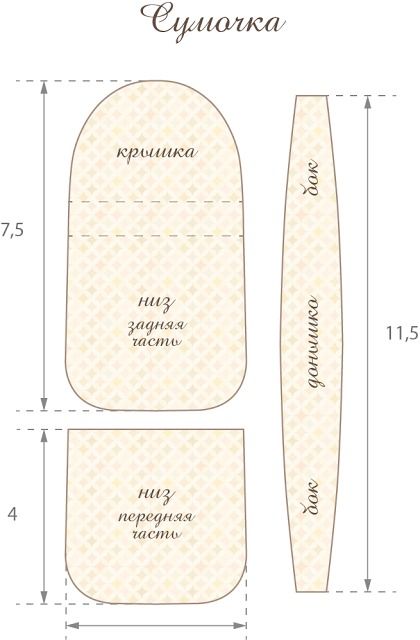
The handbag consists of three blanks.
- Cover with lower back.
- Bottom of the front.
- Pattern for the sides and bottom.
Lid
We are preparing a pattern for the lid with the lower back part. To do this, draw a 7.5 by 4 cm rectangle on a sheet of paper. Cut out the rectangle. On one side of the rectangle, slightly round the corners. On the other hand, we round the corners more. One pattern piece is ready.
Front end
Prepare the next part: draw a 4 by 4 cm square and cut it out. We apply the square to part 1 and on one side we round the corners in the same way as the first part.
Sides and bottom
We measure and cut out a rectangle 11.5 by 4 cm. From the center of the strip down on both sides, we cut off the sides so that 3 cm remains. We do the same on the opposite side.
Step-by-step sewing instructions
- You need to transfer the pattern to the lining material.We place all three patterns on the front side of the fabric and trace them with a pencil or pen.
- We glue the inner sides of the outer and lining fabric using a glue stick or any other glue.
- Cut out the parts of the bag. It is better to cut the pattern for the sides and bottom a little longer.
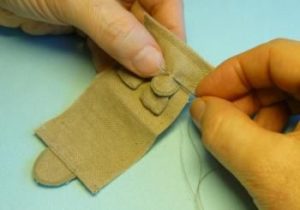
- Having prepared the parts, we begin to sew them together. We use a blanket stitch. We start stitching from the middle so that the parts are connected correctly: without distortion. Initially, you need to insert the needle on the inside of part 3 exactly in the center, 1 cm away from the edge.
ATTENTION! The parts of the bag must be sewn together with one thread using a thin needle. Then you will get a beautiful and neat seam.
- We attach part 2 to part 3 so that the cuts on both parts are equal. The needle will need to be inserted there.
- We begin stitching as follows: stepping back 2 mm from the edge, insert the needle on the left at a distance of 2 mm. We start the thread to the left of the needle. So we continue to sew to the edge, making a loop, cutting off the excess.
- On the other side we do the same.
- We sew part 1 in the same way.
- We process the edge of the lid with the same seam.
- We process the edges of the bag.
- Getting the strap ready. Cut out a strip of the required width and length.
- We sew on all sides.
- Glue or carefully sew the strap to the bag.
- We decorate the bag.
Useful tips
- The more meticulously and neatly the seams are made, the more beautiful the doll bag will look.
- There is no need to make even one internal pocket. With such a size of the bag, it will only get in the way and complicate the process of sewing the bag. And it’s difficult to say how this will affect the quality of the product.
- The places where the strap is attached must be strong, because we don’t know what the doll’s owner will decide to put there.
- The clasp should be such that it is easy and simple for a child to open or fasten it.
- An abundance of jewelry can indicate bad taste. One or two decorations are enough to make the handbag look beautiful and unusual.
 0
0