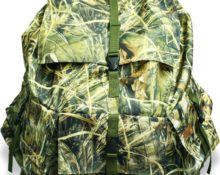
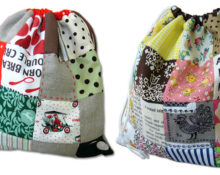
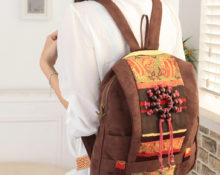
 A backpack is a versatile, convenient and practical accessory. It complements the look of any fashionable, active woman. It is not surprising that little (and not only!) fashionistas want to have a backpack in the wardrobe of their favorite doll. After all, you can put the little things she needs in it!
You can make a backpack for a doll with your own hands, using your imagination and imagination. It is important to decide: will the accessory be only decorative, or will it be possible to put objects in it? Based on this, it is worth choosing the material and tools for making our future backpack.
Materials and tools for manufacturing
A doll's backpack can be made from different types of fabric: denim, dermantine, felt, foamiran, linen, leather, suede, corduroy, wool. In this article we will tell you how, using a simple backpack model as a basis, you can make such a wonderful product.
To make a backpack we will need the following materials and tools
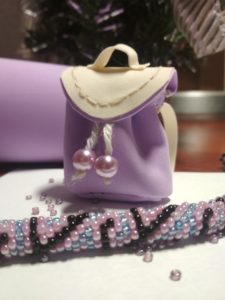
- Foamiran (lilac and beige).
- Thin fabric for lining (thin knitwear).
- A needle with a small eye, threads in color.
- Transparent instant adhesive.
- Two beads.
- Velcro.
- A4 sheet, a simple pencil, scissors, a ruler - for making a pattern.
How to make a backpack for a doll
Having prepared everything you need, we get to work.
Backpack details and their pattern
In order to sew a doll backpack, you need to make a pattern. Let's look at the original model and determine what parts we need to cut out for its small copy.
- Bottom.
- Base.
- "Lid."
- Two straps.
- Handle.
- Lining
To determine the size of the backpack, we take the necessary measurements on the doll itself and mark out the details on an A4 sheet. This is done so that the backpack is not too small or too large for our fashionista.
We recommend the following part sizes: base 10x4 cm, bottom 3.5x1.5 cm, handle 3x0.5 cm, strap 7x0.7 cm, lid 3.5x3.5 cm.
Our backpack will be held together with woolen threads (for example, Alize baby), decorated with beads in color. Our accessory will be fastened with Velcro.
Step-by-step manufacturing instructions
- We cut out the resulting parts and transfer them to the fabric.
IMPORTANT! Don't forget to allow allowances of 0.4-0.5 cm! Otherwise, the product will turn out smaller. We do not make allowances on all parts: we leave the straps and handle without allowances.
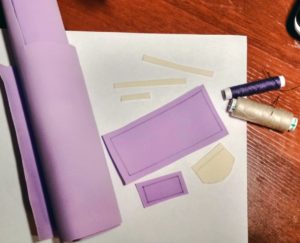
- Sew the sides of the base together to form a cylinder. Sew the bottom to it with the seam inside. You can also sew the bottom seam facing out, this will add originality to the product.. Afterwards, be sure to turn the resulting part inside out.
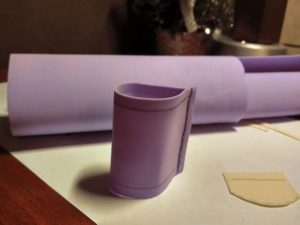
Advice. It is better to sew parts together using an overcast stitch or a backstitch stitch.
- We make a decorative stitch “back with a needle” along the edge of our lid. To make the reverse side look neat, glue a lining of a different color to the lid. Sew the lid to the base. We attach the straps and the handle with cross stitches at an equal distance from each other. If desired, you can make decorative seams on them.
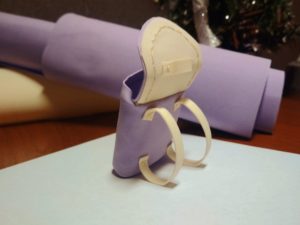
- We sew in the lining. To do this, cut out the base from the knitwear, sew a side seam, sew the resulting cylinder inside out to the backpack and sew the bottom.
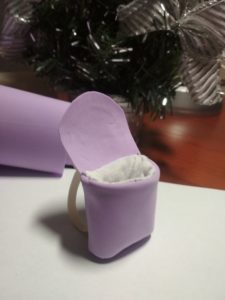
- We take two identical pieces of woolen thread and stretch them from different sides of our accessory. Cut off the excess. Attach beads. We glue Velcro onto the base and lid so that the backpack closes without any problems.
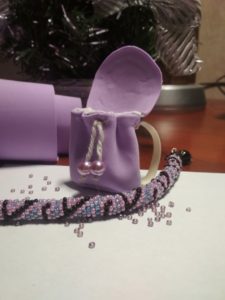
The doll backpack is ready! It is suitable for both Barbie and other little friends of the child. I am sure that you will get equally beautiful accessories for your pets!
Useful tips for making a backpack for a doll
To ensure that your product turns out to be truly high-quality and unique, you can use the following recommendations.
- As the basis of the product, you should choose a dense, but quite flexible, elastic fabric that can take different shapes.
IMPORTANT! The selected fabric should not “crumble”.
- To transfer pattern details onto fabric, use a simple pencil for light fabrics or a chalk/white gel pen for dark ones.
- We can connect the elements of a backpack in different ways: using a sewing machine; needle and thread; high quality glue. Liquid nails are very convenient (don't forget about the glue gun!).
IMPORTANT! Cheap glue will not allow the backpack to last long, do not skimp on it!
- The backpack can be fastened with a zipper, tightened with a lace/thick thread/twin, closed with a button, Velcro or button. We sell special feet for sewing machines for sewing in zippers. They will help you quickly complete such painstaking work.
- For decoration, use stickers, beads, beads, sequins, pendants, decorative buttons, flowers.
- Be careful when making decorative stitches: they should be even and uniform.
- To keep the backpack in shape, you can glue thick cardboard inside, to the sides and base.
- If you pull the thread through a loop, as many embroiderers do, you will get rid of unnecessary knots inside the product.
The main thing is to devote yourself to the process with all your heart! Only then will you truly enjoy the work done!


 0
0
