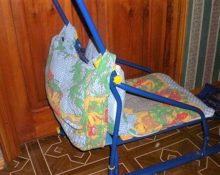
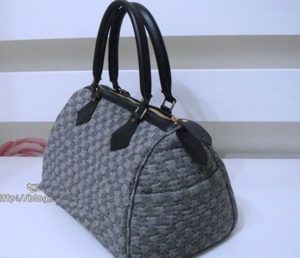
The bag performs not only a decorative function, acting as an accessory. She stores personal belongings and documents and helps in their transportation. The most spacious and stylish product is a travel bag. It is suitable for a short trip or business trip, and will also complement a classic or everyday look. The bag is easy to make, and therefore you can sew a fashionable product with your own hands.
Preparing for work
When sewing any products yourself, the initial stage is preparation. You should select a texture suitable for sewing, prepare the necessary tools and materials.
Textile
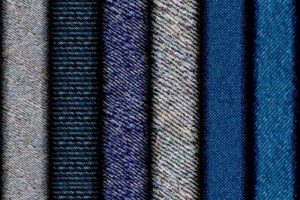
The choice of fabric should be given special attention. Since most bags serve as travel bags, manufacturers use durable, elastic materials for sewing.
Suitable Fabric:
- textiles (for making a travel bag);
- denim (for everyday use);
- suede (for lovers of classic style);
- leather.
Reference: many needlewomen also use velvet or knitwear.
Materials and tools

After selecting a suitable texture, we proceed to preparing everything that is needed for work.
Tools:
- sewing material;
- synthetic fabric for lining (optional);
- cardboard;
- pencil;
- ruler;
- scissors;
- needle;
- threads;
- punch;
- safety pins;
- sewing machine;
- accessories (legs, leather or fabric handles, zipper).
After preparation, you can begin building samples.
Details and pattern
Among similar accessories, the travel bag stands out due to its simple patterns. As a basis, sample patterns are suitable, which can be easily reconstructed at your own request. This will require the desired height and width of the finished product.
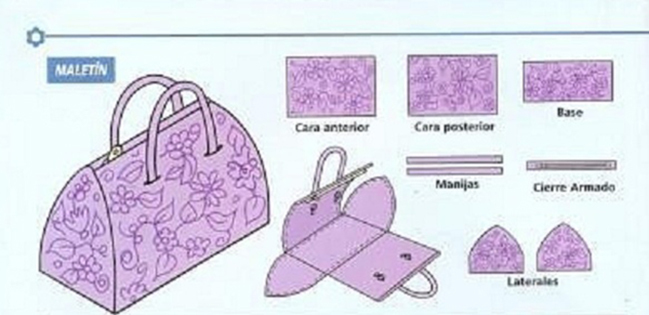
The bag consists of two side parts that resemble a triangle with a rounded top corner. The front and back sides are identical in size. Travel bags have a fairly stable bottom, so when cutting it is recommended to make two parts.
Addition: For additional protection, cut out the second piece of the bottom from leather. This will provide reliable protection for the items in the bag.
Patterns for patterns are built according to similar parameters. It is recommended to make the samples themselves on cardboard in order to accurately calculate the dimensions of the finished product. Then we cut out all the drawings and transfer them to the fabric. When building on the material, do not forget about seam allowances. They will be about one centimeter.
Important: When making an accessory from leather, seam allowances are not needed, since the bag is stitched by hand.
Stages of work
When all the patterns are ready, we begin the technological process.
Base
First of all, you should make the legs. The head is located under the lining, so we attach nails in the corners of the base material.
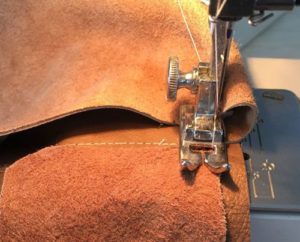
Then we sew on the lining. For greater convenience, we fasten the materials along the edges with pins. Carefully sew on the sewing machine. On the front side you need to make a leather bottom. The material must be sewn on by hand. To do this, we make holes for stitching along the edges using a punch.
We outline the position of the legs and make holes. Carefully insert and secure. We sew the leather bottom to the main one using a saddle stitch.
Walls
On the main walls you should mark the location of the handles. It is recommended to use leather ones with tags for fastening. Use a punch to mark the location of the stitching and sew it on.
We move on to sewing the lining for the remaining parts of the future bag. If there is a pocket inside, cut out the necessary pattern from the lining fabric. Carefully fold in the seam allowances and pin them to the lining. Sew using a sewing machine using a zigzag stitch. Only after this do we place the material itself on the main wall.
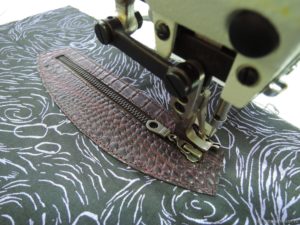
If the finished version has a zipper, we’ll start placing it. To do this, we attach a zipper to the top of the main walls using pins. Make sure that the zipper is placed in the same position. Otherwise, the slider will not cope with the task. Before sewing, you should check the exact position several times. If everything matches, sew it on with a sewing machine using a regular stitch.
Assembly
Finally, the parts are assembled into a single composition.
- We attach the side triangle to the finished bottom. We sew it carefully.
- Let's move on to the main aspects. We process the second half in the same way.
- Turn the finished bag right side out.
- In addition, you can use various accessories for greater attractiveness.An important addition will be a belt that will allow you to carry the bag not only in your hands, but also on your shoulder.
Advice. If leather was used during sewing, it is recommended that the finished product be treated with a special impregnation on the front side.
This will help protect the bag and the items in it from aggressive environmental influences.
The bag is an addition to any wardrobe. It helps in transporting personal belongings and important documents. The most stylish and spacious solutions include a travel bag. Using a few skills, it’s easy to sew such an accessory yourself. It will be a smart addition to both women's and men's wardrobes.
 0
0