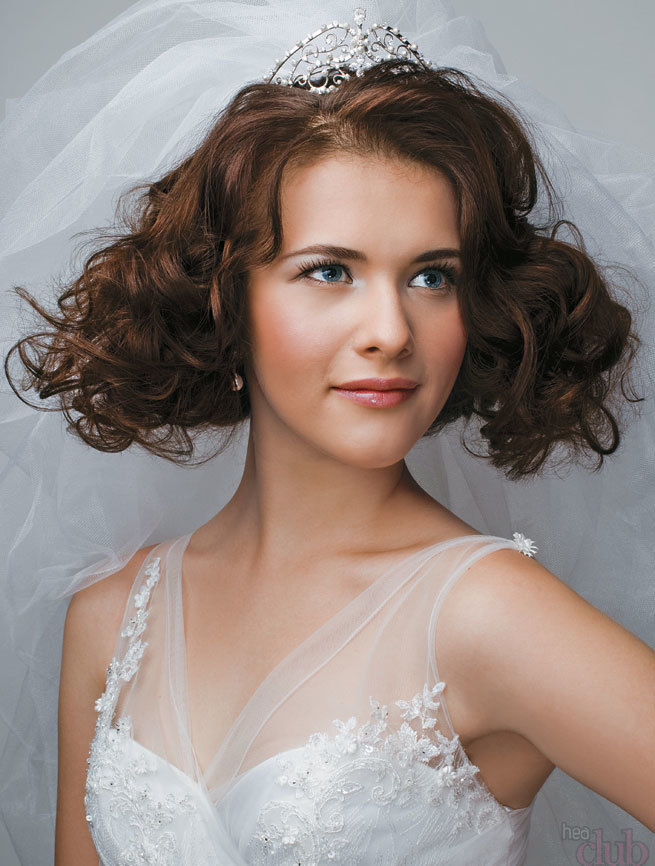
 A wedding is a special day in a girl’s life. The symbol of this day has always been a veil or a wedding veil. Brides prefer to choose a ready-made wedding dress, but veils are increasingly made to order or made independently. You can create a fantastic veil to suit every taste.
Choosing a style for a veil
Depending on the style of the wedding dress, as well as the form of the wedding celebration, the style of the headdress is selected.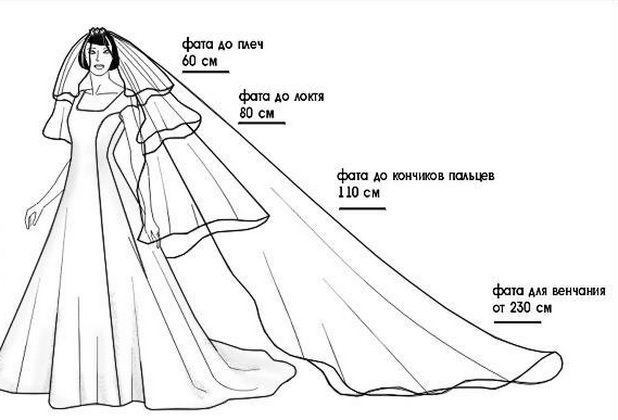
Decoration length gradation:
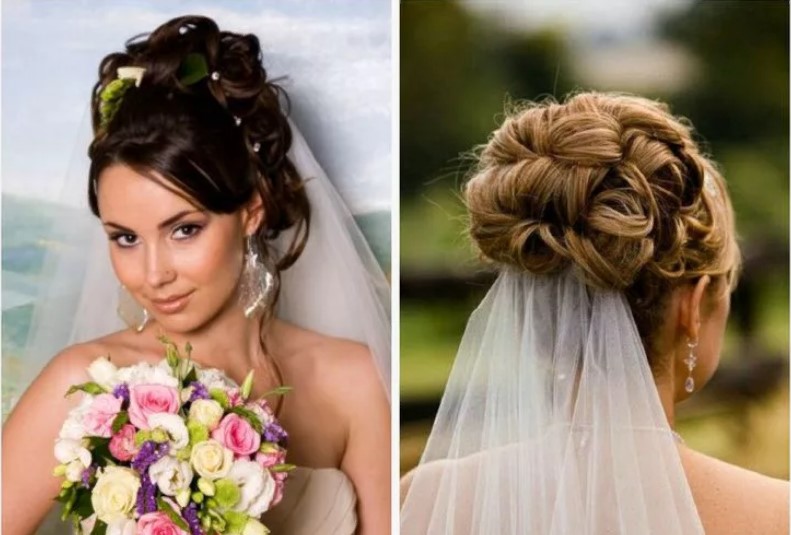
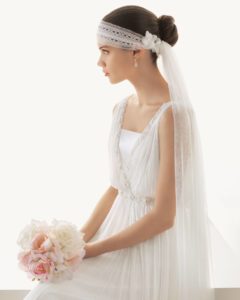
- Veil above the shoulders typical for youth parties or modest painting in the registry office. Often this is just part of a wedding hairstyle. It can only represent a veil over the face.
- Shoulder-length. It can be single-layer or double-layer.
- Up to the elbow. Two layers with a veil, very common in recent seasons.
- To your fingertips. Suitable for any style of dress.
- Wedding (Cathedral). It suggests a long elegant dress, richly decorated, the finishing elements often repeat those of the dress.
Jewelry styles
Large selection for every taste:
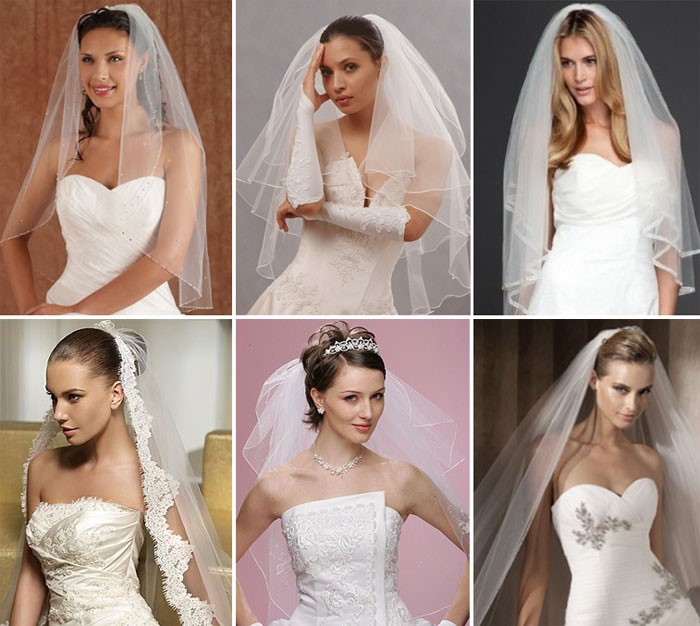
- Fantasy. Often from several panels, with corners, ribbons, frills.
- Classical. Doesn't cover the head. It is usually attached to the bottom of the hairstyle. The veil is worn only at the beginning of the celebration.
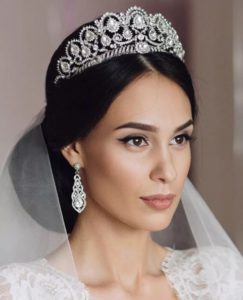
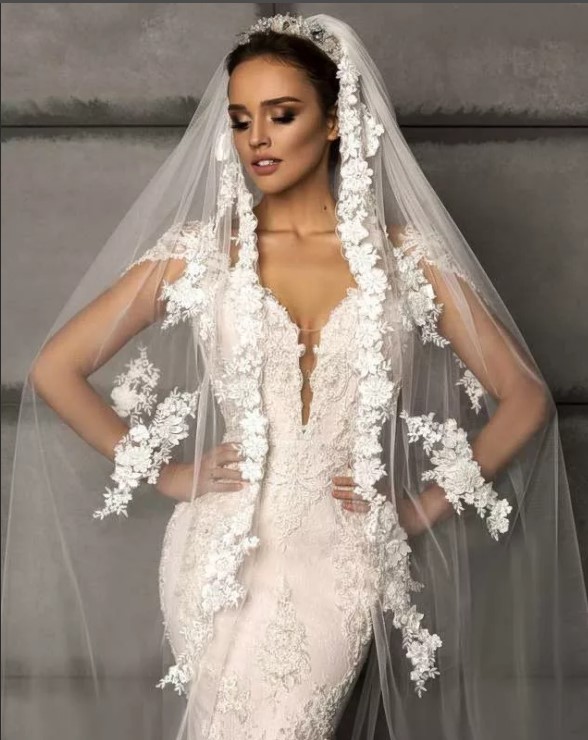
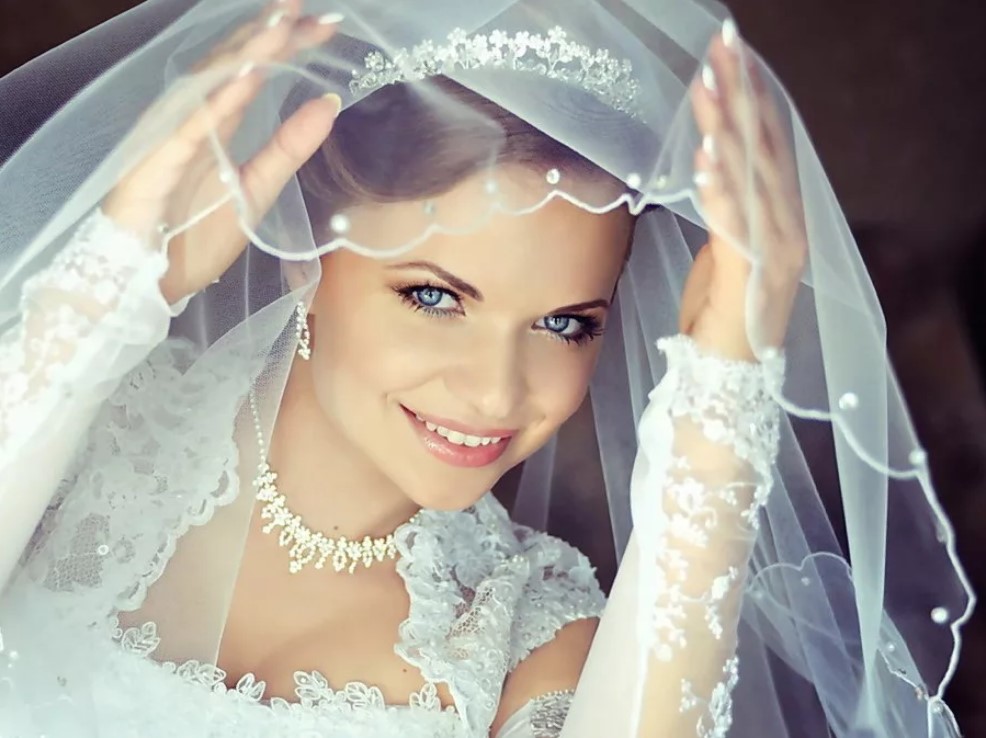
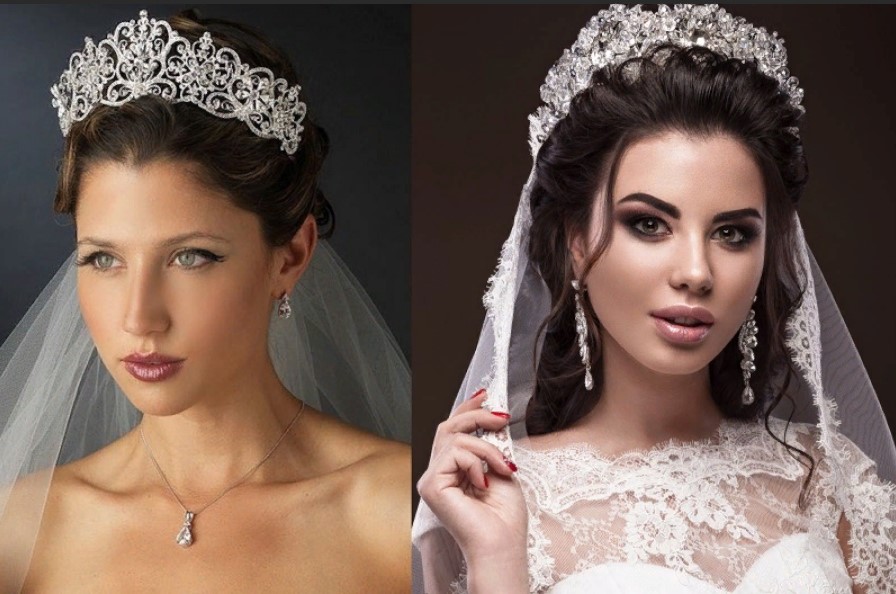
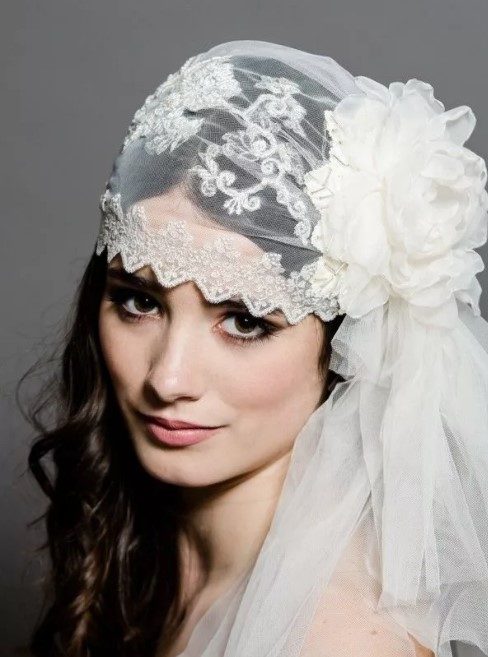
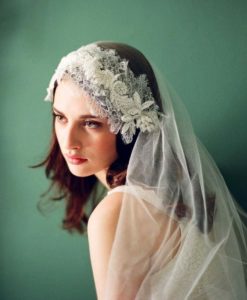
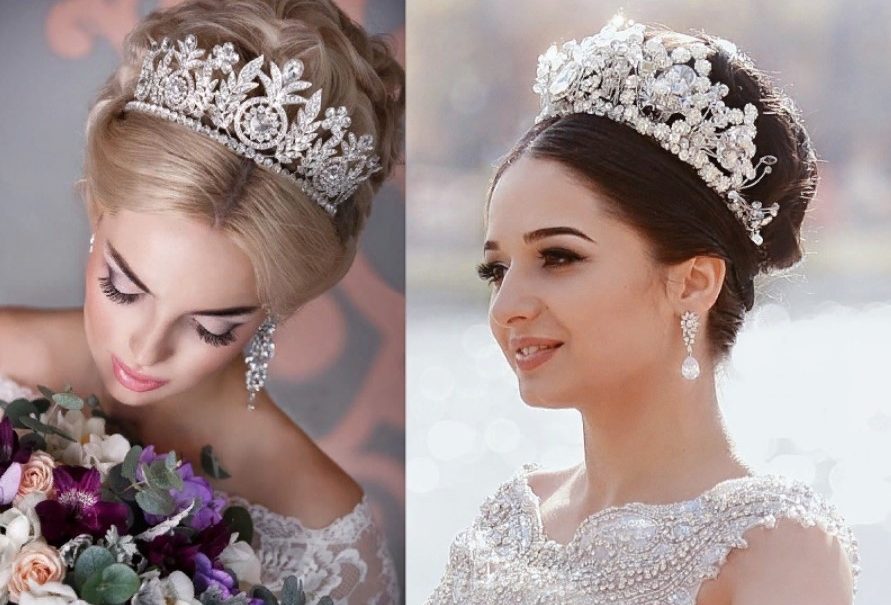
- Wedding. The head is completely covered. Complemented with flowers, hairpins, and a tiara.
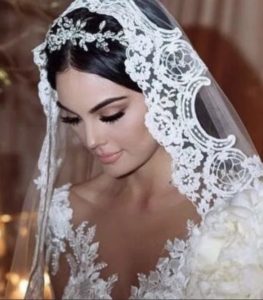
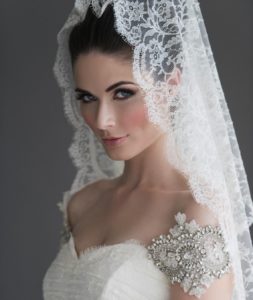
- Wedding veil-veil (mantilla). Inspired by oriental or Spanish motifs. It is a thin transparent blanket, fixed with several invisible ones.
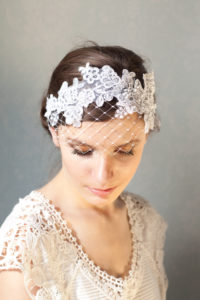
- Veil with head decoration frame. Sometimes a complex hairstyle is not meant; there is a frame made of beads, seed beads, flowers, which practically covers the head, and the bedspread is attached to it.
Tools
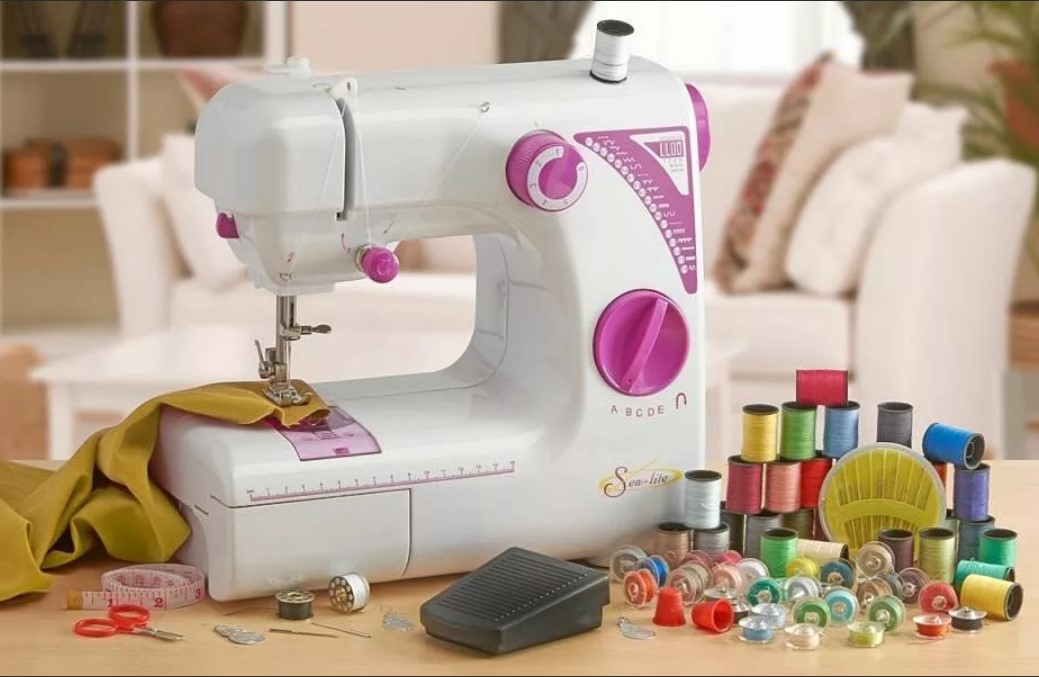 A wedding veil is not difficult to make, standard tools for any type of sewing:
- Scissors.
- Sewing machine.
- Pins.
- White threads.
- Fishing line is preferable to thread, stitches are not visible. Used to create assemblies.
Choice of fabric and trim
Fabrics used for sewing a wedding veil, they are divided into two groups - hard, holding their shape well, and soft - flowing, falling. We choose the type of material depending on the cut of your dress.
 Most often used:
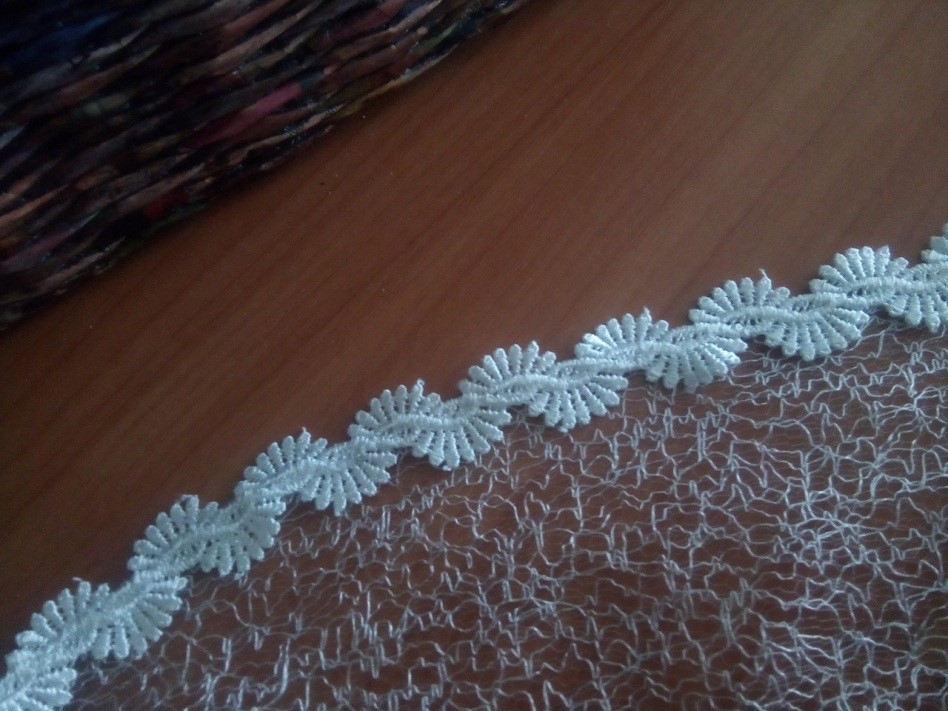
- Tulle is a special fine mesh. It can be hard and soft, smooth and decorated.
- Guipure.
- Veil.
- Tulle.
- Organza.
- Lace.
Advice! If you can’t decide on a fabric for a long time and still don’t have the right one, pay attention to curtain stores. Some types of drapes made from thin white fabric may work well. A large number of translucent lace or mesh veils and tulles are now produced.
How to sew a wedding veil with your own hands?
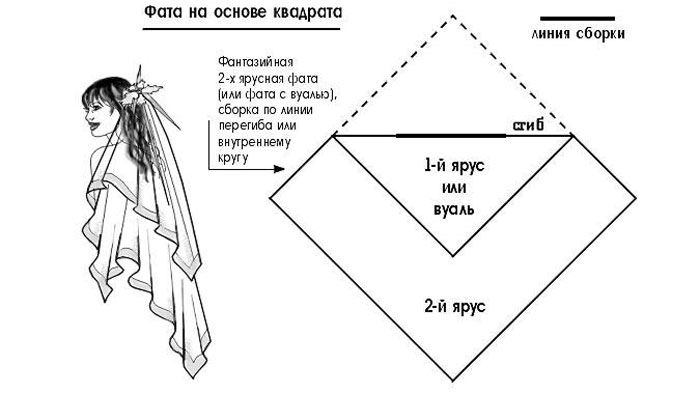
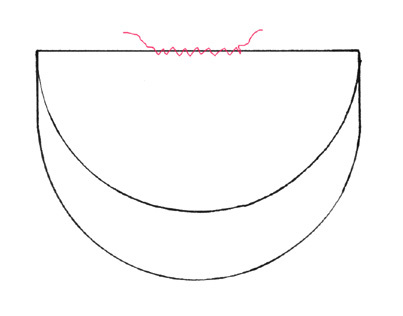
Constructing a veil pattern
After that, Once you have decided on the length of the veil, we choose based on which figure we will build the pattern:
- Oval.
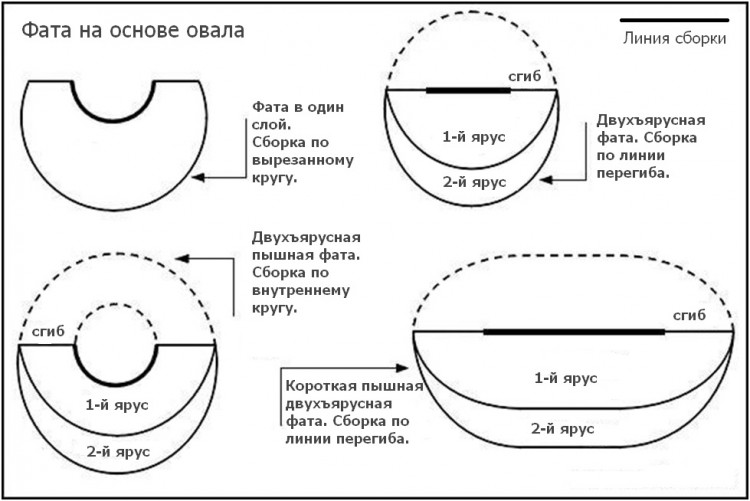
- Circle.

- Square.
- Rectangle.
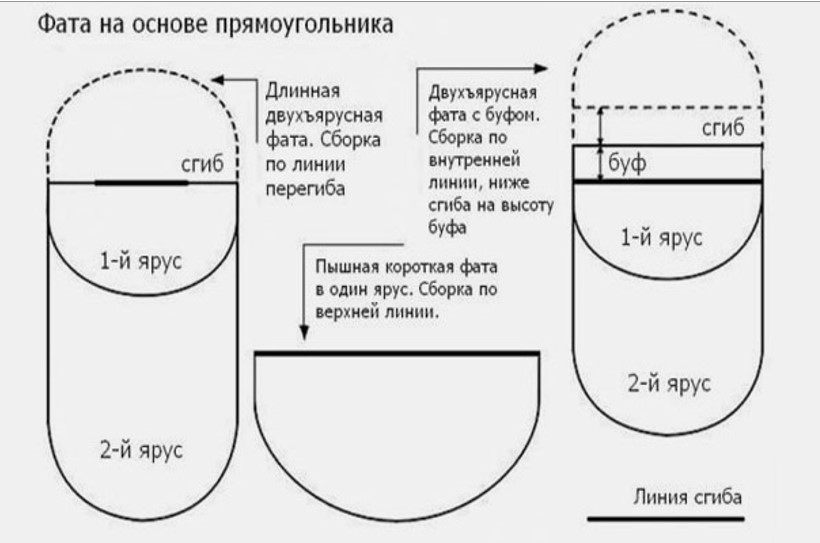
- Ring.
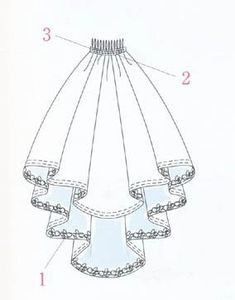
All proposed models assume the presence of a veil, or your veil will turn out to be two-layer.
Advice! If you want the front of the veil to be even throughout: in front and on the sides, then when choosing a place for gathering, make sure that the distance from the edge of the veil to the gathering is the same on 3 sides.
This way, at the front, the veil veil will form a neat circle.
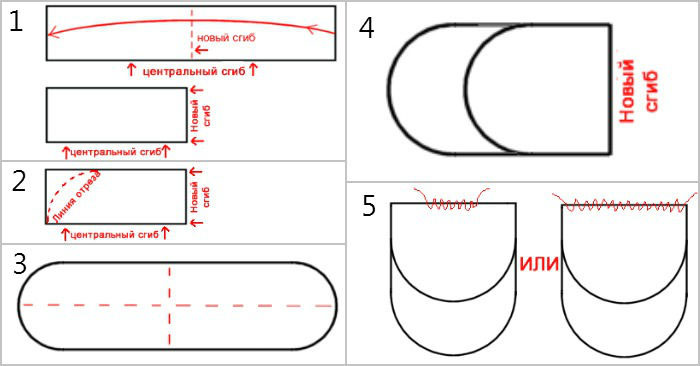
 Progress of pattern construction:
- We determine how the veil will be attached and where. The place where the veil is attached will be our reference point for measurements.
- We measure the length of the veil.
- Determine the length of the veil.
- We decide what shape we will build the pattern.
- We build a drawing of an oval, circle or rectangle.
- Fold a sheet of paper or wallpaper into four.
- Cut the corner.
- Let's expand.
- Let's trim.
- We mark the location of the assemblies.
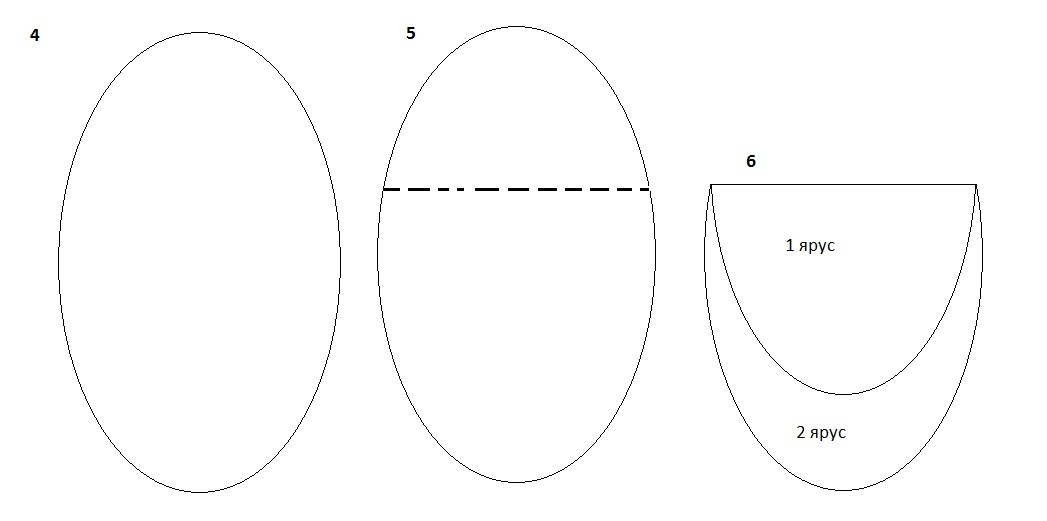
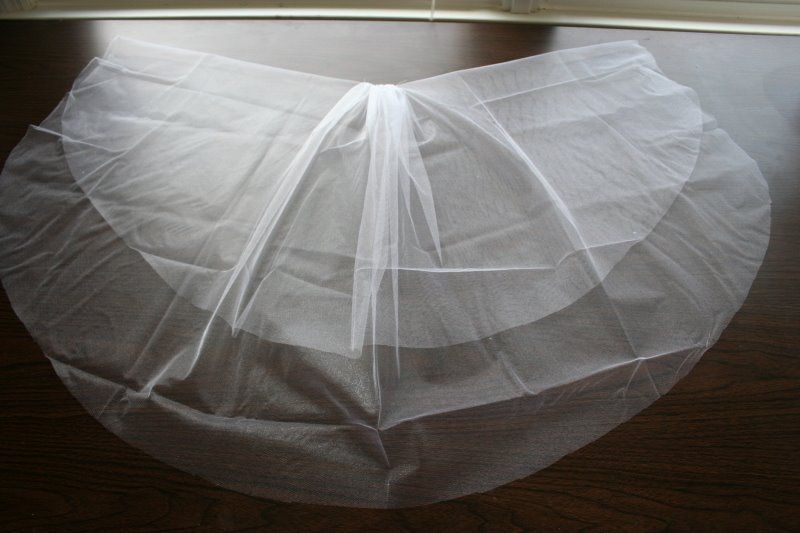
Cutting and sewing
 Cutting operations can be carried out directly on the fabric, but if you are using a paper pattern, you need to transfer the drawing to the fabric:
- Place the pattern on the fabric.
- Let's shallow it. We do not make seam allowances.
- Cut it out.
- We try it on and find out how narrow your veil should be at the highest point.
- Determine the fold location according to the pattern.
- We measure the height of the veil on the sides.
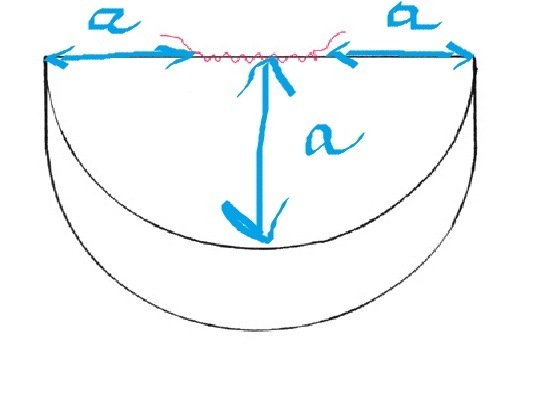
- The width of the fabric on the fold, remaining from the sides, is removed into folds.
- There are two options for working with the assembly: make even, symmetrical folds, or simply assemble the assembly on the fishing line.
- When working with folds, divide the required width by the number of folds and lay them as consecutive or counter.
- Sweep it away.
- We stitch by car.
- If the fabric allows, then steam it using an iron.
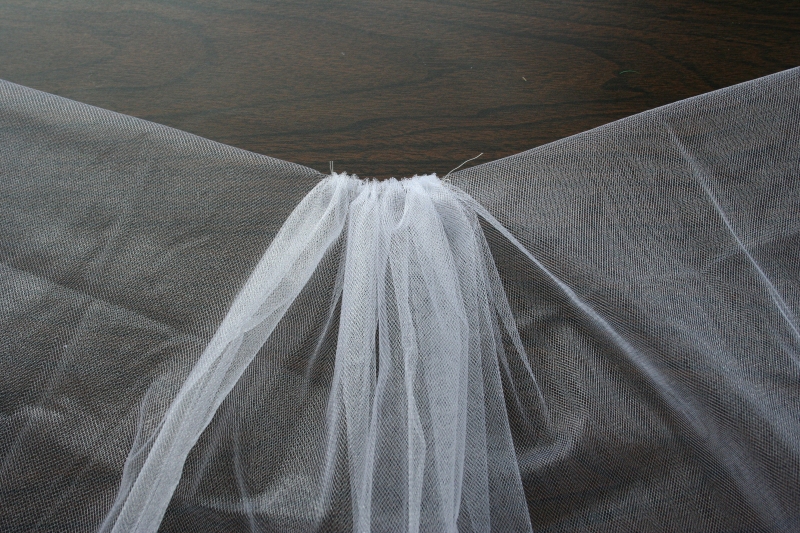
Important! We determine the possibility of ironing on the scrap of fabric remaining during cutting. Coated fabric cannot be ironed; all the decor will remain on the iron.
- If assembly is enough for you, then sew the required distance with a “forward needle” seam. Then we tighten the seam and secure the knot.
- If your material does not crumble, then you can leave the edges as they are, or you can decorate them with ribbon or lace.
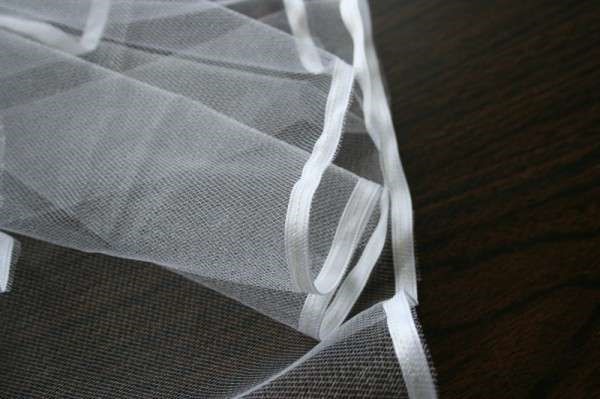
The problem with decorated hems is that one layer of veil will always be wrong side up.
- Therefore, try to sew the lace as carefully as possible strictly along the edge. In this case, the difference will not be noticeable.
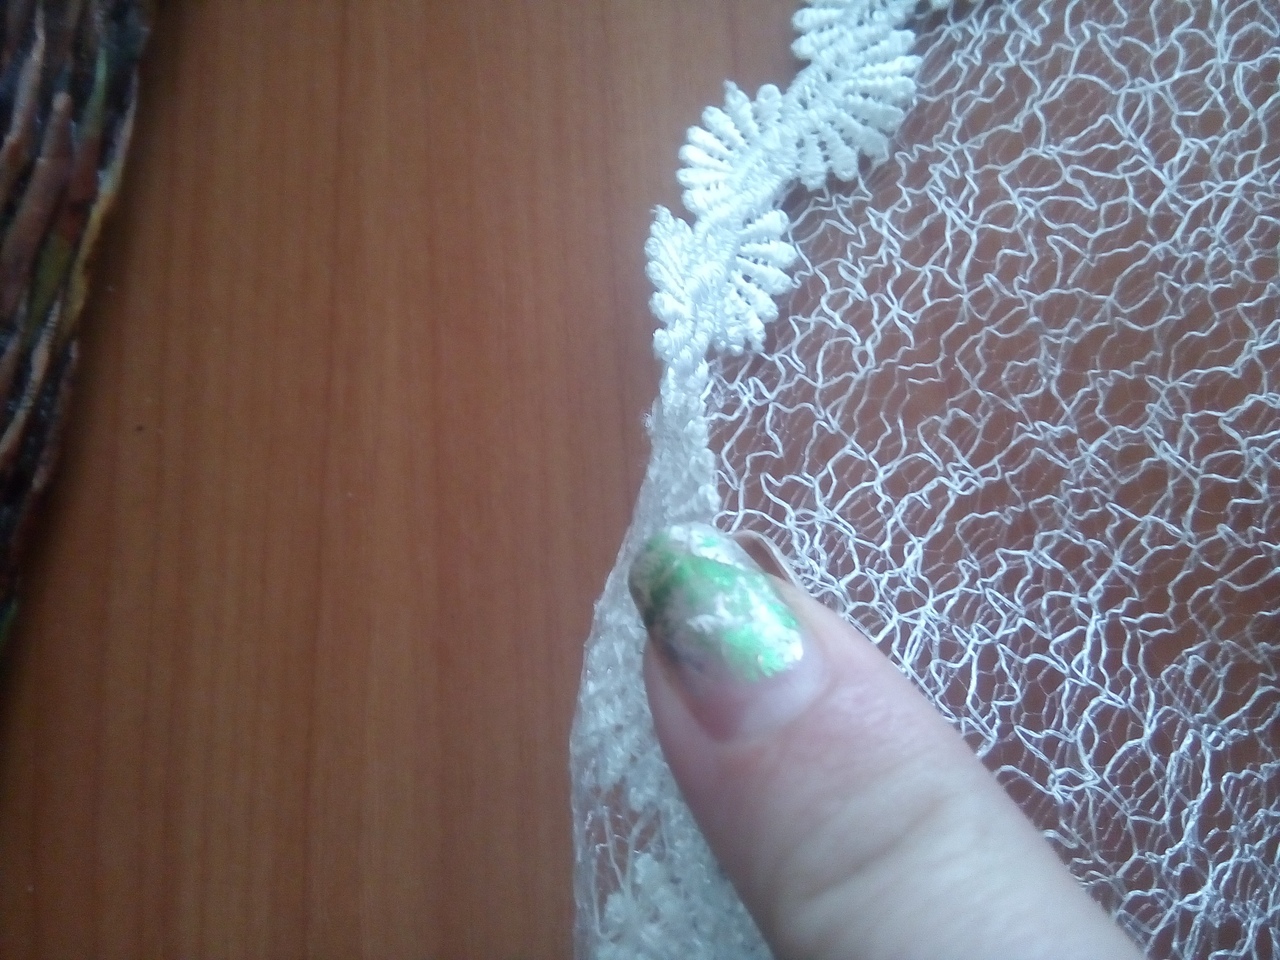
- Using lurex threads, you will make the reverse side quite decorative.
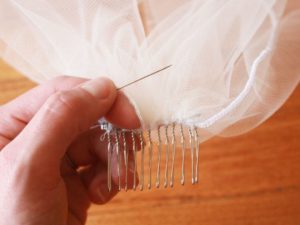
Attaching a wedding veil to your hair
As a rule, a comb is sewn to the veil, which, in turn, is decorated.
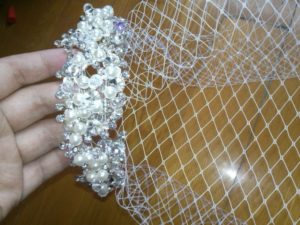
But this is not the only way, let's look at some more:
- Bobby pins and stilettos The veil is pinned under the hairstyle, or it becomes part of the hairstyle.


- If the image suggests tiara or diadem, then the product is sewn or pinned directly to it.
- The Juliet veil is gathered into a bow at the side.
- Headbands and headbands sewn using fishing line.
- Veil in the style of 10-20 years of the XX century attached to the sides of the head, worn like a hat.

The fastenings are very decorative.
This wedding accessory is really easy to sew at home; in one evening you will create the thing that will probably be dear to you the most.
 0
0