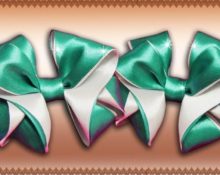
Often in life situations arise when an interesting accessory is urgently needed for an outfit or costume. In such cases, the optimal solution would be to make a butterfly with your own hands, which has been a classic decoration since the 19th century. In this material we will look at how to make a butterfly from a satin ribbon.
Which satin ribbon is suitable?
There is no need to complicate the problem and buy different materials in the store; just buy two skeins of satin ribbon of different widths: one thin (about 1 cm), and the second thicker (3-4 cm).
What is needed for production?
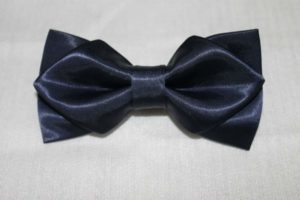 To make a butterfly we don’t need a lot of materials, just stationery and the ribbon itself. So, the work will use scissors, glue, thread and a needle. A lighter or matches will also be useful for processing fabric.
You will need to cut a strip 1 meter long from a wide ribbon, and 60 centimeters from a narrow ribbon.Of course, you can ask the store employee to immediately cut off the required length if you are sure that the satin will never be needed again. However, the experience of needlewomen suggests that you should always have supplies of various materials. It is possible that you may make a mistake and somehow spoil the material, so it is better to play it safe and take more at once.
Important! If for some reason you do not have a thin tape, you can work with a thick one, simply bending the edges inward.
Step by step instructions on how to make a bow tie
Let's consider several options.
simple butterfly
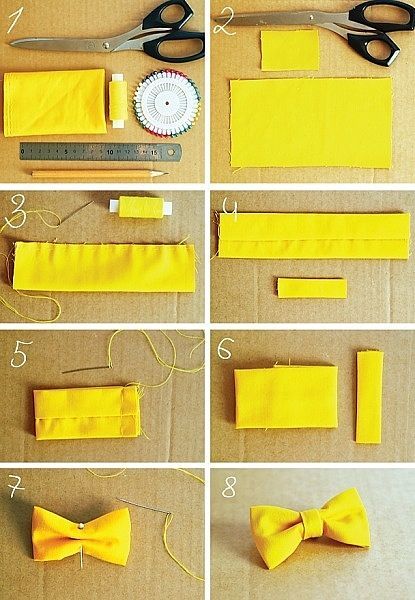
 The structure of a common butterfly consists of two simple bows of different sizes. To create the first one, you need to measure a piece of about 25 centimeters, for the other - up to 40 (we specially purchased a ribbon with a reserve of 2-3 butterflies).
- A shorter piece needs to be folded in half, making sure that the ends are next to each other.
- Several seams are made along the middle, tightened, and a couple of turns of tape are wound in the middle for fastening and an aesthetic component.
A large bow is made using the same principle, after which it begins to create a base that will hold the butterfly in place. For this purpose, a thin piece of ribbon is suitable, on which our bows are attached. We we choose a thin ribbon so that it can be easier to hide under the collar of a shirt.
- For the base, measure out the required portion of the tape and sew hooks to the edges. To avoid fraying of the edges, it is recommended to singe them with matches or a lighter.
- The final step is to combine the two parts of the tie that we made. To do this, you need to sew them in the center and wrap this place with a neat piece of paper. Job completed!
- Hooks for fastening can be replaced with Velcro or special buttons.
Like this:
To make the product seem even more unique and special, you can use ribbons of different colors, ribbons with prints and designs. Feel free to experiment. You can decorate the accessory with various beautiful stones and rhinestones, lace patterns, and various decorative elements. The most the main thing is to choose the right combination of colors and shades.
Practice shows that a classic butterfly, also made by hand, has a good effect, competing even with popular brands of accessories and jewelry.
Butterfly for a girl
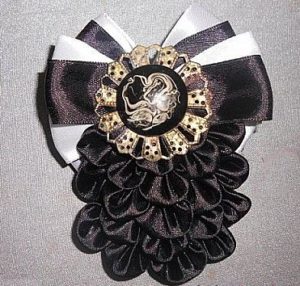 A butterfly for a girl is made according to a similar principle as the male version. Please note that Now it’s quite fashionable to wear red butterflies with white specks or a pure red tone. However, black remains a classic color even in a women's suit; it is only important to use it correctly in combination with other wardrobe elements.
Unlike the male version, here you can safely experiment with decorating the product. To do this, you need to find a suitable material for decoration and prepare a glue gun. It is advisable to work with ribbons of two different colors. From the shorter pieces you need to make bows and sew their ends, then turn them inside out and sew them in the center. Then you need to wind the thread around the stitch and carefully pull the two sides together.
To create the tie itself:
- you need to take a long piece of tape and bend it in the middle at an angle so that the sides are 90 degrees from each other;
- after that we fold it in half, getting a triangle; to preserve the structure, you need to iron it. Let's move on to collecting the entire butterfly;
- we attach the bows to the tie, hem a little lace to the bows;
- You can carefully glue the beads onto the butterfly itself using a glue gun.Other decorations are also suitable, the main thing is that they are not very small and hold up well.
As you can see, you can make a very beautiful accessory at home without putting in much effort. Believe me, doing something with your own hands is much more pleasant than buying it, and besides, your butterfly will be a kind of exclusive if you decorate it beautifully.


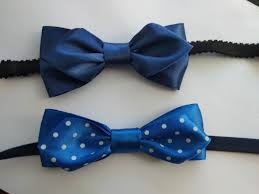 The structure of a common butterfly consists of two simple bows of different sizes. To create the first one, you need to measure a piece of about 25 centimeters, for the other - up to 40 (we specially purchased a ribbon with a reserve of 2-3 butterflies).
 0
0