 On the eve of the festive celebration, we carefully choose a beautiful outfit, trying to stand out from the crowd. But to create a memorable image, one dress is not enough. A mandatory addition that can change your appearance beyond recognition will be stylish accessories. This is especially true for young beauties.
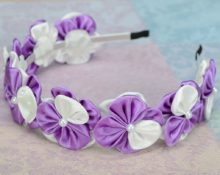
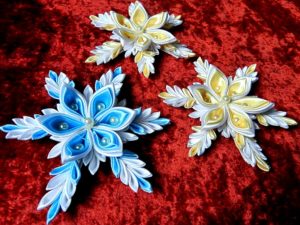
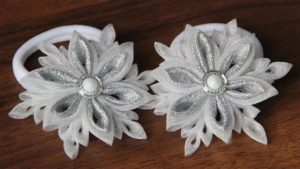
The best thing for them will be an original hair decoration, created by the hands of a caring mother. This could be a metal clip, a plastic headband, an elastic band or a bandage. Or decorated with an unusual snowflake made using the kanzashi technique.
Even a beginner can cope with this work. It is enough to have a desire, show imagination and spend a little free time. Let's take a closer look at what this technique is and how to make a voluminous snowflake from satin ribbons with your own hands.
What is unique about the kanzashi technique?
This technique came to us from the east. She represents the art of creating figurines by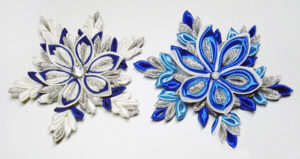 folding material. But unlike similar origami, Kanzashi uses small squares of fabric. The most commonly used forms are:
- rounded;
- oblong;
- sharp petals.
Subsequently, beautiful flowers, snowflakes, twigs, and so on are collected from these elements. Images created using the kanzashi technique can be not only flat, but also three-dimensional.
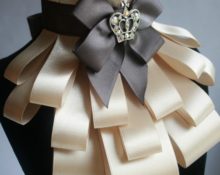
This method is mainly used to produce hair ornaments. But recently, this type of creativity has become widely used in the form of decoration. Made from satin ribbon unusual earrings and necklace. Created by flowers and twigs decorate handbags. Such details are even used to decorate interior items. For example, a panel made in the form of a painting.
Materials and tools for making snowflakes
Before starting the work process, you need to prepare materials and tools. For this you can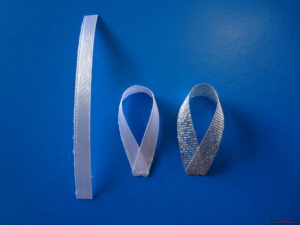 The following items will be required.
- Tapes of various widths. The material used is mainly satin, but brocade, silk stripes and bows can also be used. Blanks are cut from them in the form of squares of the required size.
- Open flame source: lighter or lit candle. In this capacity it can also be used a device for burning patterns on wood.
- Tweezers. This tool makes it easier to hold small parts over the fire without damaging the skin.
- Scissors and safety pins. The latter will be required for temporary fixation of parts.
- The basis. It can be wire covered with ribbon, felt in color, or another thing on which it is convenient to assemble the product.
- PVA glue or Moment-gel.
May also be required decorative elements. These can be beads of different sizes, rhinestones, sequins, lace and so on.Whatever your imagination is enough to bring your idea to life.
Attention! For an ideal final result, before starting work, carefully consider your product and prepare the base for mounting.
For example, for a hairpin it could be a metal clothespin blank.
Step-by-step instructions for making a snowflake
A charming snowflake made in this manner can be used in many ways. Using it as a pendant, you will get an unusual necklace or earrings. Attach to a headband, hairpin or elastic band, and your little one will go crazy for such a gift. Decorate a knitted handbag with it and get an original accessory that will make you stand out from the crowd.
Now let's take a closer look at the process of creating a beautiful snowflake.
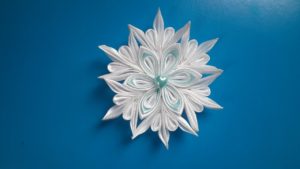
Materials and tools
To implement this you will need to prepare the following.
- White satin ribbon from 5 cm to 30 cm wide, from 2.5 cm to 117 cm wide.
- Pale blue satin ribbon from 4 cm to 24 cm wide.
- White felt.
- Pale blue heart shaped bead.
- Scissors, glue, lighter, tweezers.
Work process
- Cut the 5cm wide white ribbon into six pieces. The result should be 4 squares with sides of 5 cm.
- From a ribbon of the same color, 2.5 cm wide, make six pieces of 2.5 cm each and 18 pieces. 4 cm each.
- Next, cut six squares from the blue stripe.
- Cut a round base with a diameter of 3.5 cm from felt.
- Make sharp petals from the blue blank.
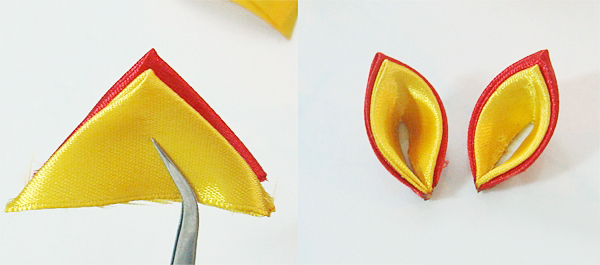
- From squares of white tape (2.5x2.5) we make a round petal.
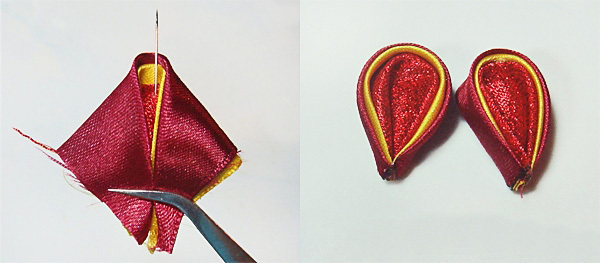
- We place the round blank into the sharp petal. Then we place the resulting part in a sharp petal made of a 5x5 cm square.
- Trim the inner corner.
- We solder the corner over the fire.
- We cut off the bottom and burn it a little so that the workpiece does not unravel.
- In this way we make six petals.
- Then we make twelve round petals from a piece of 2.5x2.5 cm.
- Next, take a white blank with sides 2.5x4 cm, fold it in half and form a fan.
- We perform 12 parts in the same way.
- From the last elements we form the outer circle from those fans.
Assembly
- Using glue, we assemble a flower of six blue and white petals.

- Between the two petals we glue a blank of three fans.
- Then we add round petals between the fans.
- At the back in the center we fix it on a felt base.
- Glue the middle element to the front.
Our charming snowflake is ready. Now you can decorate any item with it: a hairpin, an elastic band, a handbag and much more.
Reference! For the youngest representatives of the fairer sex, this exquisite decor can be attached to a headband.
Enjoy your creative process!


 0
0