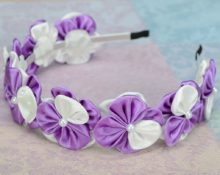
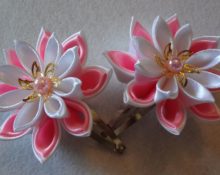
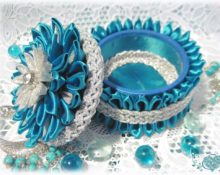
 A beautiful hairstyle is important for the fair sex at any age. Accessories play a big role in creating an elegant look. A young princess will definitely have a lot of hairpins and elastic bands hidden in her piggy bank that will help highlight the beauty of her hair.
Modern manufacturers offer a wide range. The disadvantage of such products is the inflated price and not always acceptable quality. Using a few skills, you can make hair clips from satin ribbons. Such accessories will be particularly original and fully meet the requirements of the hostess.
Master class on making hairpins from satin ribbons with your own hands
The technique for making such products does not have a high level of complexity. The big advantage is the creation of unique accessories. Among the variety of options presented, it is easy to choose the most suitable one for the job.
The initial stage is preparation for the needlework process.
Materials and tools:
- satin ribbons;
- scissors;
- pencil;
- compass;
- felt;
- hairpins;
- threads;
- needle;
- glue;
- sewing machine;
- beads or rhinestones for decoration.
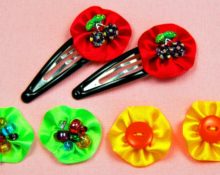
Addition: When decorating, bright buttons instead of colored beads are also suitable.
Option 1: We mark circles (5-7 pieces) of the same diameter on the material using a compass. Carefully cut out according to the outline. We fold each circle in half twice. We carefully fold the lower wide edge like an accordion and hem it. Gradually sew on each petal. The flower is almost ready. On the wrong side we glue a small circle cut out of felt. It will serve as the basis. Place a bead in the center of the front side. It can be secured with glue or thread. Carefully glue the felt base to the hairpin. The original accessory is ready.
Reference: To make the process more comfortable, it is recommended to use cardboard circle blanks.
Option 2: EThis method is more complex compared to the method described above. To work, we cut out several strips of the material of the same length, but different widths. Fold each element in half. The width of the strip on one side is folded into a careless accordion and stitched on a sewing machine. We process the remaining parts in the same way. Cut out a small circle from felt for the base. Carefully glue the petals to the base, overlapping each other, so that the flower turns out to be multi-layered. Place a stone in the middle. This accessory will imitate a real rose.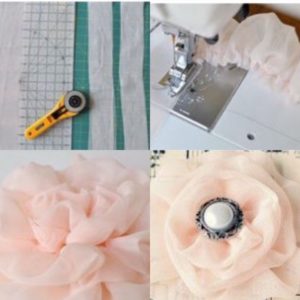
Option 3: This method of creation is easier and does not require working with a sewing machine. Cut out 4 strips of the same size from the tape. We place the ends of the workpiece in the center and sew them on. We work with the rest of the patterns in a similar way.We carefully sew the two resulting blanks together in the center. It turns out to be a small bow. Cover the attachment point with a small piece of fabric. You can place a bright bead or small brooch in the center. The difference between these bows is their size, which is easy to adjust yourself. The final result depends on the length of the workpieces. When decorating one hairpin, you can use several small bows at once.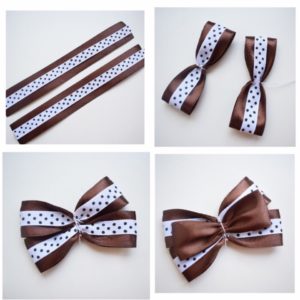
Advice: The bow can also be made more voluminous by using several blanks when sewing. For example, an additional tape is placed horizontally, between the main edges. For greater brightness, it is recommended to make this strip in a different shade.
Ideas for New Year's kanzashi hairpins made of satin ribbons
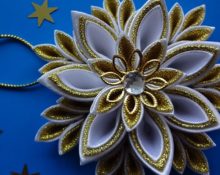
The technology of kanzashi needlework migrated to us from the inhabitants of Japan and China. This type of art is very popular among girls in these countries. Flowers are used as additional decor for festive outfits or ceremonial decoration of the room. The techniques seem very complicated at first glance, but they are very beautiful and different. However, making original flowers is quite easy.
Materials and tools:
- satin fabric in several shades;
- pencil;
- ruler;
- scissors;
- felt;
- glue;
- barrette;
- lighter;
- beads or rhinestones for decoration.
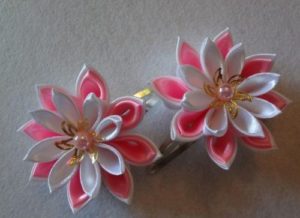
We cut strips of different lengths from the fabric. Blanks of a certain shade must have the same parameters. From each part we form a droplet. We fold the ends on top of each other. Observing safety precautions, lightly burn it with a lighter. This is necessary so that the ends are secured to each other.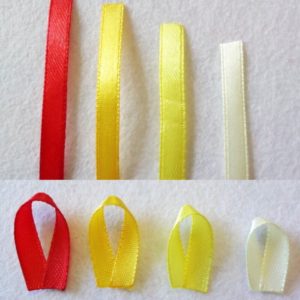
Attention: for more comfortable work, the ends can be secured with an invisible thread and only then cauterized.This action will help avoid possible burns.
Insert a smaller petal into the large blank and burn it. We arrange the rest of the details in the same way. The petal is ready. When making the remaining parts of the flower, we use a similar method. The main elements of the flower are ready.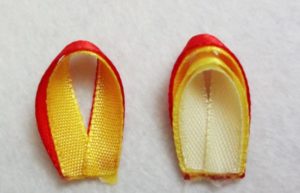
We cut out a small base in the form of a circle from felt. Carefully glue the petals around the circumference at a distance of about a centimeter from each other. the second layer should be moved slightly. Then the flower will turn out more lush and voluminous. In this way we glue three rows.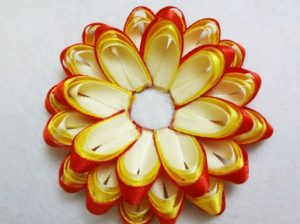
Let's move on to preparing the base for the stone. To do this, cut out small identical squares from a brightly colored ribbon. (for example, lemon or pink). We fold each element diagonally to form a rectangle. We fold the side ends towards each other and burn them with a lighter. It turns out to be a kind of boat.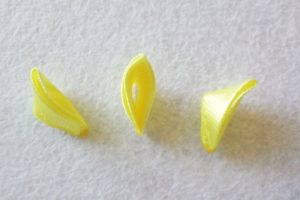
Reference: When forming a boat, a small piece of excess fabric may form at the bottom. We get rid of it using scissors.
We glue the petals in a tight row to a small fabric circle, which acts as a base. Place a large stone or brooch in the center. The decoration can be attached using glue or thread. We glue the resulting flower in the center of the main pre-prepared product.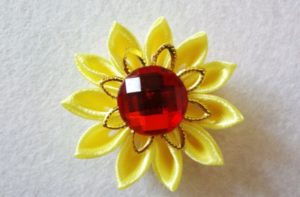
The finished accessory, designed using kanzashi technology, can be left as is or further decorated. For example, pieces of brocade can imitate grass and decorate a flower. To do this, cut out several short pieces of material. We carefully disassemble each element fiber by fiber, without reaching the base. Glue it to the center of the main flower, carefully distribute the fibers throughout the flower. We glue the element with the stone on top.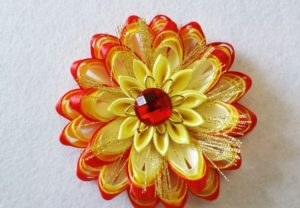
Advice: To prevent the brocade from falling apart, the base should be scorched with fire.
To decorate the bottom layer, brightly colored petals are suitable. In addition to decoration, they will help hide the base made of felt. We cut out diamonds of the same size from satin material. We place the figures on the wrong side. Make sure that the ends meet exactly in the center and are evenly spaced over the entire area of the flower. We carefully glue all components. At the end, we attach the finished flower to a pre-prepared hairpin.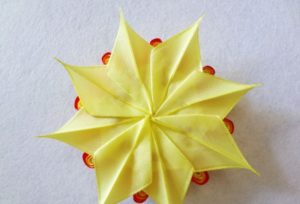
Conclusion
Hair accessories complement and decorate any outfit. Products made by hand are especially attractive. Using a few tricks, you can create several original hairpins from satin ribbons. They will be distinguished by originality and individuality, and will fully meet the personal requirements and expectations of the young princess.


 0
0