Everyone knows that the symbol of 2019 is the Yellow Pig. But in many countries, the pig is a sign of good luck, financial well-being and peace of mind. Therefore, on the shelves of souvenir shops you can often find a piggy bank, which is made in the shape of a plump pink pig.
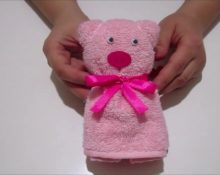
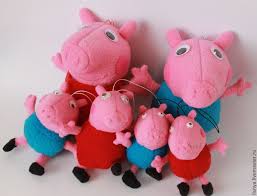 It is best to make a piglet with your own hands from fleece. And if there are children in your house, then such a soft toy will become a real friend for the baby. Your child will be very happy to receive a soft toy in the shape of a pink pig as a gift. Moreover, in the form of Peppa Pig - one of the most popular cartoon characters. The most important thing is that production will not take much time and will not take much effort from you.
What they are made from - beads, paper, plasticine, puff pastry, etc. But most often fabric is used as a basis, since a soft toy is a warm gift for an adult and a child. Before you start sewing a soft toy, you need to prepare special templates - a pattern.
How to make a pattern for making a pink pig?
Creative work is always a complex process. The main thing in such work is imagination. If you already have ideas in your head about what the finished pig toy will look like, then you should transfer the ideas to paper. This will be the pattern.
For a novice craftsman or just a mother who is sewing a toy with her own hands for the first time, it is best to find templates on the Internet. It is very important for inexperienced craftswomen to choose a model with the least amount of parts.
When the desired pig model is chosen, it can be the most popular now Tilda Pig, Peppa, characters from the well-known fairy tale about the Three Little Pigs or Little Heels from the cartoon “Winnie the Pooh” (there are many options); you just need to print the pattern and cut out all the details. Now you can proceed directly to production.
Master class: how to sew a fleece pig with your own hands.
IMPORTANT: Before sewing the product, prepare all the necessary material, as well as the tools that you will need during the work process.
To make your own Pillow Pig, you will need: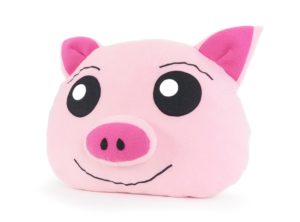
- Fleece in pink and white. We use white fleece only to decorate the inside of the pig's ears - the pillow.
- Pillow filling – holofiber, cotton wool, or synthetic padding is suitable.
- Pink and black threads.
- To decorate the eyes you will need black beads, and to make the heels beautiful, you can use small pink buttons or highlight it with black threads. You can tie a beautiful bow on the pig, then you need to prepare a ribbon to beautifully decorate the toy.
- A needle for sewing parts, scissors, small pins.
- Printed pattern in the required size. To transfer the details onto the fleece, it is best to use chalk or a small piece of soap.
When the necessary tools are prepared, you can begin to work.
- First stage – working with the pattern: transfer all the elements of the pig pillow onto paper.
IMPORTANT: so that the details are drawn in the required size.
- We carefully cut out the finished templates. Next, take a piece of pink fleece, apply the pattern and redraw it with chalk onto the material.
ATTENTION! It is very important to prepare patterns for the pig’s body in a mirror image, so that the two parts of the pig’s body are fluffy on the outside.
At the first stage, you will get two blanks for the body; snout; tail; eight pieces for legs; two pink fleece pieces and two white fleece pieces for the ears.
- Stitching the resulting parts together is second phase at work.
IMPORTANT! Before you start collecting all the elements into a single pillow toy, it is best to connect them all together using special pins.
- First of all, we sew on the small details - ears, legs and tail. The main thing is not to forget to leave room for stuffing the parts with filler.
- Next, we proceed to the pig’s body itself - we sew together the parts, while leaving a small piece of fabric unstitched so that we can turn the pig’s body inside out and stuff it with filler.
- We turn out the finished parts - ears, four legs, stuff them and sew them to the body of the pig.
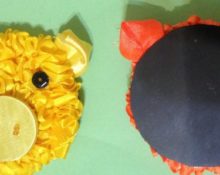
- Now you need to prepare and sew on the patch. In the photo you can see how to properly sew a pig's snout. Before sewing the finished part to the main part of the pig pillow, it is best to pin it to the stitching site with pins.
- Third stage in making pigs with your own hands - decoration.
- To the finished body of the pig, first sew the beady eyes, then the tail.Using black thread, we embroider the pig’s mouth and carefully decorate the snout.
All that remains is to decorate the pillow pig a little with a beautiful bow, which can be sewn from a satin ribbon. Sew on the bow and that’s it.
 0
0