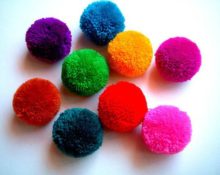
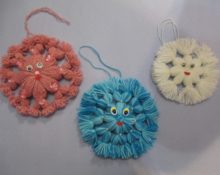
 Pompoms are lush round balls that are traditionally used to decorate hats, scarves, belts, slippers, and handbags.
Important! Do not use the word “bubo” to name a soft decorative element! This is a special medical term used to describe serious lymphatic diseases.
We will talk specifically about pom-poms. These soft, cute, fluffy balls are a favorite craft for many needlewomen.
What is needed for making
Wool
The most suitable yarn for pompoms. It makes crafts especially lush and soft. The thickness of the thread is selected depending on the diameter of the ball. For large ones - thicker, for small ones - thinner.
The threads may not be new, such as an unraveled scarf or sweater. In this case, they should be wetted and dried to level them.
IMPORTANT! From “curly” yarn, pompoms will turn out unattractive and unkempt.
Pattern
It is necessary to take care of the patterns.Craft stores sell ready-made ones, but it’s not difficult to cut them out yourself from thick paper. The width of the ring is half the diameter of the craft. The greater the width, the larger the ball. The smaller it is, the more miniature it is.
Stationery
To work, you will definitely need pointed, well-sharpened scissors. Depending on the chosen method of completing the craft, you may need stapler or stationery clips, compass, ruler, pencil.
How to make a pompom
There are several ways to make this accessory.
The classic way - on a cardboard ring
- Cut out the pattern. Using a compass, draw a small circle D 20–30 mm on the cardboard. This is the inner diameter. From the center of the first circle, draw a circle of larger diameter, the size of the pompom. Cut a 2-3 mm slot in the resulting ring. You will need two such patterns.
- Align the two blanks with each other, first laying a cut piece of woolen thread in a circle between them. You will need it to tie the pompom at the end of the work.
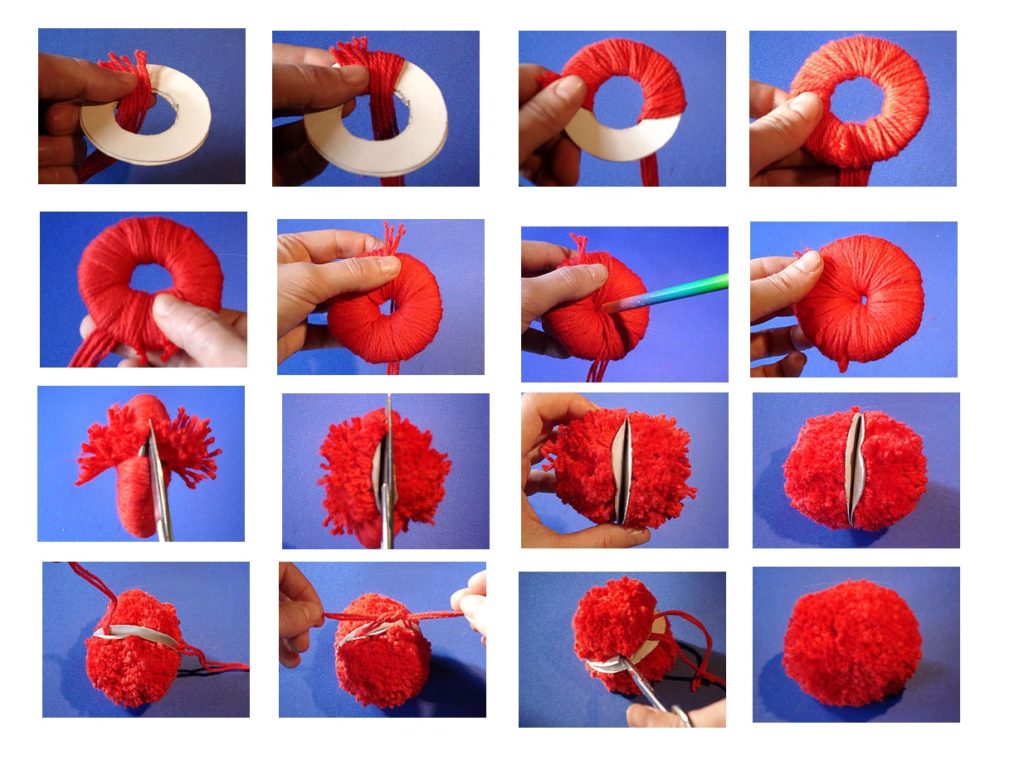
- Wind the yarn in even rows, with equal tension on the workpiece. The inner diameter should decrease by about half. In this case, the product will be quite dense, but not heavy.
- If you need a larger ball, then continue winding until the inner hole of the ring turns into a small hole. Such an accessory will be dense, fluffy and heavy.
Advice! If you need to make many identical pompoms, then you should count the number of turns or footage.
- The ring should not be wrapped up to the slots, but at a distance of about a centimeter from them. You can speed up the winding process by folding the thread into two or three layers.If you take wool of several colors, you will get a multi-colored pompom.
- Using thin scissors, you need to cut the threads along the end of the ring, holding it with your fingers so that the craft does not fall apart.
- Carefully, so as not to move the loops from the blanks, slightly move the rings apart with scissors. Then tie the thread stretched inside very tightly.
- Release the patterns from winding and fluff the finished product. All that remains is to “trim” - straighten the threads, giving the pompom a spherical shape.
A simple way - on a square or rectangle
This method is simple and quite popular among needlewomen. Using squares and rectangles you can make not only pompoms, but also brushes of any length. They can be used to decorate curtains, belts, handbags and more.
- Cut two identical squares or rectangles from cardboard the same size as the future accessory.
- Make a small cut in the middle of the side, through which you pull and secure the thread. Its length should be enough for further tying of the product.
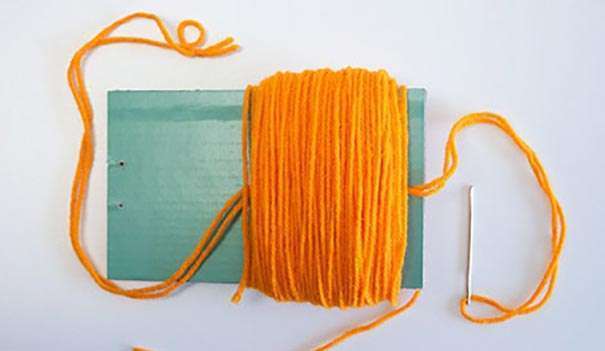
- Wrap the yarn around the rectangle in neat rows, maintaining the same density. The splendor of the accessory depends on the number of winding revolutions.
Reference. One average ball takes approximately 20 g or 3 to 5 m of wool.
- Use the free end of the thread to tightly tie one of the sides of the winding. Carefully remove from the cardboard blank. Tie the threads again. The resulting blank resembles a bow.
- Cut the sides of the “bow”, fluff the finished product, trim with scissors, giving it a ball shape.
Advice! To make a large number of medium-sized pompoms, you can use an unnecessary plastic card by making a cut in it. This “pattern” will last a very long time due to its strength.
The original way is on a horseshoe
- Prepare four patterns in the shape of horseshoes made of thick paper.
- Combine the templates in pairs to make two horseshoes.
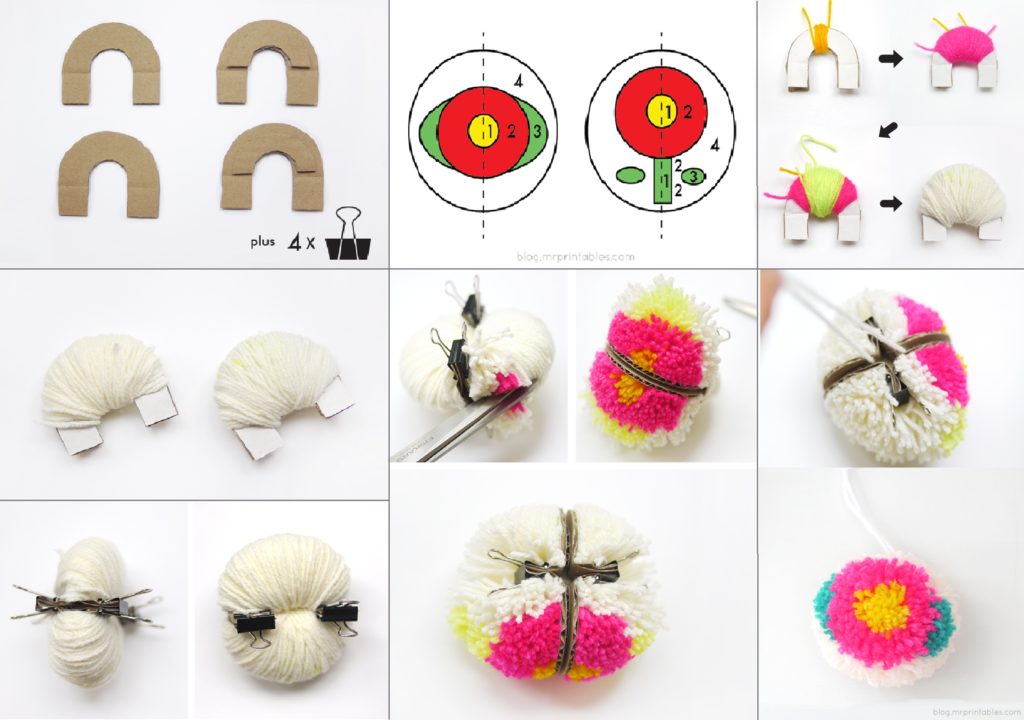
- Wind the thread first on one, then on the second workpiece.
- Connect both parts to each other using a stapler or clamp.
- Carefully cut the winding along the end.
- Lightly separate the cardboards from each other and tie the craft tightly in a knot.
This method is the most original for several reasons.
- On horseshoes you can make not only balls, but also ovals.
- By alternating layers of multi-colored threads, you can create various patterns, flowers and fruits.
- Using scissors, you can give the craft a variety of shapes. For example, a carrot nose for a snowman, strawberry, lemon and others.

Advice! By following a strict sequence of winding yarn of different colors and then giving the product a certain shape, you can surprise everyone with original accessories and decorative elements.
Unusual ways
Craftswomen are constantly coming up with new and unusual methods for making pompoms. Let's talk about them too.
The easiest way is on your fingers
This method is known to every craftswoman. It is very simple and does not require any extra tools or equipment except yarn, sharp scissors and your hands. Moreover, the size of the accessory depends on the number of fingers being wrapped. Four is a large ball, three is a medium ball, and two or one is a tiny “bambon”, as the children call it. You will need it for baby booties, blouse buttons and other crafts.
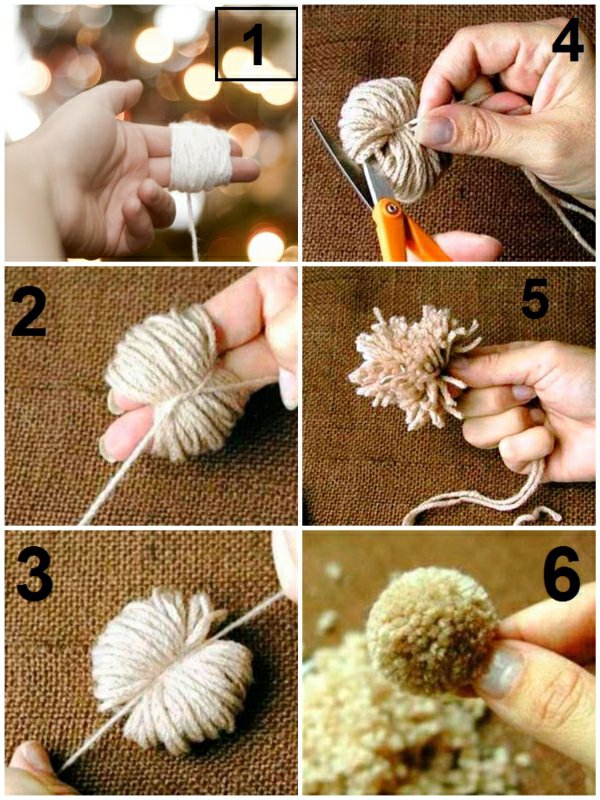
- Choose wool of the desired color. Cut a small piece of thread from the skein to tie the finished product.
- Wind as much yarn around your fingers as needed for the accessory.
- Pull the prepared thread through the turns and tie the workpiece with a strong knot to form a bow. Carefully cut the sides of the bow with scissors.
- Fluff the finished product and trim, forming an even ball.
Convenient way - on a fork
Many will be surprised, but there is another unusual method of making pompoms - on a fork. It is one of the most convenient.
- Prepare a skein of wool of the required color, cut off a piece for tying the product.
- Take a fork of the appropriate size (large or small) and wrap it perpendicular to the direction of the tines.
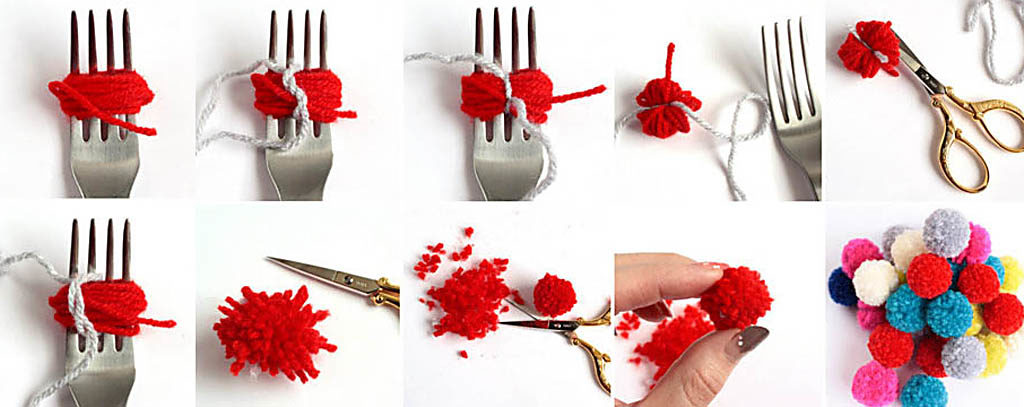
- Pull a piece of thread between the second and third teeth and tie the winding with a strong knot.
- Remove the workpiece from the fork and cut the resulting “bow” on the sides.
- Shake and straighten the finished craft. Use scissors to trim and shape into a round shape.
Even a child can handle the process of creating fluffy balls on a fork. Maybe you should give your household cutlery and a skein of wool and spend the weekend together making pom-poms. Then make some decorative elements from them. Multi-colored soft and fluffy crafts will touch and delight everyone for a long time.
As you can see, needlewomen practice using several options for making pom-poms. Which one do you think is the most suitable?


 0
0