Every person should have an activity that would make them happy, relax and help them spend their free time usefully. There are many types of hobbies that can be expressed in photography, soap making, sewing, knitting, etc. The last of these activities have recently gained extraordinary popularity among women, and today every second housewife can boast that she knitted a new scarf or embroidered a picture as a gift for her mother.
Of all the available types of needlework, felting from wool still stands apart. Toys and other things made using the technique of dry and wet felting look so realistic and beautiful that people unfamiliar with this type of needlework may find it almost impossible to learn. Let's find out if this is so.
Features and methods of felting wool at home
Felting, as well as most types of needlework, came to us from the distant past.Even ancient people, after realizing that animal wool is a good material for creating clothing and everyday items, began to invent new ways of processing it.
Important! Due to the fact that wool fibers are well stratified along the length and connected to each other, they can be used to make yarn for knitting or wool balls, which can be given any shape. The technique involves the use of natural wool, artificial materials serve as a complement.
There are several techniques that you can easily master on your own.
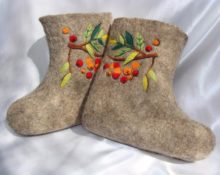
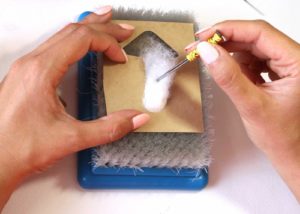
Dry method – felting. The essence of felting is to entangle wool fibers with each other, which is why they are transformed into felt fabric. To work, you will need certain tools - needles with different sections and a piece of foam rubber, which must be used as a backing. Using the felting technique, voluminous souvenirs, hats, felt boots, coats, bags and other accessories are created. The dry felting process has its own characteristics:
- sometimes the base of the craft is made of padding polyester, which is covered with wool on top;
- often the wool is placed on top of a piece of sponge or foam pad and tangled with needles;
- the needle must be held perpendicular;
- at the beginning of the work, use a thick needle, which is gradually changed to a thinner one;
- the resulting flaws are removed in the process by adding new elements.
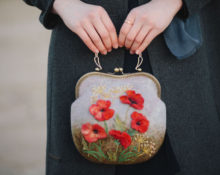
Wet technique – felting. Felting does not require needles. Gauze is used as a substrate, on which multi-colored wool is laid out according to a pre-selected pattern. Also used in the work is a thick soap solution, which is infused for two hours. Using this technique, paintings, panels, and decorations for clothes and bags are made. Features of the felting technique are as follows:
- gauze should be spread on a hard surface covered with oilcloth;
- the wool is laid out on gauze in strips, crosswise, without holes, in layers of equal thickness;
- after the threads are laid out, they are sprinkled with water, blotted with nylon cloth and lubricated with a solution;
- rub the wet fabric with your hands until the desired pattern comes out.
Modern needlewomen, if they need to quickly get ready-made elements, use a washing machine. They place the material in special felting molds, put them in a washing bag and set the machine to fifty degrees. The blanks are removed from the molds using scissors.
What you need to felt your own wool
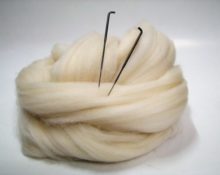
As already mentioned, the dry felting technique involves the use of special needles. They differ from ordinary sewing ones in that they are shaped like the letter “g” and have serrations on the tip.
Important! The more notches on the tip, the faster the process. The accuracy of the holes left by the needle also depends on the cross-section.
Needles are distinguished by numbers:
- number 36 - a coarse needle used at the beginning of work;
- number 38 is a thinner instrument that is suitable for the main stage;
- number 40 – thin needle for processing decorative, small elements.
In addition to these, every needlewoman should have a needle with a reverse section in her arsenal. With serrations directed in the opposite direction, it is very easy to make the finished animals softer and fluffier.
The second most important item for felting is the mat on which the process is performed - the backing. It prevents the needle from breaking if it hits a hard surface and protects the needlewoman’s fingers from being punctured.As a substrate, dishwashing sponges made of soft and dense foam rubber, wide brushes with long and thick bristles, felt or foam plastic are used.
Advice! Beginner felters are recommended to use felt as a backing, as it does not fluff up the wool fibers.
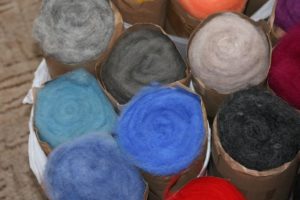
In addition to choosing convenient tools, you also need to acquire high-quality wool, from which the finished souvenirs will be made. Wool varies in texture and purpose:
- Tops. The second name for this wool is comb tape. It is classified as a high quality material that can be used for both felting and felting. This is well-combed wool, the fibers of which are very soft.
- Cotton wool (carding). Wool wool is combed out with large combs, which make the fibers multidirectional. Carding is good for beginners.
- Sliver. Undyed wool, which is used to make bases for crafts made using the dry felting technique. Keeps its shape well, inexpensive.
How to felt wool: step-by-step instructions for beginners
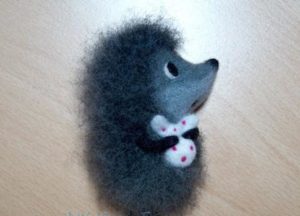
Those who want to try their hand at creating souvenirs should start with dry techniques. To make a cute brooch in the shape of a character from the cartoon “Hedgehog in the Fog” you will need the following materials:
- carded wool in black, white, gray (dark and light shades) and pink;
- needles;
- clasp;
- soap, warm water;
- backing brush;
- glue "Moment".
Step-by-step work process:
- A piece of black carding is placed on a tall brush with long bristles and threaded through it with a medium-thick needle.
- The fragment is rolled up into a small roll and rolled again.
- The resulting paw is left fluffed on one side.
- The workpiece is soaked in water and soaped on all sides.Place on the palm of your hand and roll between your fingers, rinse with water and set to dry.
- In the same way, another leg and two arms of the hedgehog are made.
- A large, about 10 centimeters in height and 3 centimeters in thickness, black fragment is laid out on a brush in the shape of an oval.
- Begin felting with the thickest needle, gradually reducing the fragment along the edges.
- After the cotton wool takes the shape of a small oval, it is covered with dark gray wool on top so that the black color is not visible.
- From a small dark gray fragment, use a number 38 needle to make a hedgehog nose, rolling it into a roll and leaving one edge fluffier.
- The workpiece is applied to the body and rolled on all sides.
- A mouth is made from a lighter gray material, and a little red wool is added to make the tongue.
- Finally, sanding is done by placing the needle into the workpiece as often as possible.
- Eyes are made from small pieces.
- A small white ball of wool is used to make a knot, which is rolled over the hedgehog's body. Then the arms and legs are laid on top of the bundle.
- On the reverse side of the figure there are recesses for attaching the clasp.
- The knot can be decorated with red polka dots made of wool or beads.
- Needles are made for a hedgehog using a needle with a reverse section.
Felting wool is a labor-intensive process that requires attention and perseverance from the needlewoman. For beginners, creating a small souvenir can take from several hours to several days.


 0
0