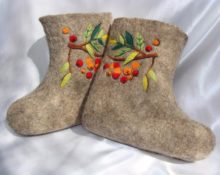
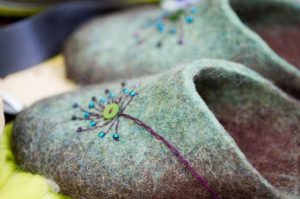
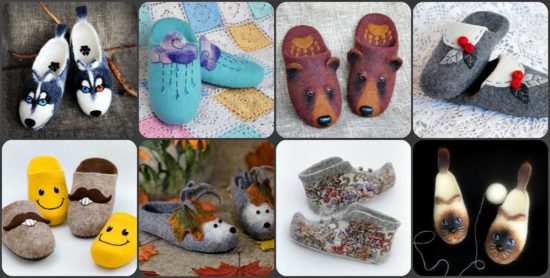
Each of us wants to feel comfortable at home, This is especially important after a hard day at work. Comfortable shoes can help you relax at home - felted wool slippers.
Feet do not sweat in them, because they are made of natural material, which allows the skin to breathe. Finding natural slippers on store shelves is quite difficult. We recommend making felted slippers to suit your taste. This article will help you understand the basics of ancient needlework.
What you need to know before you start felting wool
Felting wool is a technique for producing dense felt from bulky and lightweight material.
Only natural wool can be felted due to the scaly structure of the fiber.
Before you start study thematic articles, watch video tutorials. From them you can learn a lot of useful information, including about techniques, principles of making felted products, materials, and This means you will be ready for any difficulties.
Dry and wet felting techniques - which is easier for beginners?
There are two types of felting: dry and wet.
IN dry technique, matting is achieved with the help of special needles, which are used to pierce the wool several hundred times. The villi combine to become a single material.
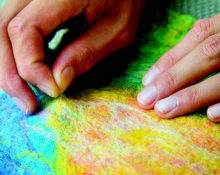
IN wet Technique masters work using soap and water. A wool product soaked in a soap solution is felted due to friction.
According to experts, wet felting is more suitable for experienced needlewomen than for beginners.
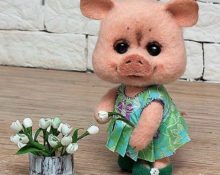
IN dry felting they make figurines, various costume jewelry, apply drawings and patterns on felt, felt or pre-felted work. Craftsmen who want to create canvases or clothing work in wet technique.
How to felt slippers from wool - master class
Felting woolen slippers, although labor-intensive, is a very exciting activity. Moreover, the result will definitely please the needlewoman.
Materials and tools
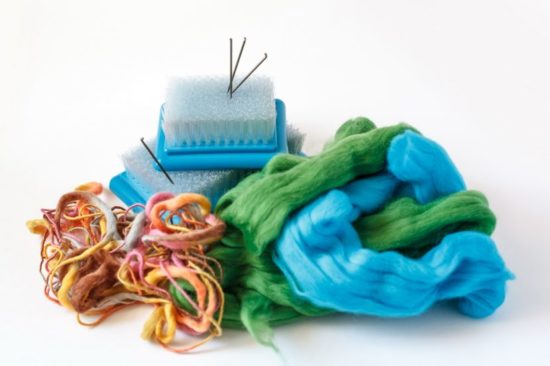
Needed for work:
- moisture-resistant material (for example, isolon);
- wool;
- oilcloth;
- soap solution (dissolve a tablespoon of soap per 1 liter);
- towel;
- mesh material;
- orbital sander;
- needle massagers;
- pads;
- hook;
- wool for tying;
- decorations.
detailed instructions
First, let's prepare a couple of patterns.
- Circle your feet on a moisture-resistant material. For further work, multiply the width and height by 0.3. Divide the result in half. The final figure needs to be added. For example, the length of my foot is twenty-two centimeters. So, we multiply 22 by 0.3. The resulting result: 6.6 divided by 2. I add the final value to the length. Now I measure the width of the foot. In the widest part it was 7.6 cm. So, I multiply 7.6 by 0.3, I get 2.28 cm. I divide the resulting figure in half. Final meaning 1.14 cm. Round and add to the width 1.2 cm each. All that's left is to cut it out.
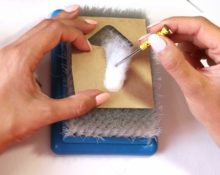
- Lay out the wool in fibers along the length of the pattern. Another layer - across. Cover with a net, moisten with soap solution and compact with a machine. Tuck the “peeking out” edges of the wool, turning the workpiece over.
- Place a couple of layers of wool along and across the workpiece. Moisten and compact. Fold back any lint that has gone beyond the edges. Repeat these steps until you have 8 layers on each side.
Make the number of layers as you wish. Keep in mind that the more layers, the thicker the slippers will be.
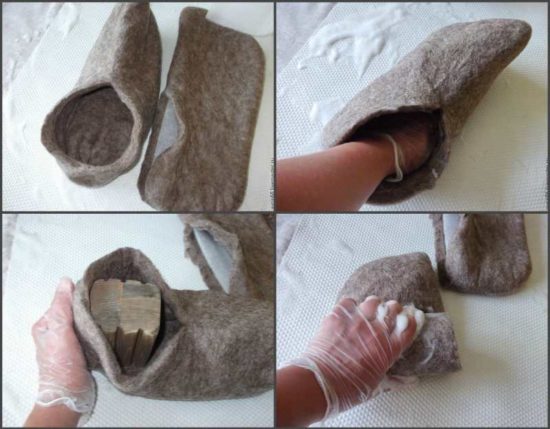
- When the workpiece is ready, make sure that the fibers should intertwine with each other. A wooden massager will help with this. Process each side about a hundred times. Repeat the steps using a massager with thin metal teeth. Then cut oval holes and remove the patterns through them. Work hard on the cuts massager.
- Turn the product inside out and repeat the steps. Focus on lateral - the most thin part of felted slippers. Now turn the product right side out and wrap it In the towel. Then roll it as if using a rolling pin. Do it up to 40 times in one direction. Carry out the same operation with slippers placed across the towel. Roll out again. This will help compact and reduce the slippers to the required size. By the way, this procedure is felting.
- Now you can slightly widen the hole and, if necessary, adjust the height of the backdrop.
If you pull a lint and it comes off without catching the whole layer of hair — the product is ready!
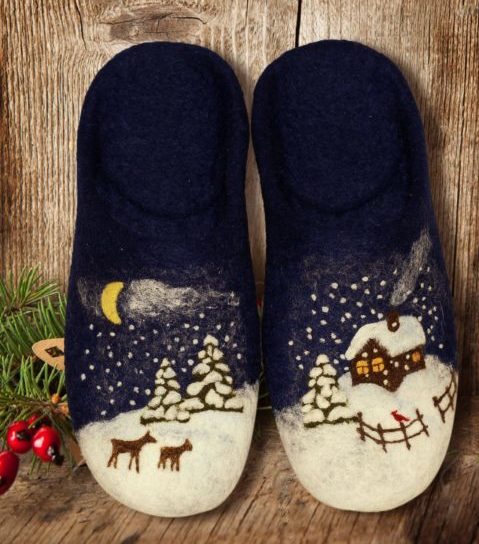
- Try it on. If the slippers do not fit, continue felting.When you achieve the desired result, rinse in cold and hot water, pat firmly against the walls of the bath. Squeeze and pull on any the basis is will help shape the toe, A the heel can be made by hand. It will take almost a day for the product to dry.. After half the time, you can pull out the base and put it on the battery. Afterwards, decorate the felted slippers, for example, with butterflies, and tie the hole with a crochet hook. And voila, you can wear your own homemade shoes.
 0
0