Funny woolen trinkets create comfort in the house and entertain; they are given and accepted as gifts.
Interesting and easy wool crafts that even a child can handle
It’s a rare day on the calendar that isn’t decorated with a holiday. It is not always possible to prepare surprises. And in this case, wool crafts will help out - their production does not require a long time and costs.
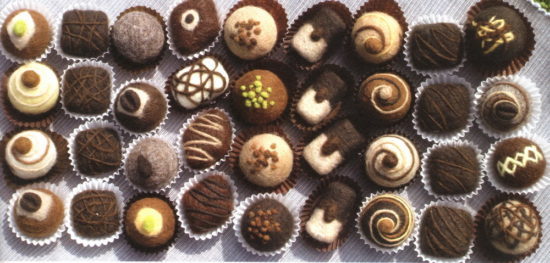
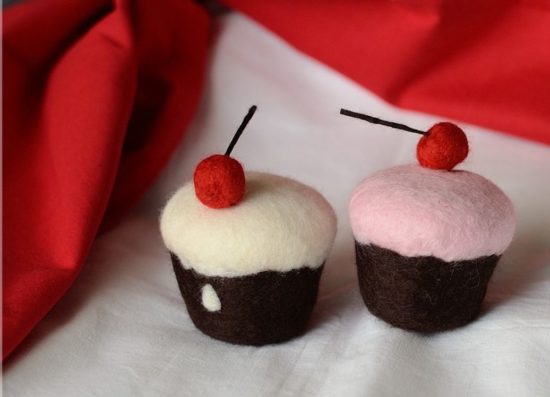
An appetizing cream cake, felted from multi-colored fibers using the dry felting technique, can become an impressive gift.

Materials and tools
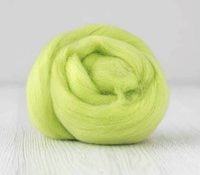
- Wool for felting (carded): yellow, white and pink.
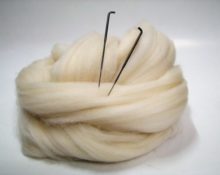
- Triangular (or “star”) needle No. 38.
- Substrate (sponge or brush).
Master Class
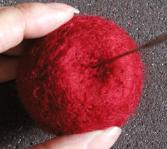
Stage 1. Blank for a toy cake.
- Roll up a tight ball of yellow fibers. It should be the size and shape of an orange. Start piercing it with a felting needle.
- Turn the workpiece over and process it from all sides until a dense core forms inside it. There should be orange on the outside soft.
- Shape the yellow ball into a short cylinder (washer). Flatten the workpiece on both sides. Felt each one well.
- Work on the side edge: take the workpiece in your hands and carefully, along the entire circumference, go deeply with a needle.
- Again lie down all surfaces. The wool will thicken and take the desired shape of a flat wool tablet.
Stage 2. Adding "cream".
- Form from carding pink flagellum. Attach it to the workpiece in the middle of the side surface. It should resemble a layer of cream between the cake layers.
- If the location of the layer suits you, carefully nail the pink strip to the main part with a needle.
Stage 3. Decoration with “glaze” and “cream”.
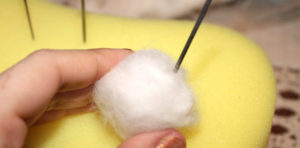
- Get in touch a ball of white wool on one of the two round sides of the workpiece. Using a needle, form “appetizing streaks of glaze” on the sides of the cake.
Try to make the “smudges” look uneven, like real ones. To do this, first lightly beat the “glaze” - outline the contours. After correcting the line, press thoroughly.
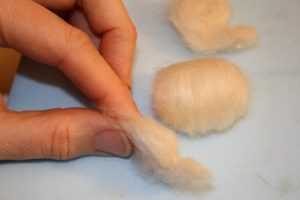
- Use your fingers to roll the pink wool into several small balls. Nail them on top of the white “glaze”, arranging them in any order you like.
- You can finish the felting here, or add decorations. They can be made of wool of a different color, beads, beads. It all depends on the flight of fancy.
- If you are a cheerful person and like “jokes,” before guests arrive, place the felted cake on a platter among the real ones.
- In your free time from working on the holiday table, the cake will be a pleasant toy for your child.
- This wonderful trinket can be used as a pincushion. The inserted needles will look like candles on a birthday cake.
When all the possibilities for using wool cakes have been thought of - start your New Year's crafts.
Felted wool crafts in a New Year theme
The tradition of decorating the Christmas tree has existed for a long time. Two centuries ago, our ancestors hung apples on spruce branches. And for good reason.
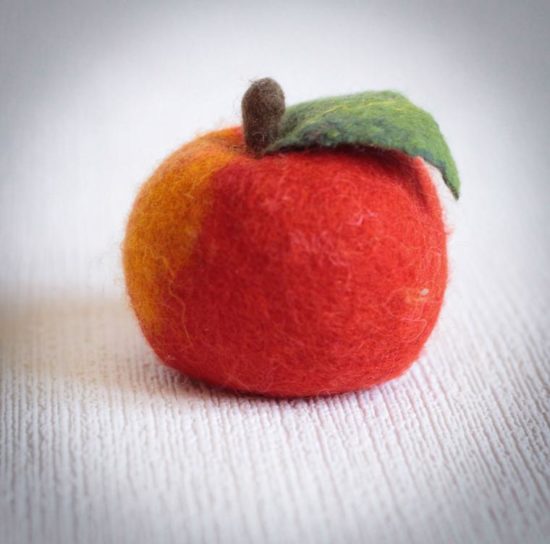
Apple - not an easy fruit. In Russian folk tales it is a symbol of eternal youth and fertility. Later, traditional Christmas tree balls symbolically replaced apples.
We will try to revive the old New Year's custom. To do this, we will use the method of dry and, unusually, wet - “lazy” felting of wool.
Nature, materials, tools
Apple. Decide on nature: choose the apple variety that you like best. The wool palette will depend on this.
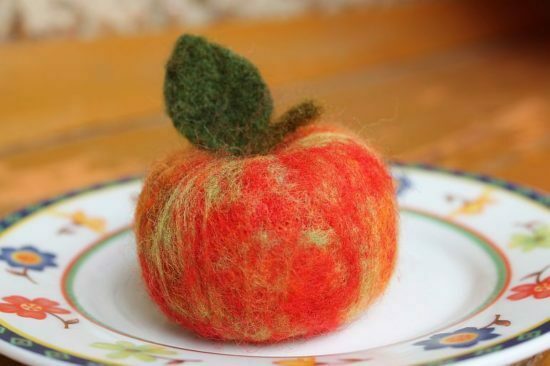
For master class a New Year's apple, a winter variety, was used - Orlik. Its fruits have a yellow-green skin with a red blush on the sides. A Christmas tree with such apples will be amazingly beautiful.
Wool:
- Tow – coarse sheep wool in the form of fluffy lumps (like familiar pharmacy cotton wool). Use it to make the base.
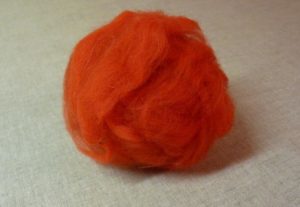
- Carding - combed, twisted wool. Needed to decorate an apple. Colors: light yellow-green, yellow, any shades of red. Brown wool - for making the stalk.
The more shades you use, even if the difference is subtle, the more natural the apple will look.
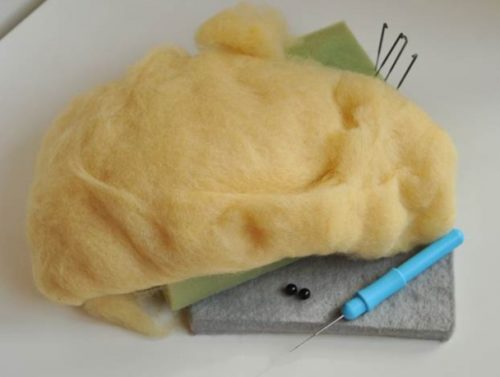
Felting needles No.38.
Substrate.
Felting brush or sponge.
A cover for “lazy” wet felting of wool in the washing machine. This is nothing more than part of an unnecessary stocking or tights. The main thing is that there are no holes and a light color.
Master Class
Stage 1. Formation of the workpiece.
Tie a knot in the stocking.Place the wool for the base in large pieces into the resulting bag and give it the shape of a ball (apple).
The comb must be laid evenly and tightly. When the desired size of the ball is reached, tie a second knot with tension. There should be no gap left between the wool and the knot. If the second knot loosens, tie it again. The quality of wool felting depends on how successfully this part of the work is completed.
If you decide to make not just one fruit, but a whole apple garland, continue the process: knot – dense ball of floss – knot. It may end up resembling a bunch of thick sausages.
Stage 2. "Lazy" wet felting.
The apple blank is wet felted in a washing machine for one hour at a temperature of 30-40 degrees. Use automatic spin. The future apple can be subjected to this process at the same time as washing things.
Stage 3. Drying.
After finishing the wash and spin cycle, dry the ball (garland) in a hanging position. Do not untie the knots until the product is completely dry.
After drying, creases may appear on the ball. They are easy to fix when decorating.
Stage 4. Decoration using dry felting.
The shape of an apple is quite simple: a ball with two indentations. The upper recess is called the funnel. This is where the stalk is attached. The bottom, where the remains of the flower are located, is the saucer. It is less deep than a funnel. As you decorate, you need to take these apple features into account. Use light yellow-green wool to create the general background of the fruit peel. Apply other shades on top of it. Get in touch small strands along the meridians of the ball carding main shade. The fibers should not overlap and leave white gaps in the fringe.
Control the shape of the apple: sculpt it with your hands, add wool to the creases. Use a needle to work out the dents for the saucer and funnel.
Slight asymmetry will make the apple very similar to natural. The process of imparting the base color to an apple requires patience. But when it's finished, start creating!
Work with colored wool like an artist: use small fibers of different shades to paint an apple.
The colors should flow smoothly into one another, without clear boundaries.
Be sure to look at a real apple - you will see ruddy veins, spots of different colors and sizes. Complete freedom of imagination!
Stage 5. Details.
- In order for the apple to have a stalk, you will need a piece of brown wool. Pull and curl the fibers lengthwise. Holding one edge, twist them with your fingers. The curled tip will be the tip of the stalk.
- Holding onto the fluffy end of the stem, okay get lost Use a needle to just curl the edge. Twist the stalk with your fingers, making it firm and smooth.
- Place the fluffy edge of the stem into the recess of the funnel. Add brown fibers under the stem and lie down them in the bull's eye underneath it.
- Work the needle until all the fibers are gone. tumble in into an apple, and the stem will not hold securely.
- Apple in a saucer lie down a small amount of brown wool. Fluff the top layer a little. The remains of the flower (saucer) are ready.
You can decorate the Christmas tree. You can attach an apple to spruce branches in different ways. For example, using a narrow green ribbon. Tie it to the stem in the middle, and decorate the free ends of the ribbon with a bow on the spruce paw.
Apples don't have to look natural. If you decide to be naughty, use any color from the wool palette.
What other crafts can be created by felting wool?
Get creative with the preparation: Or maybe it’s not an apple and tomorrow is not a New Year’s holiday, but Halloween? If you're in the pumpkin mood, you can easily turn the blank into a cute handmade pumpkin.
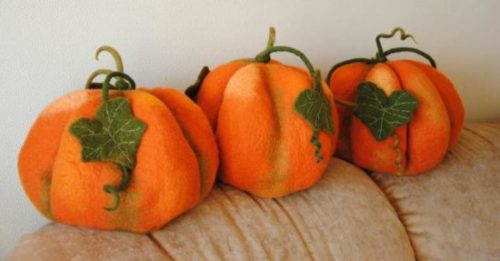
To do this, slightly change the shape: slightly flatten the ball on top and bottom. Use orange wool for decoration. After rolling, sew the ribs of the pumpkin with green thread. Felt (similar to the stem of an apple) a green curly stem.
Surprise your friends with your own funny emoticons. Choose bright yellow for the decoration of the blank carding. After laying down Embroider the face you like with black thread.

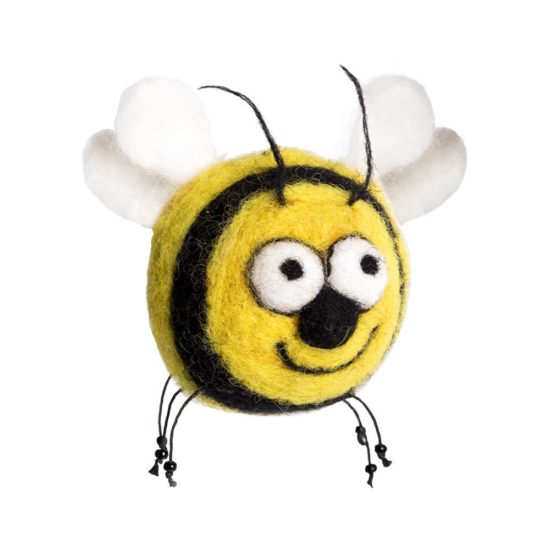
Bee Bee will certainly appeal to the younger members of the family. Decorate the blank with alternating black and yellow stripes. Felt the bee's wings separately from white wool and nail them to the body with a needle. The eyes and mouth can be embroidered with black thread or small black buttons can be used.
During the creative process, many ideas will appear. This is how woolen trinkets, dear to the heart and pleasing to the eye, take up residence in the house. A small “romance” turns into a lifelong passion.
 0
0