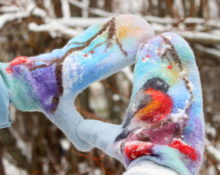
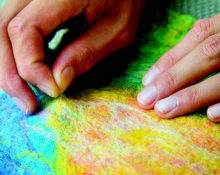
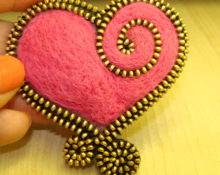
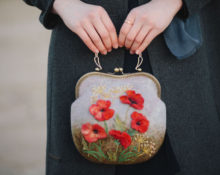
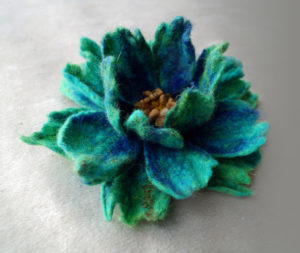
 Rooted in the distant past and still popular today, a type of needlework is wool felting. This is how items of clothing, toys, panels and accessories are made.
Another name for this type of needlework is felting or felting. The felting process is fascinating in its simplicity, and the result is exclusive, beautiful things.
For beginners, we will tell you how felting is done from wool and introduce you to the step-by-step execution of the work.
What to prepare for work
Materials
There are two types of felting: dry and wet.
When using the dry method, it is better to use semi-fine dyed wool. Fine wool is less 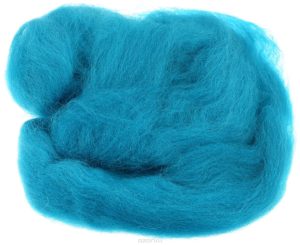 practical, under the influence of a needle it is destroyed, and the thing can be ruined.
When creating toys, coarse, undyed wool is used as a basis. It is called a sliver, then it is wrapped in colored wool. Note that toys made from sliver are softer, but do not hold their shape in the best way.
You can find it in stores combed tape - wool fibers elongated. Before using such raw materials, the fibers must be tangled by placing them on top of each other crosswise or combing them with a special brush. You can use the kind that is used to comb animals. The fibers should be strongly tangled, then the felting process will be easier and the expected result will be more accurate.
Wool wool (carded) works well for beginners. This is a bunch of wool consisting of tangled fibers. It is already ready for felting and does not require additional preparation.
Reference. Felting is carried out only from natural wool.
This is due to the fact that only natural fibers are capable of matting and felting.
As a rule, products are made from camel or sheep wool. But you can also use more expensive ones: angora, cashmere, alpaca, mohair.
Tools
In addition, you will need the following.
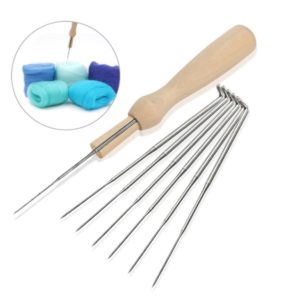
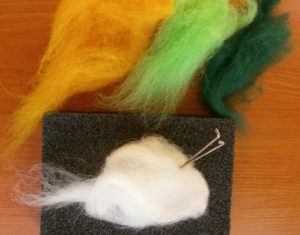
- Felting needle. It differs from a sewing needle in its shape and the presence of notches). Most
 Triangular needles are popular and available.
 - The felting process is carried out on a substrate. These can be thick sponges, brushes or special foam mats for felting.
It would be useful to use thimbles to avoid scratches. The needles are sharp and notched and can damage the skin.
How to do dry felting
Dry felting is the process of entangling fibers using a needle to form felt. Thus, three-dimensional things are created.
More suitable would be triangular or four-beam (star) needles, different in thickness. It is also necessary to prepare hard foam rubber or brush.
Step-by-step instruction
- We place a piece of wool on the foam rubber and begin to pierce it with a thick needle. Let's enter it
 perpendicular to the surface.
 - Initially, we make deep punctures to tightly felt the inside of the product. Gradually turn the felted workpiece over so that the felting is uniform.
- The result should be a ball or cylinder, uniform on all sides. The workpiece should not be deformed during compression; only then can one proceed to the next stage.
Important! Take the wool in small portions and gradually add more. This will ensure a more even stall.
- For further work, it is worth taking a thinner needle. It is used to pierce the part as close as possible to the previous injection. Since this stage is carried out on the surface of the product, the needle should be inserted onto one or two notches.
- To remove unevenness, pierce it with a needle as often as possible. The relief on the surface is created in the same way. If you cannot remove the flaw, add a small amount of wool, distributing it evenly over the appropriate area.
Attention! To check the workpiece for density, tap the table with your finger and the product. If the sound is the same, the fall can be completed. You have reached the required density.
- The connection of individual workpieces is made by rolling them together. To do this, a small amount of non-fulled fibers is left at the junction on one of the parts. They are threaded into another part using a needle.
- Then a small piece of wool is placed at the junction, which grabs both parts and falls down. The matting layer should be thin to avoid unsightly bumps.
How to learn the wet felting technique
This technology is called wet felting because it is based on a solution of soap. 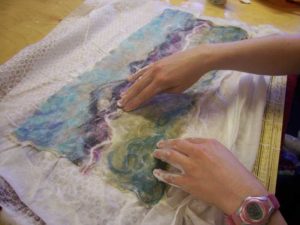
The fabric created in this way is used for sewing coats, hats, bags, and scarves. For this you will need:
- wool;
- 1.5 meters of single-layer film with bubbles (sold in hardware stores) or mosquito net;
- spray;
- baby soap or detergent;
- water.
As a rule, thin semi-fine wool or combed tape is used for wet felting.
Step-by-step instruction
- Initially, a soap solution is made. A bar of soap is grated and filled with two liters of hot water. Mix everything until the soap dissolves. Allow time to thicken (about 2 hours). You can just take liquid soap. The resulting solution promotes rapid tangling of the fibers.
Important: in the process of wet felting, the product shrinks up to 20%.
Wool layout
- Spread the film on a smooth surface with the bubbles facing up. Approximately measure the dimensions of the canvas,
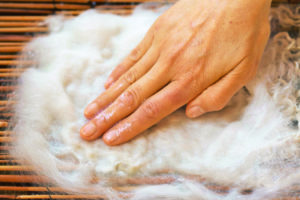
 that you want to receive, do not forget to add 20%. Decide in advance on the pattern you want to get. Separate the strands from the skein of wool carefully along the entire length. Try doing this with gentle twitches. In this case, hold the edge in your left hand and pull out the strands with your right.
 - We spread the wool in one direction over the entire marked surface of the film.
- Place the second layer perpendicular to the first. If you want to get a dense product, add 2 or 3 more layers. If you leave 2 layers, the product will be thin and light.
- When all the layers are laid out, you can apply the drawing. We make it in a thin layer so that it does not look rough in the finished canvas.
Soaping
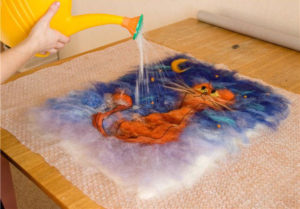
- The drawing is laid out and has the appearance that the finished item will have. Let's start soaping the canvas. Carefully pouring the soap solution creates a foamy mass. To prevent the pattern from floating and blurring, do not pour too much water.
Smoothing
- Cover the soaped wool with film.Gently smooth the surface so that the soap is distributed evenly over the entire surface. If you slightly moisten the film on top, your hands will glide over it more easily. If, upon opening the film, you find that there is not enough soap solution, you can add more.
- We perform smoothing for half an hour, gradually increasing the degree of hand pressure on the film.
The canvas is ready when the surface becomes smooth and the design does not separate from the main canvas. And it, in turn, will not exfoliate.
Rolling out
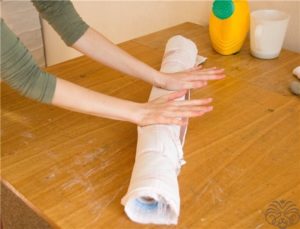
- Next, we roll the workpiece into a pipe and roll it back and forth with our palms.

- Then we make a tube on the other side and roll it again.
- You need to roll the canvas about fifty times on all four sides. There is no need to put any effort into this process. But keep in mind that excess water will still drain from the sides. Each time you unroll the canvas, straighten the film and make sure that the workpiece is not jammed.
- When finished rolling, remove the top film. Without lifting the product, move it to the center and begin to lightly knead it, pressing it like dough. Periodically unroll it and straighten it. After 5-7 minutes you will realize that the wool has rolled up.
Falling off
The last step is to carry out the fall. For this free the surface from the film and throw the product on the table. Don’t forget to straighten it sometimes to avoid unnecessary folds. It is now that the product will acquire its final size.
Having completed the felting, the canvas must be rinsed and dried, laying it out on the table.
Simple and unexpected: wallowing in the washing machine
Felting in a washing machine is accessible even to beginners.

Take an old sheet and on one half of it lay out pieces of wool in the pattern you want. Cover with the other half of the sheet.Baste the fabric lengthwise and crosswise, along the entire fabric approximately every 10 cm.
Reference. You can use not only wool, but also yarn, the presence of natural wool in it should be more than 60%.
Place the workpiece in a washing bag; it will protect the drum from clogging. Add a few items made of hard fabrics, such as jeans, to the machine; they will increase the vibration of the drum. It is also advisable to add a cotton item; cotton dust promotes the felting process.
Important! We set the washing mode to no more than 40 degrees, be sure to use spinning and drying.
Beginners can easily create simple models in this way: a scarf, a phone case or a small rug.
Useful tips for beginners
- If you want to create something quickly from wool, use coarse wool. The more
 the thickness of the fibers, the faster they fall off.
 - The deeper and more often the needle hits the wool at the initial stage of work, the faster and better the item will be matted.
- If the shape of the created part does not suit you, you can correct it by felting a small piece of wool of the appropriate color.
- When a product has several identical parts, for example, paws or ears in a toy, it would be more correct to immediately prepare the same amount of wool for each part. And only then roll them.
- You should not take a large volume at once, it is more difficult to felt. Start small and gradually wrap it in thin layers of wool. The denser the product is on the inside, the easier it is to sand it on the outside.
The main thing is to approach felting with soul and imagination. And the result will definitely please you.


 Triangular needles are popular and available.
 perpendicular to the surface.
 that you want to receive, do not forget to add 20%. Decide in advance on the pattern you want to get. Separate the strands from the skein of wool carefully along the entire length. Try doing this with gentle twitches. In this case, hold the edge in your left hand and pull out the strands with your right.
 the thickness of the fibers, the faster they fall off.
 0
0