euroflag.by
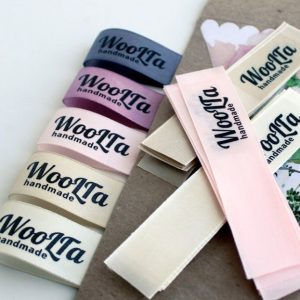
A handmade product, decorated with a stylish tag, immediately looks more solid and expensive. The stores have a large assortment of different labels that look great on knitted or sewn items. But a handmade tag looks even more original. It is guaranteed to be exclusive, made specifically for a specific item. Tags decorate not only clothes and accessories. They appear on soft toys, wallets, and gifts. Making fashionable designer jewelry is not at all difficult.
Tags for knitted products - handicrafts
The material and size of the tag for knitted items should be selected in accordance with their type. You can make your own label from different materials:
- Paper, cardboard, craft products. The most common choice among craftswomen. The material is valued for its environmental friendliness, ease of operation, and low price. The disadvantage is poor strength - the paper gets wet, tears, and wrinkles.This option is suitable for decorating a knitted toy, keychain or other souvenirs. It won't last long, but it will make an impression on the recipient of the gift.
- Synthetic raw materials. It is durable, flexible, and does not suffer from moisture. It should not be used to decorate children's knitted toys and other products for children. But it is suitable for decorating cases, wallets, and household items.
- Plastic labels. Dense raw materials that do not suffer when in contact with water or chemicals. Its disadvantage is the lack of flexibility. Plastic tags practically do not bend, they are difficult to make at home.
- Leather tags. You can replace the leather with artificial material, then it will cost less. Great for a knitted backpack, hat, bag, gloves and other things made from any thread.
There are other options for making decorations and creating your own logo. Ready-made tags for needlewomen can be found in fabric stores and specialized departments with accessories.
How to make a tag with your own hands - an easy way
To work you will need several eyelets, a piece of paper, a piece of cardboard and varnish. Among the tools you need to stock up on scissors, glue brushes and glue. To make your own logo on a product, you will need:
- Work on creating a layout. Any graphics editor can help with this. The applications have a large selection of different shapes, and the line thickness is very easy to edit. For example, in Word, you can select the template you like from the insert menu and fill it with any color.
- Finished parts are printed on a color printer and glued onto a sheet of cardboard. Modern printers can print on different types of designer cardboard.
- Afterwards the finished product is varnished.This ensures strength and long service life.
- We insert several eyelets to thread the ribbon or rope through. You will get excellent Christmas tree decorations, souvenirs for loved ones, and designer additions to the packaging.
Beautiful tags on thermal transfer paper - quick and easy
stc-istok.com.ua
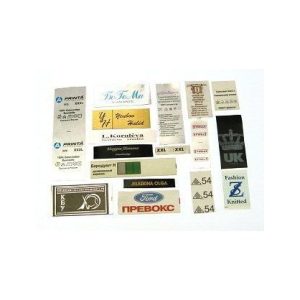
You can also create a shortcut in a modern, simple way. Especially if you are tailoring or knitting clothes to order, you will definitely need a tag. It should contain the rules for using the product, its characteristics and the author's mark. To make such a logo on clothes and accessories, you will need:
- Several sheets of thermal transfer paper, which is suitable for light-colored material.
- A small piece of canvas.
- Lighter, printer.
- Satin ribbon, light. Length – a meter, width – two centimeters.
- Scissors.
Initially, we will select a suitable and understandable graphics program. The logo will be created in it. Rules on how to care for the product, information about the composition of the material, just download it online. The drawing must contain two colors. Select the option to convert the finished image into a mirror-opposite format. This will make it easier to print. The pictures are placed on a standard sheet of paper.
Thermal transfer paper is used for printing. Afterwards, each element is carefully cut out with scissors. Tags are laid out on a satin ribbon, stepping back a couple of centimeters from the edge. They need to be covered with a piece of cloth, then ironed with a heated iron. Do not use steam.
We check whether the paper fragments are imprinted on the fabric. All that remains is to remove the material, turn the satin inside out and iron it again. This will finally secure the drawing.Now you can make custom products with your logo.


 0
0