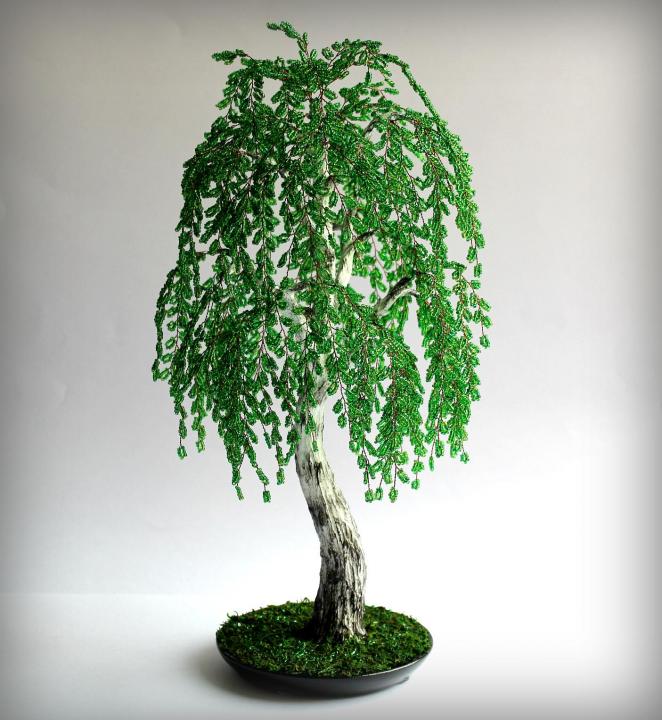
According to Feng Shui theory, tree figures can bring prosperity and well-being into the home. They symbolize the connection between earth and sky, human desire to achieve enlightenment and spiritual harmony. If you want to find peace of mind and create a positive atmosphere in your apartment, everything is in your hands, in the literal meaning of this expression. Weave a tree from beads and you can not only attract good luck, but also find something you like. And we will tell you how to do this.
How to make a tree from beads with your own hands
Looking at ready-made souvenirs of this kind, it may seem that it takes a lot of time, effort and materials to create them, and beginners will not be able to cope with the task at all - as a result, nothing worthwhile will come of it. But this is absolutely not true. The process of creating beaded trees is actually not that difficult. Weaving bracelets, necklaces, or even embroidering can be much more difficult.
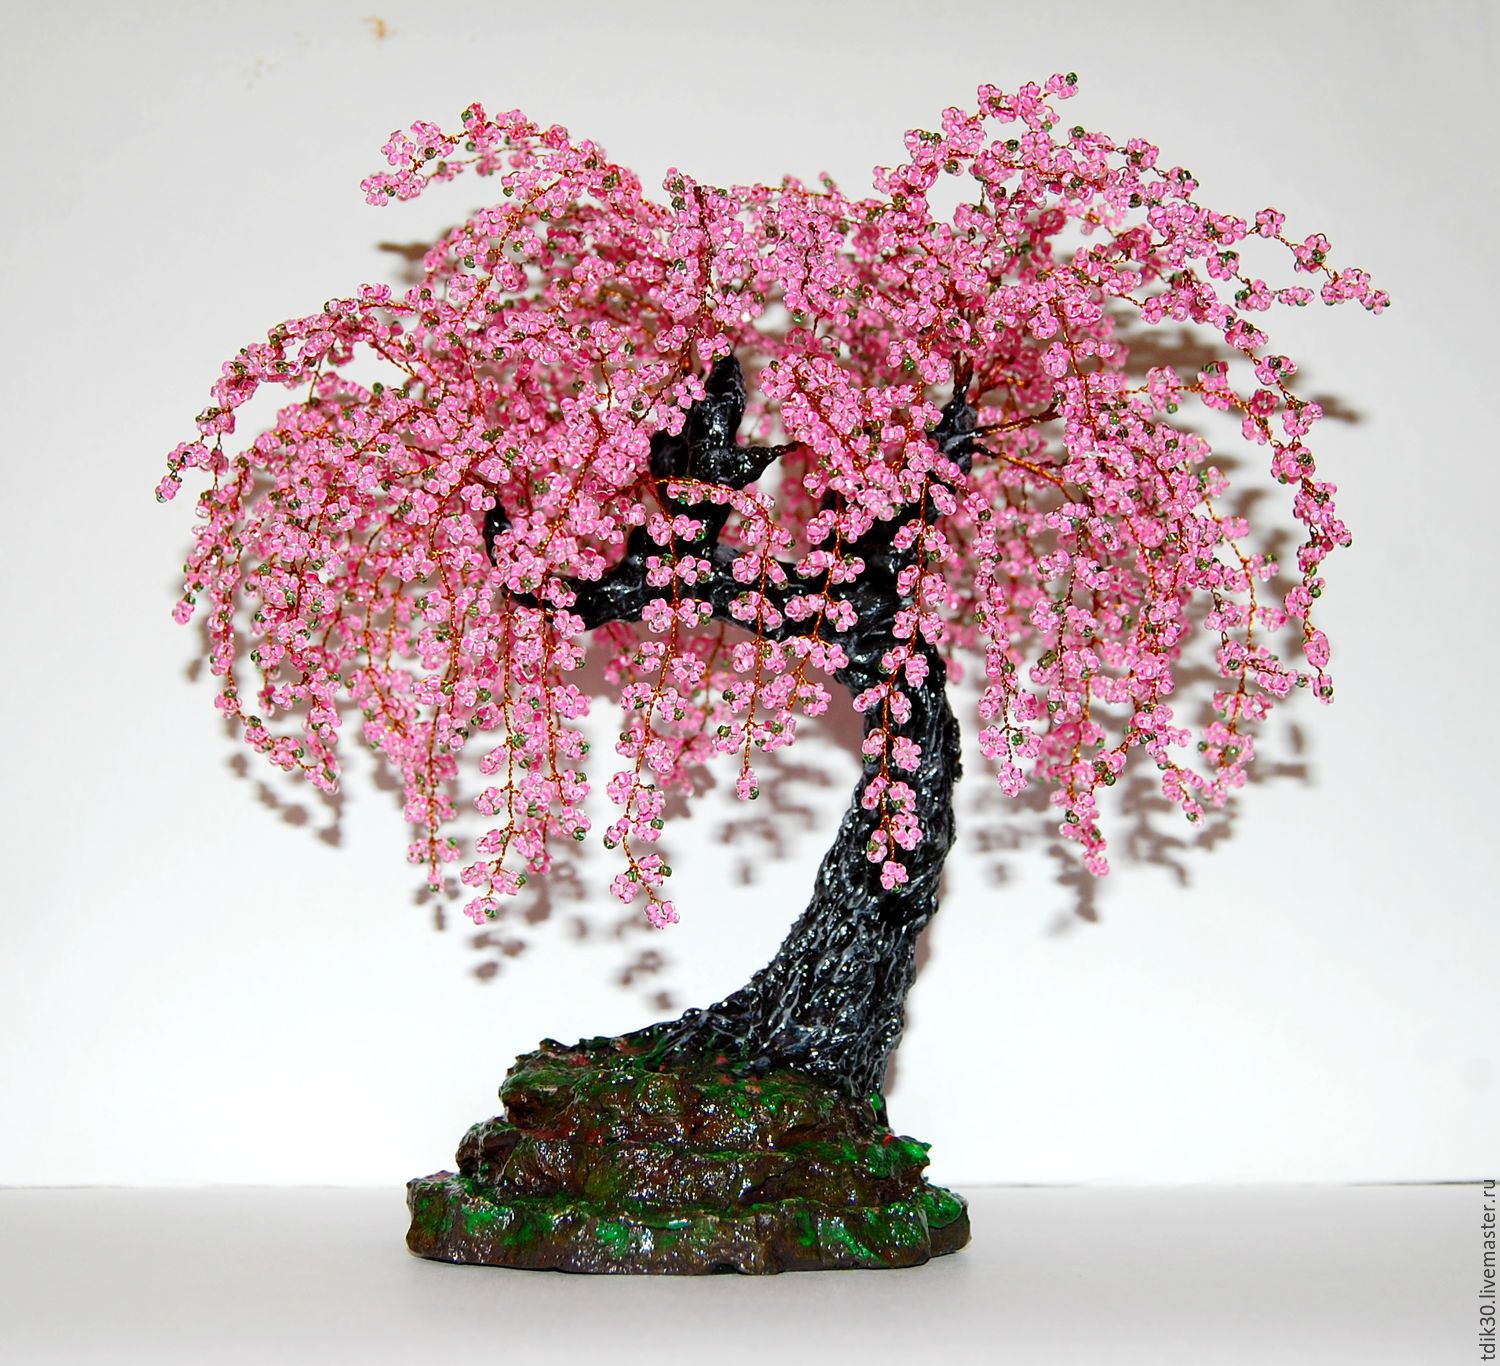
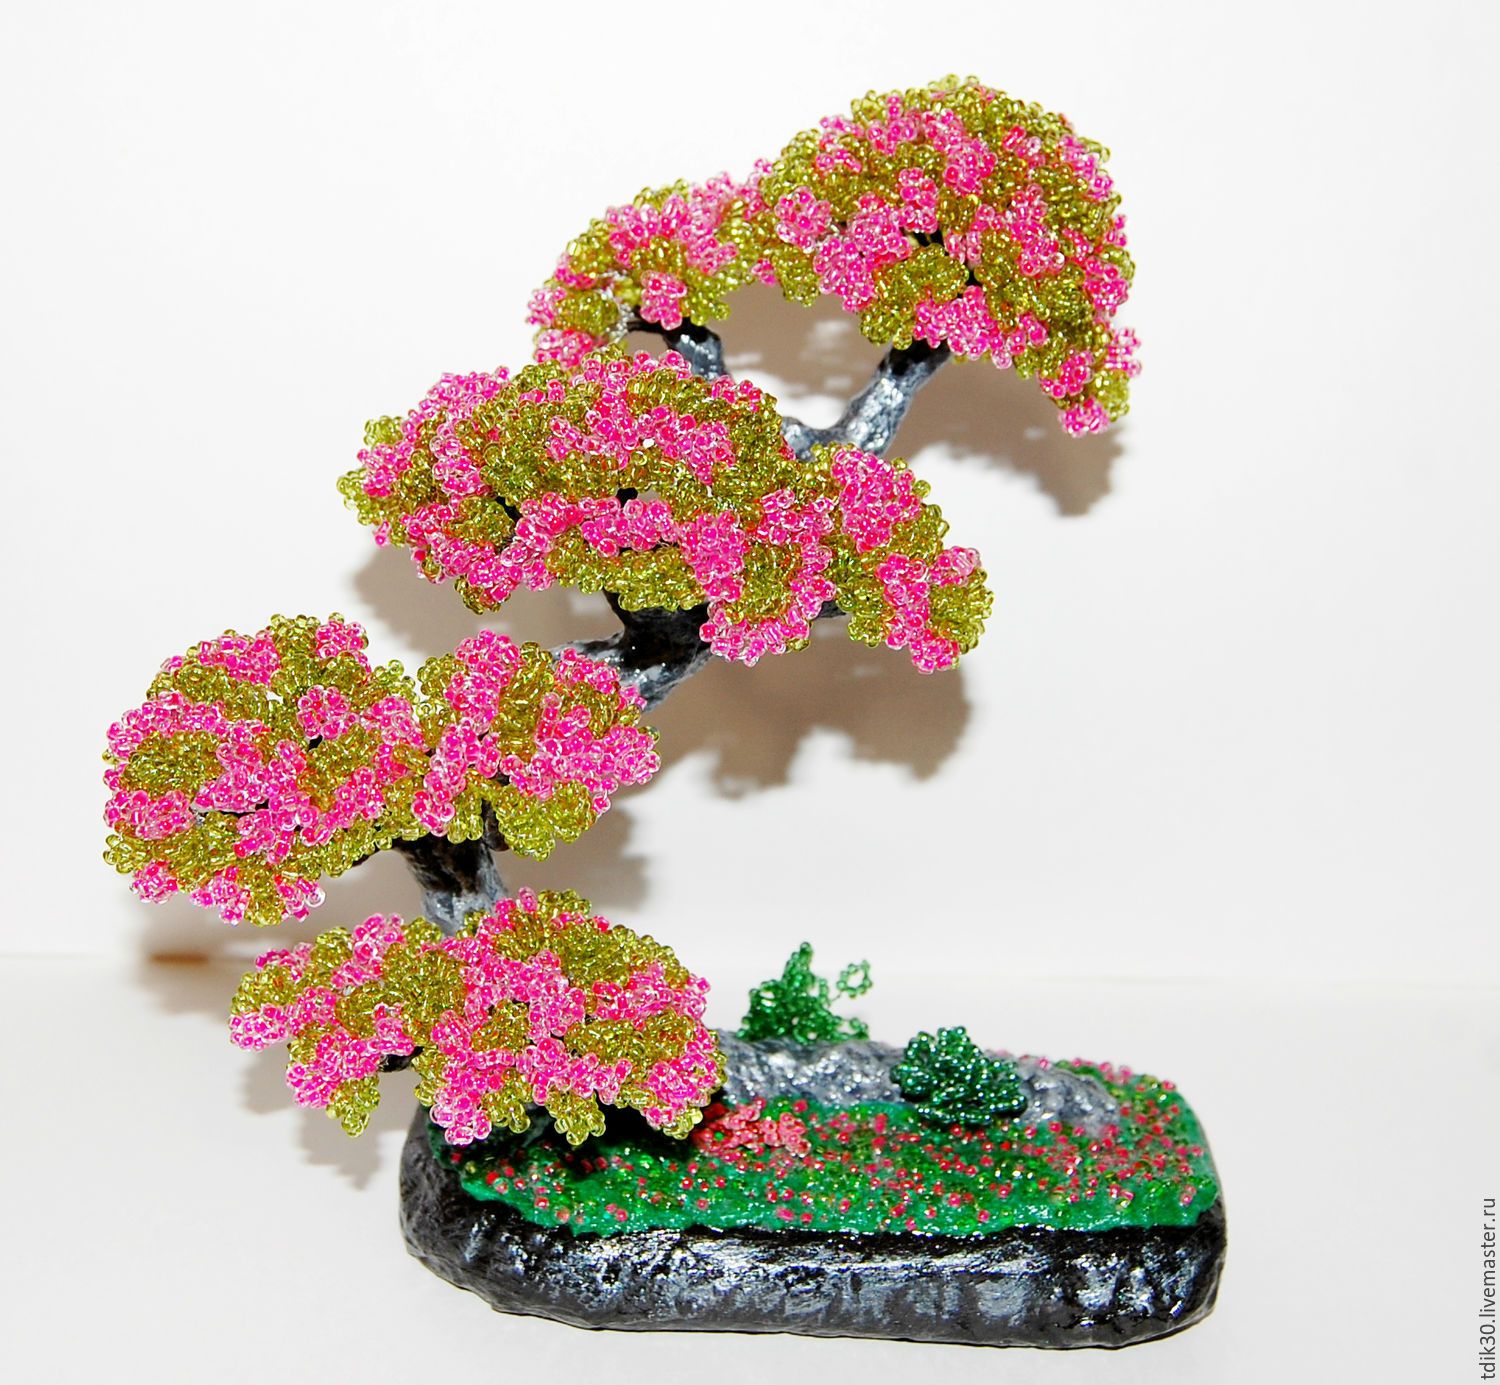
The main work consists of stringing consumables onto wire and creating loops and arcs of various lengths and sizes from it.The result depends on the correct connection of the parts and the successful selection of the color scheme of the beads. It also happens that at first glance it is difficult to distinguish ready-made trees from real ones.
Formation order
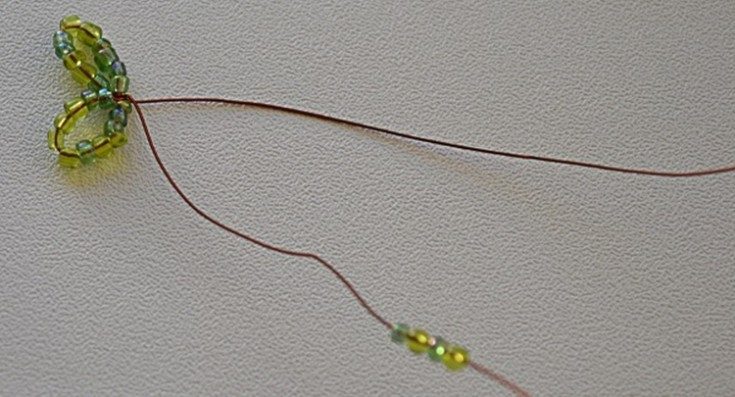
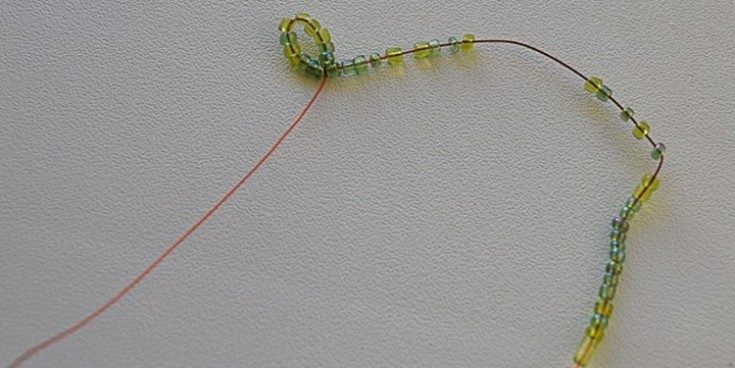
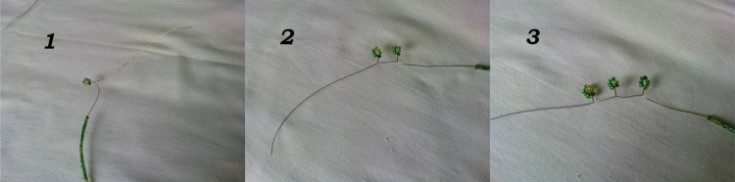
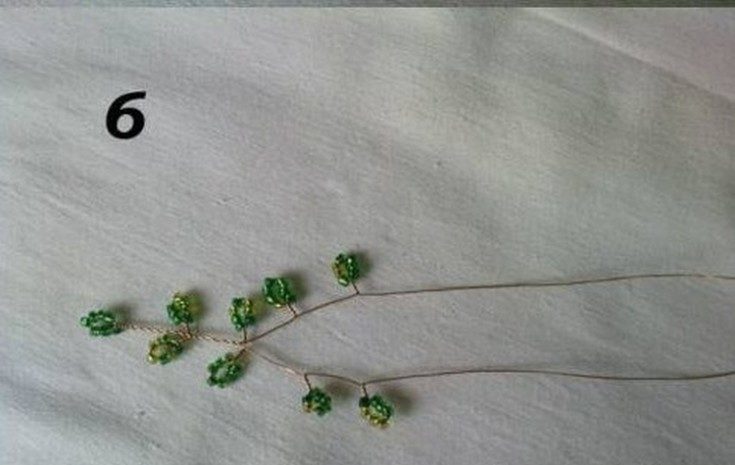
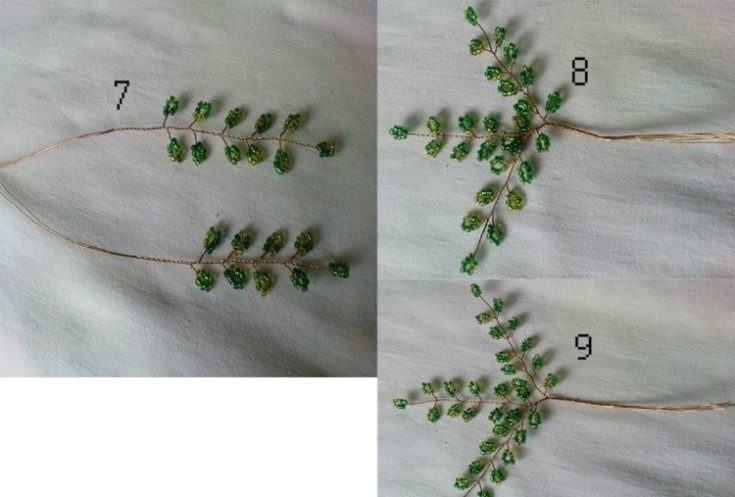
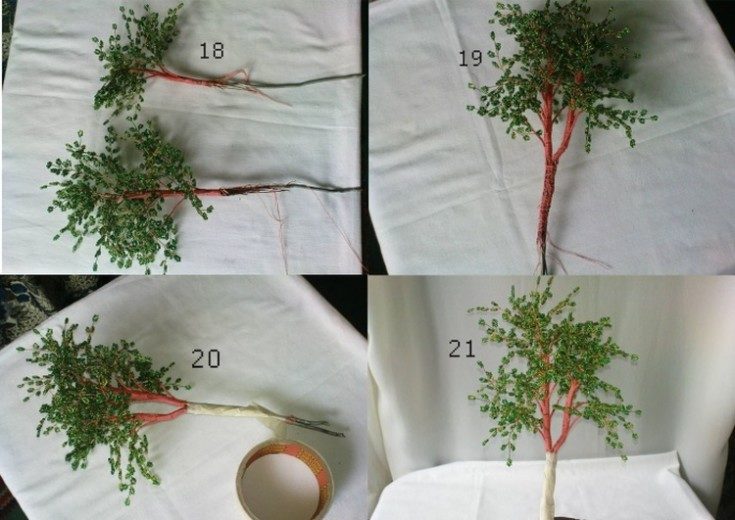
The processes for creating different beaded trees are very similar. So, first of all, twigs with leaves are woven. To do this, string a certain number of beads onto a flexible base, move them to the middle and form a loop by twisting the wire. Then a trunk is made from the prepared branches with leaves. To do this, they are screwed to a thick wire or other base. You can use a pot or shallow saucer as a stand. In order for the composition to hold, it must be filled with a previously prepared gypsum solution.
Interested? Check out the master classes we offer!
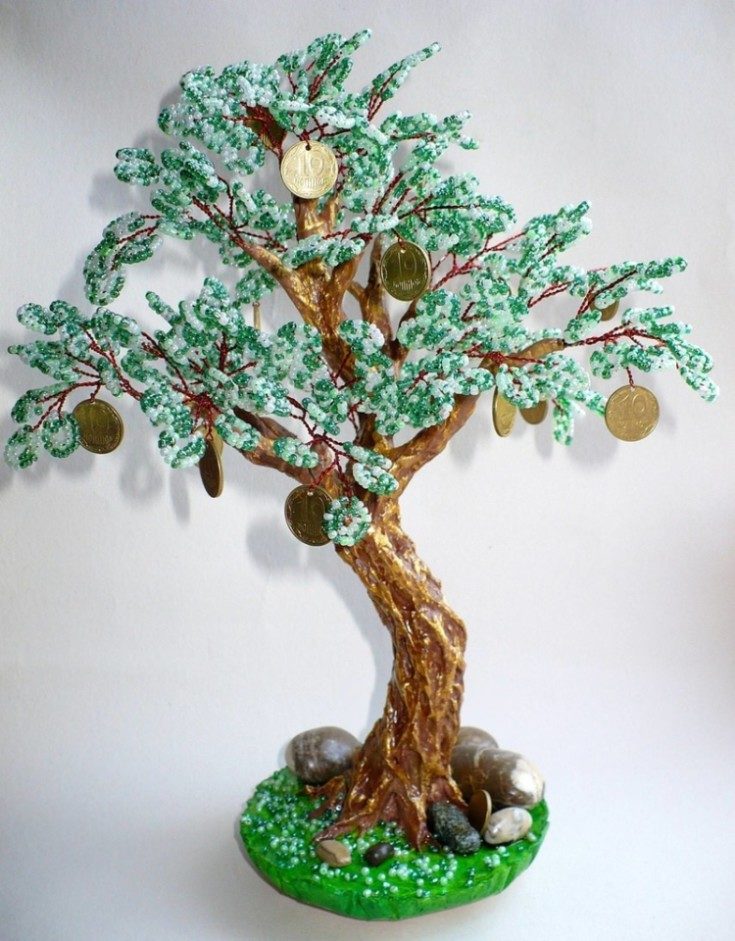
Money Tree
To create it you will need beads of different shades of green, wire, coins, paper tape or floral tape, brown gouache, a small pot, and plaster.
Important! It is better to take small denomination coins. A hole in them can be punched with a drill using a drill of the smallest diameter.
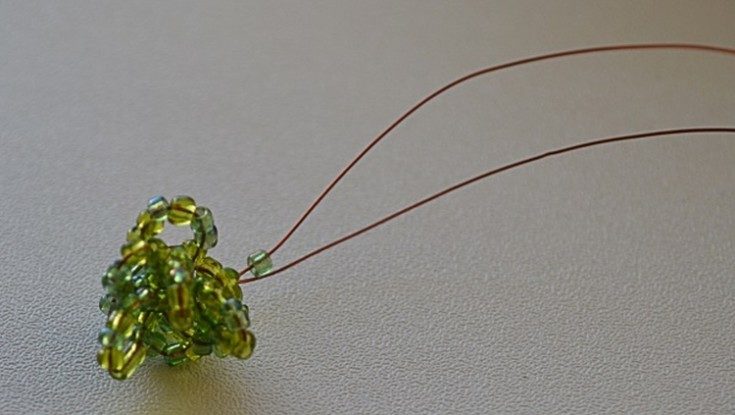
You should start working with the formation of branches. To do this, put 12 beads on the wire, roll a loop from the resulting straight piece, and fix it with twists. Without making an indent, they form another ring and then 7 more. After that, they twist everything together. Up to 60 such parts are prepared.
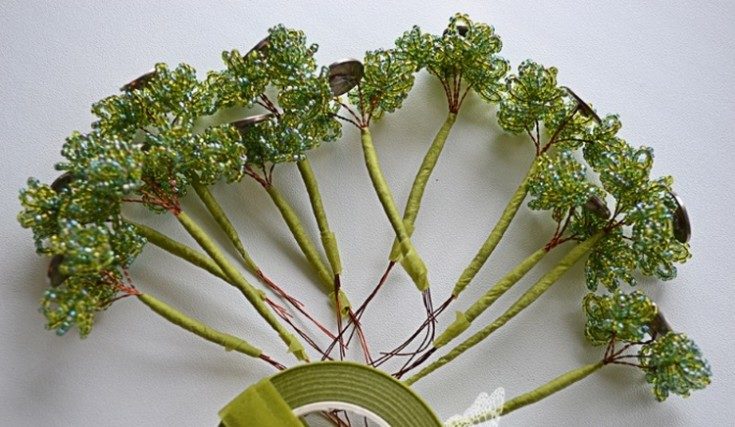
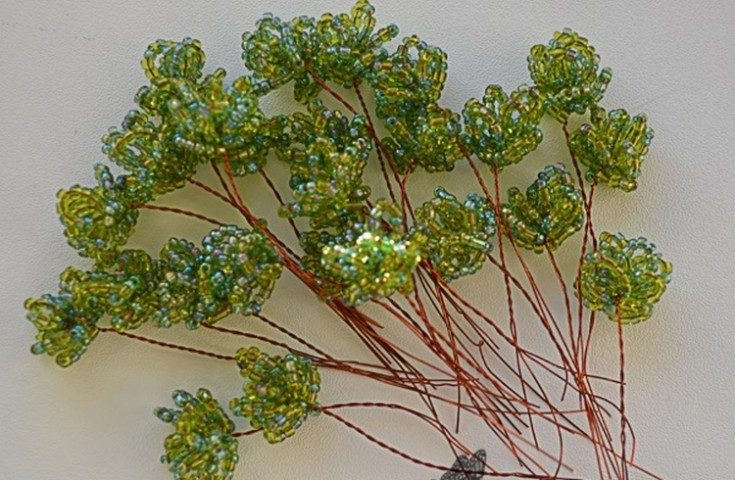
Pre-prepared coins are screwed to the third part of the total quantity. The crown is formed from 4 simple and one with a coin twigs. From the resulting bouquets, you can actually twist 5 main branches, from which small ones will branch. The resulting trunk must be wrapped with tape, imitating the unevenness of the lumpy bark.The finished product can be placed in a pot and filled with plaster.
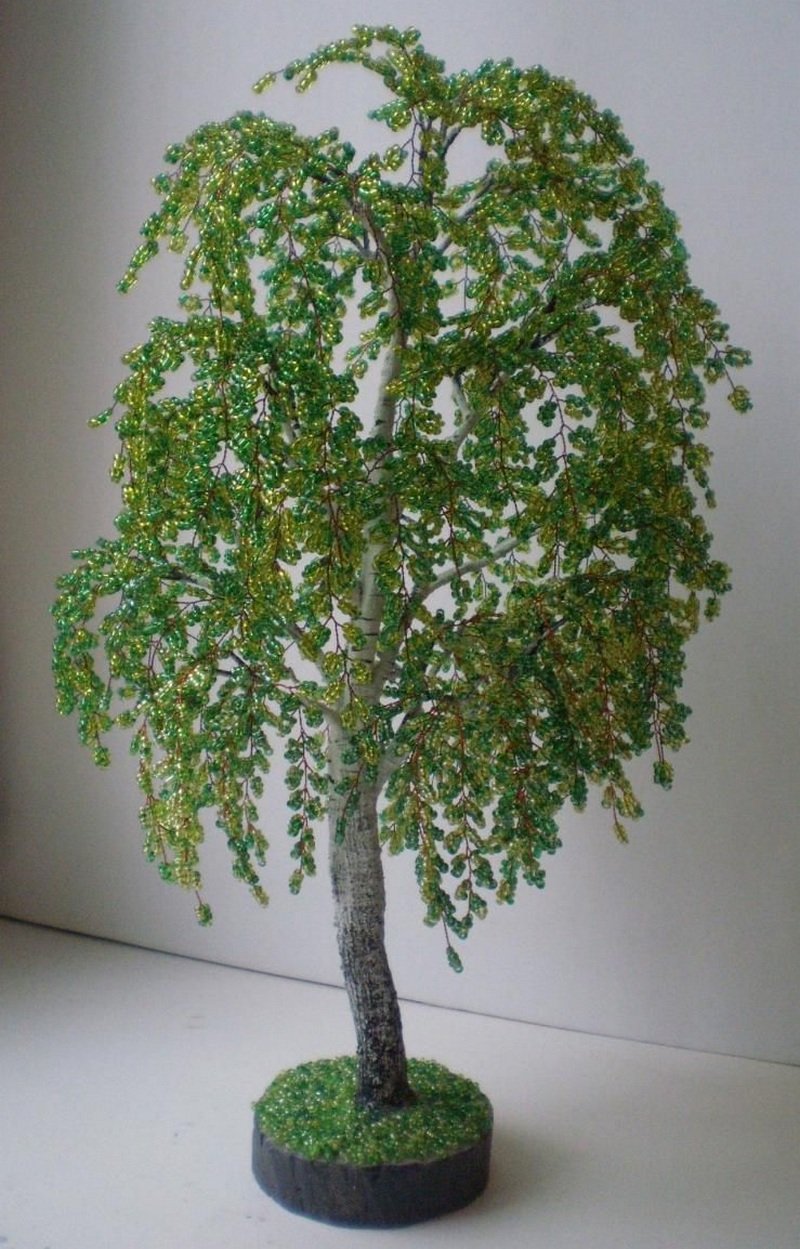
Birch
To create a symbol of Russian nature, you will need the same green beads, wire, masking tape, acrylic paints, PVA and plaster.
To make a tree, you first need to start with small branches. Ideally, there should be at least 150 of them. To do this, perform the following steps:
- string beads onto a flexible base;
- after 1 cm, make several loops in any quantity;
- fold the wire in half and twist it.
Short branches are suitable for the crown, and longer ones for the crown below. After the parts have been twisted in sufficient quantities, you need to make lush branches out of them, connecting several elements together with threads.
To make longer elements, you will have to take a wire of larger diameter and wrap the parts with it one to the other. The thickness of the barrel is increased by applying several layers of wire to it and wrapping it with tape. After the birch tree has fully formed from the branches, it is “seated” in a pot and filled with plaster for strength.
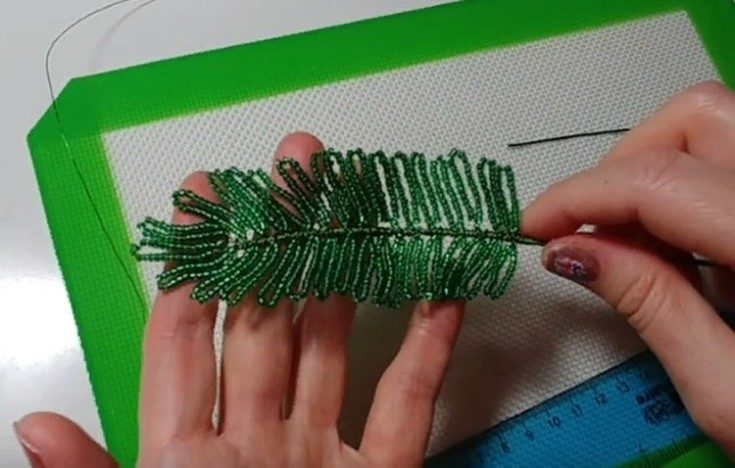
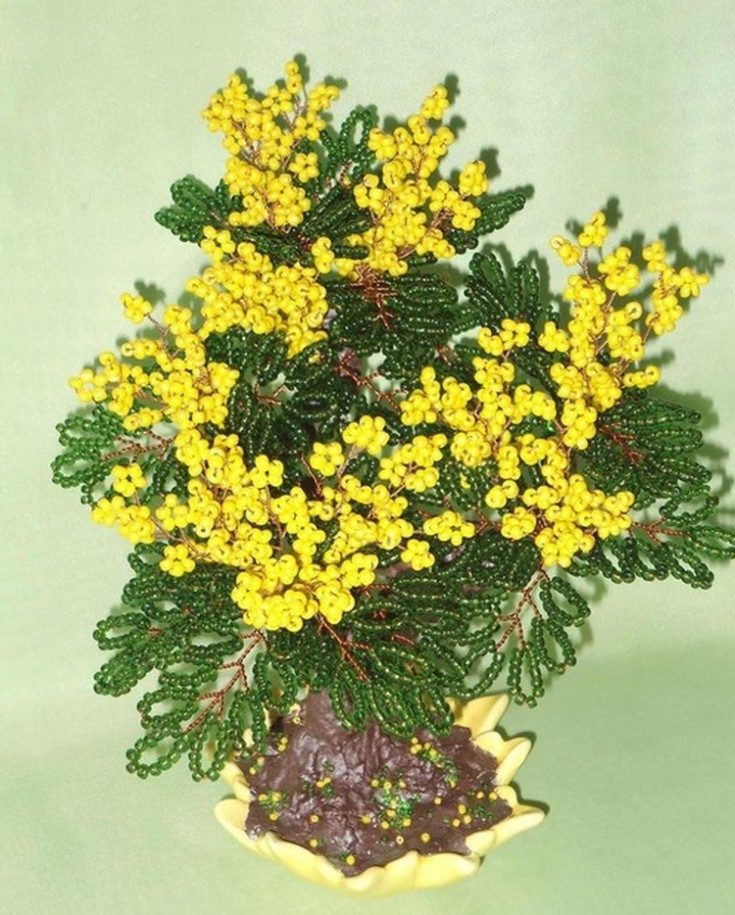
Mimosa
The spring tree itself can also be woven from beads. Only, unlike the real thing, it will not fade and will be able to delight with the beauty of its branches for much longer. To work, you will need yellow and green beads, wire of three different diameters, acrylic paint, and masking tape.
The operating algorithm is as follows:
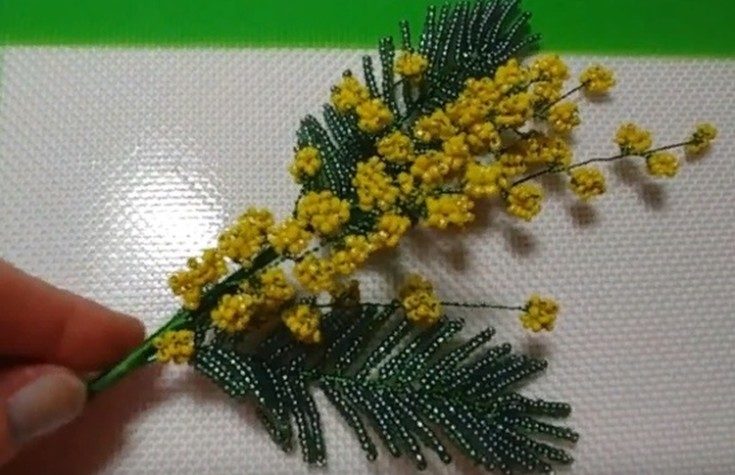
- On a base 67 cm long, place 13 yellow beads so that at least 5 cm remains from the edge. Make a loop, twist it in the shape of a figure eight, bend it, press tightly to form an inflorescence with a cross at the top.
- 13 beads are strung on the remaining tail, a second loop is made and twisted in the same way. You need to make 12 inflorescences.
- Holding the last inflorescence in your hands, place the wire lengthwise and twist it.
- Take a base with a large diameter - about 30 cm long. 16 green beads are strung on it and a loop is made. Another 86 cm of wire of the thickest diameter is attached under it, on which 18 beads are strung, secured on the leading guide, making a loop.
- Opposite they twist another one. You need to weave 9 rows of similar loops. The tenth must contain 16 beads, the 11th - 14 pcs.
- To assemble the branches, you need to attach 2 inflorescences to a thick wire, wrap it with tape, and add another one. The branch should fit 4 pieces.
- A large branch is connected from 3 small ones by wrapping it with masking tape. When the composition is ready, the trunk can be slightly bent to give it a more believable appearance.
- In the end, all that remains is to fix the mimosa in a pot prepared for it with gypsum mortar.

Any of the above crafts can be done in one evening. They can be an excellent holiday gift or souvenir. If you liked the ideas, take on a few more options for beaded trees.
 0
0