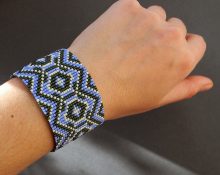
On the eve of Valentine's Day, the city begins to gradually fill with figurines and images of burgundy hearts. They are recognized as the personification of love and romantic feelings. If you wish, you can find or order almost anything you want with similar symbols. What if you make a heart with your own hands? Yes, not simple, but from a beautiful shiny beads.
Beaded heart: creation instructions for beginners
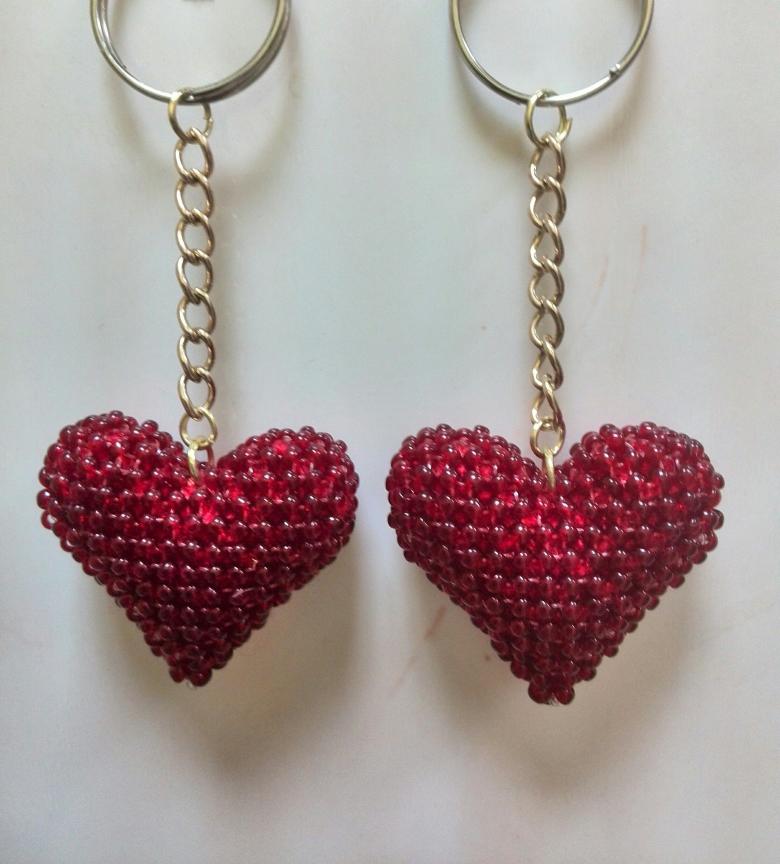
For those who are just starting to master this type of needlework, you can try your hand at creating a cute keychain. You won’t need much time or materials for the work. But the result will be an interesting trinket with which you can express your sympathy to a loved one.
Prepare the following supplies in advance:
- red or pink monofilament;
- same color beads of the same size;
- needle;
- scissors;
- pendant for keychain.
Important! Weaving will be done using brick technique. It involves attaching elements to the leading thread, and not to the previous row.
Process step by step:
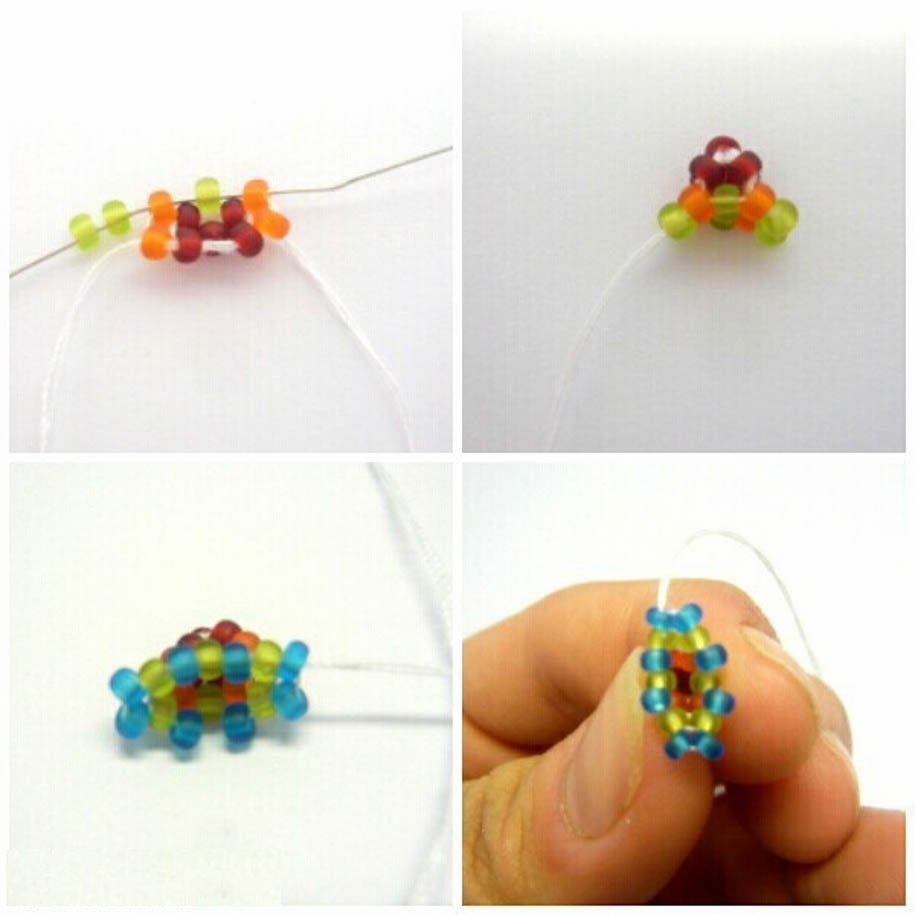
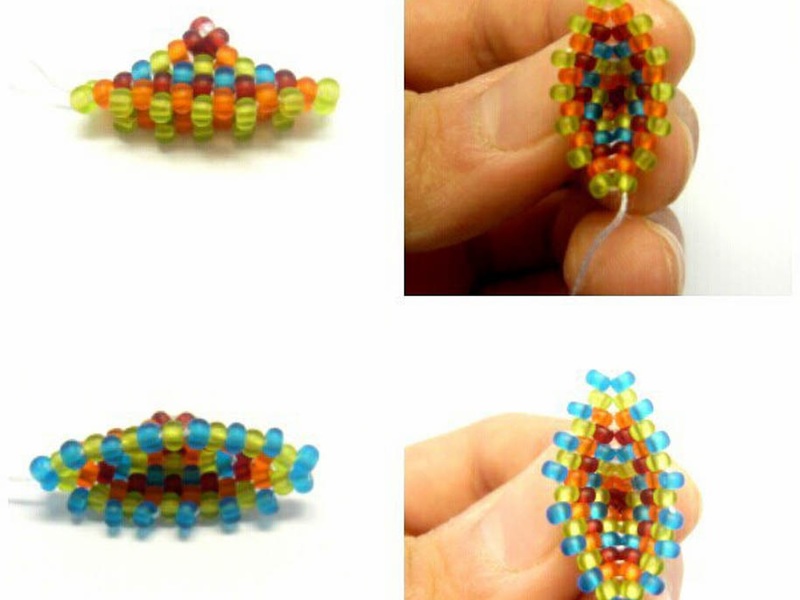
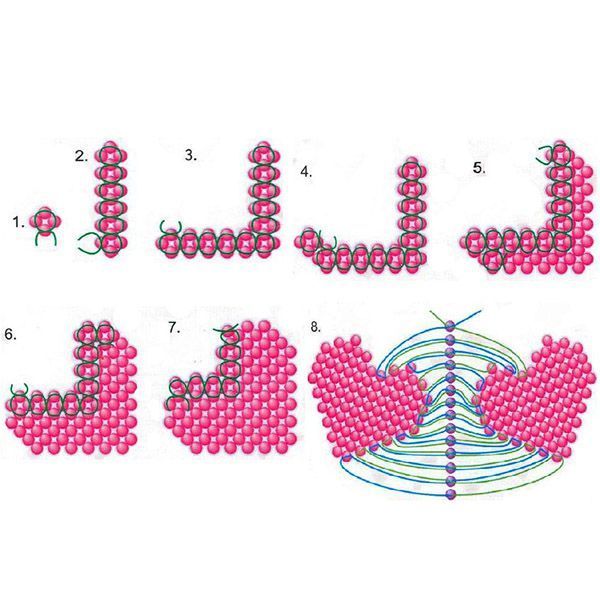
- Three beads are strung on a piece of thread at least 50 cm long. One of the free ends is once again pulled through the first two elements and tightened. The result is a small triangle.
- Take two beads and begin weaving using the brick technique. The bead is strung on a needle and passed under the thread between the two elements of the triangle. Thread a thread through a free bead and remove the resulting blank. With the next one, do the same actions, but so that two “bricks” are formed in one place. The first will contain 2 beads, the second - 1. Again you should get a figure resembling a triangle, consisting of three rows.
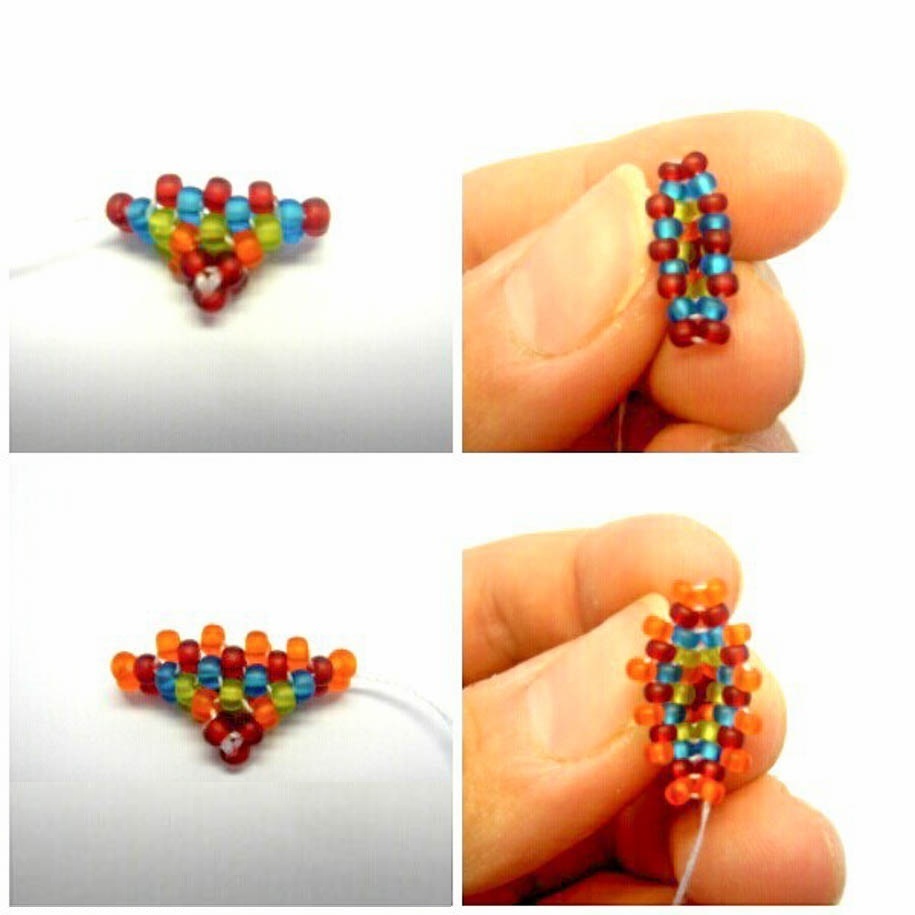
- Without departing from the technique used, a brick consisting of two beads is attached to the first loop. For the second - 2, one at a time, so that there are 4 beads in a row.
- The next two rows are increased by adding one element at a time.
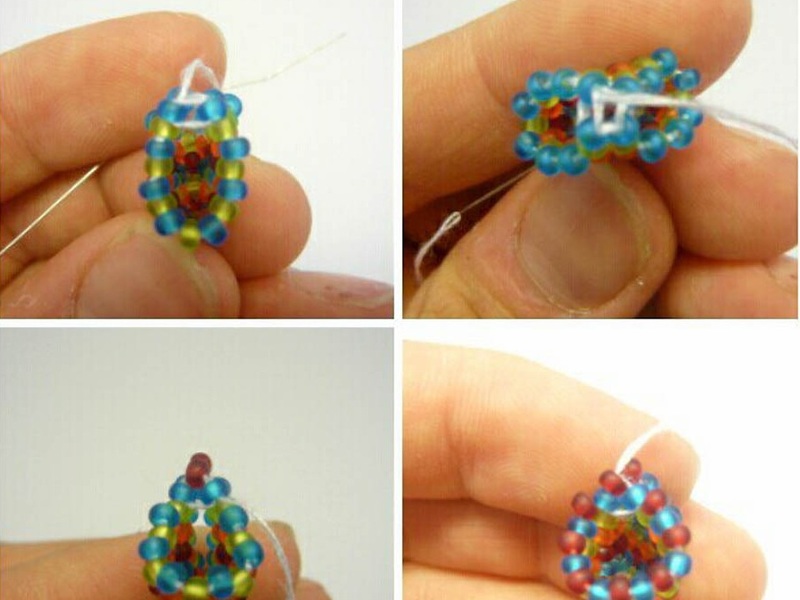
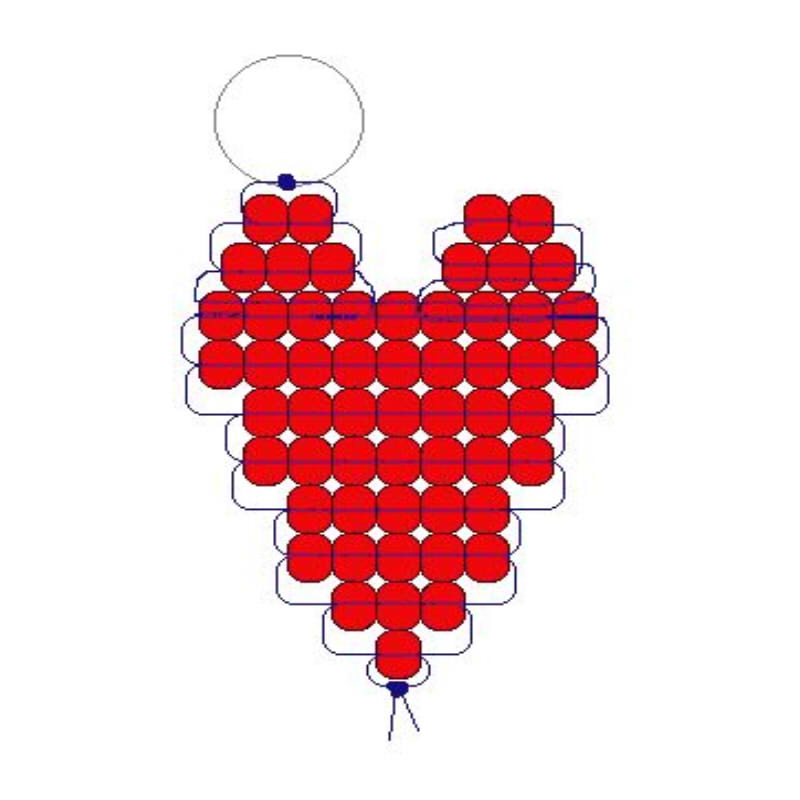
- After the workpiece, consisting of 6 rows, is ready, you can begin to create the top. To do this, string 5 beads onto a needle. Skipping one loop, the needle is inserted into the third element of the row and the monofilament is tightened so that the result is a beautiful bend. Then it is brought up through the next bead of the row.
- 5 more beads are strung onto the base and secured at the end of the row, tightening the thread securely.
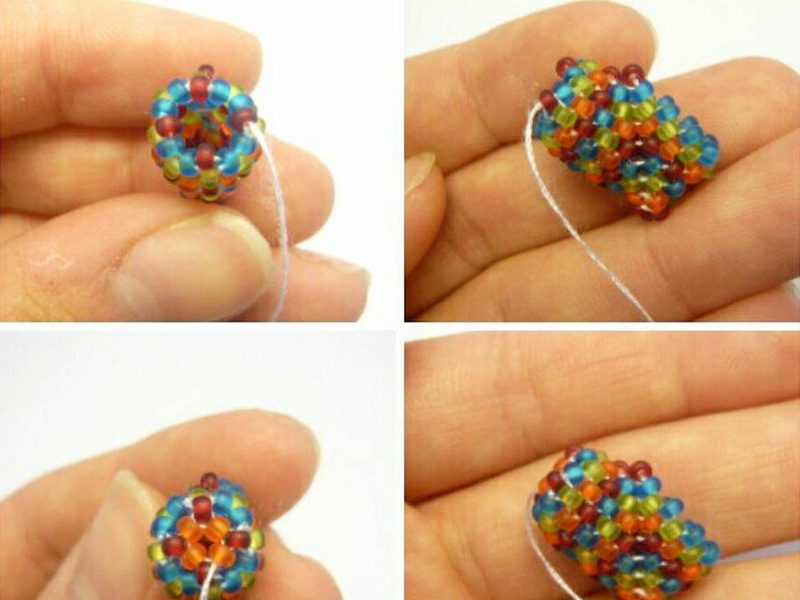
- To fill the holes formed in the product, a needle is inserted into the bead located under the center of the loop, moving from bottom to top. After this, the thread is pulled out and threaded onto the next element. Then they pull it back in the opposite direction. This way you can carefully and beautifully fill the loop and secure the beads.
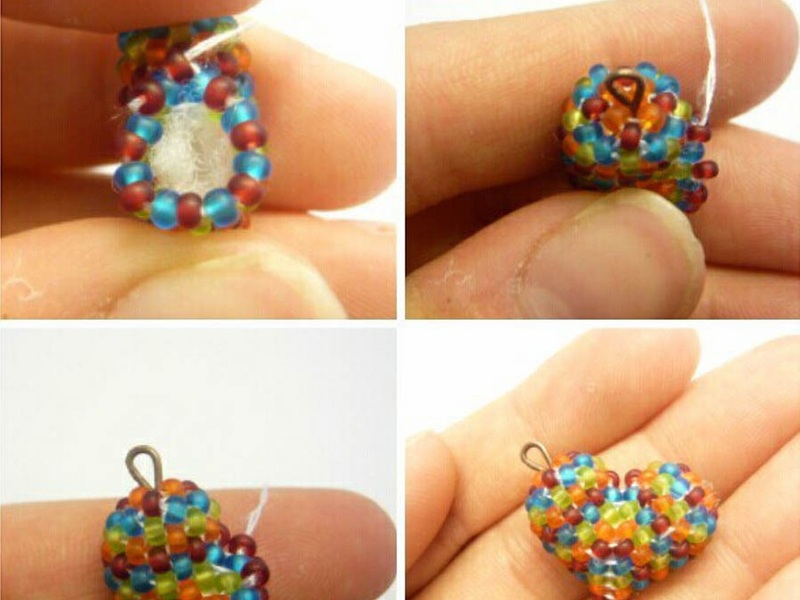
- The threads located at the edges of the heart are tightened, thereby holding it together and adding additional strength.
- The work process is completed by attaching the lace or fastener.
To make the craft larger, simply increase the number of beads in the rows.
Important! If there is a need to move the thread to the place of weaving, then it must be pulled up through the elements separating the second loop.
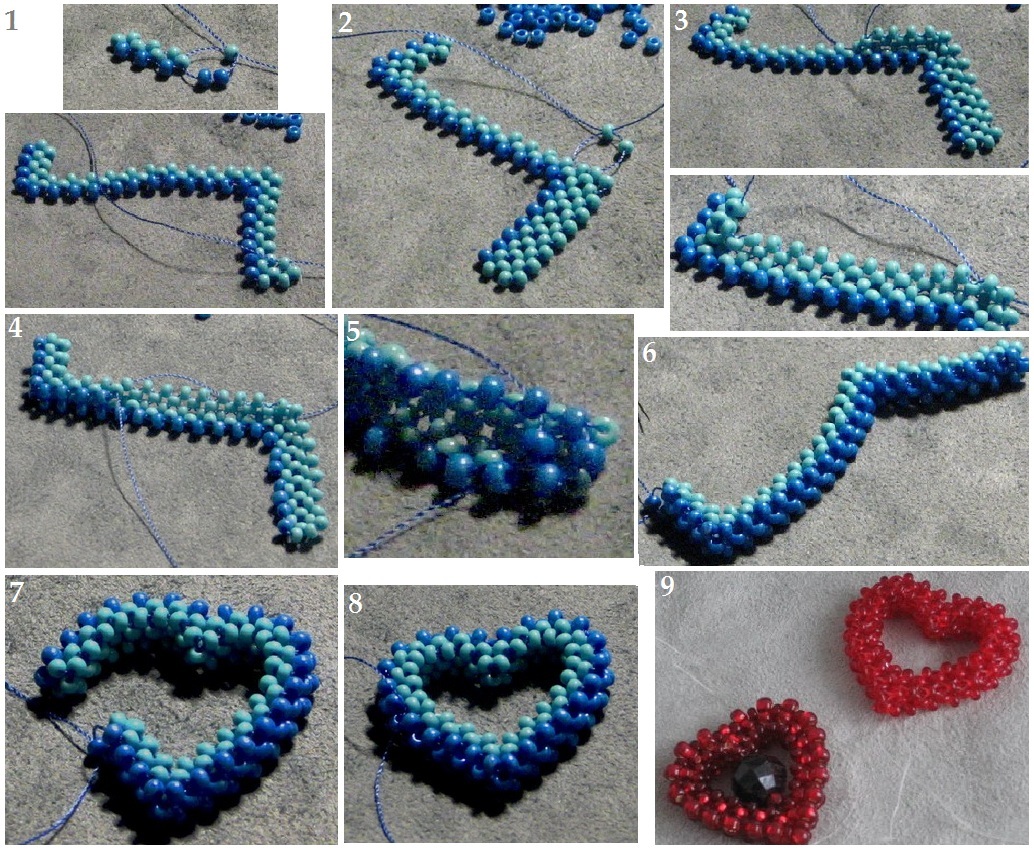
The weaving process can be seen clearly in the photo:

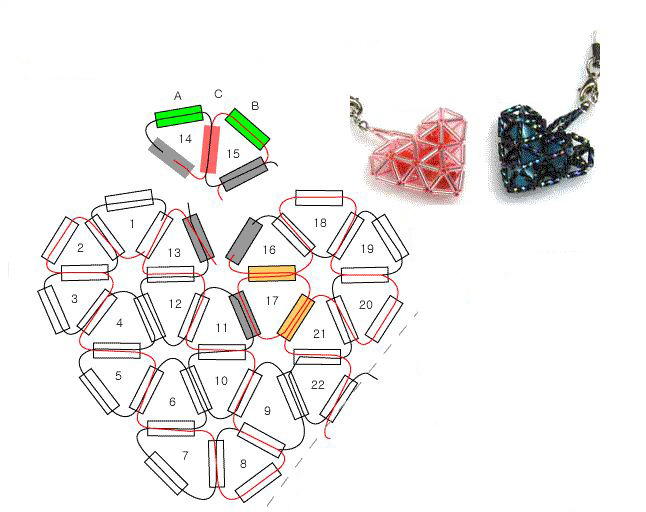
For those who enjoy working on beaded hearts, we suggest you pay attention to the diagrams below. Guided by them, can be created a few more options for interesting and very romantic souvenirs.
@biserok.org
 0
0