creativecommons.org
Making a crochet lampshade for a table lamp is not difficult even for beginner knitters. A lamp with such decor will look original and fashionable. It is important to use energy-saving light bulbs so that the product does not ignite or burn out. To make it you will need the frame of the dome itself, scissors, a number three hook and yarn. Two skeins of thread will be enough. You can choose different colors, or make a plain lampshade. Now you can update your grandmother's wonderful floor lamp, turning it into a stylish piece of furniture.
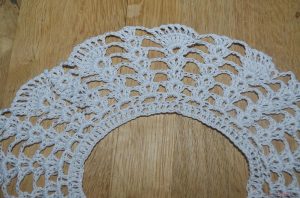
To create a model with a diameter of twenty-six centimeters we will use a specific knitting pattern. We collect loops - 52 pieces, forming a chain from them. We connect it into a ring, and continue to work in rows:
- Consists of double crochets.
- Also includes double crochets and chain stitches - five pieces.
- We make 4 double crochets, one chain stitch.
- 2 single crochets, 6 chain stitches.
- 3 double crochets, 8 chain stitches.
6–11. 3 single crochets, ten chain stitches.
12–13. 4 double crochets, five stitches.
- We make 5 pieces each - double crochet, chain stitches, single crochet.
- Last line. Consists entirely of single crochets. All loops are closed. The product is ready.
How to update a table lamp shade with your own hands
creativecommons.org
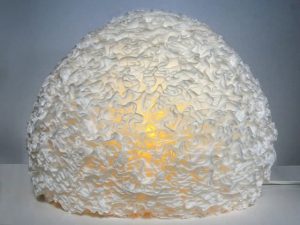
A fashionable idea for updating a table lamp is a decorative lampshade made of threads. Leftover wool floss threads or other relatively thick threads will do. With the new decor, the lamp will surely become a striking piece of furniture. It takes very little time to make a unique product. Progress:
- The frame for the future lampshade is a standard inflatable ball. Inflate it to the desired size of the product.
- Prepare some glue, thread, scissors.
- We begin to wind the threads onto the ball, randomly crossing them over the surface of the ball. We leave free space between them, creating a kind of grid.
- After completing the winding, lubricate the ball and threads with transparent glue.
- Do not wait until the glue is completely dry. Cut out a small circle for the light bulb, deflate it and take out the ball. We get an openwork design that meets the latest fashion trends.
How to update a lampshade for a floor lamp with your own hands
An updated chandelier or lampshade for a floor lamp is made using double-sided adhesive tape, scissors, a needle, thread and a piece of fabric. Progress:
- We disassemble the old lamp, remove the lampshade, leaving only the wire base of the lamp.
- We cut the material into equal strips. We use a pencil to place marks at the same distance from each other. The optimal gap is three centimeters.Marks are made in accordance with the direction of the thread. Stripes can be of different lengths. The larger it is, the easier it will be to join the fabric.
- We iron each strip and clean the edges of excess threads. One strip is attached to the top of the warp with a needle and thread. You can use regular glue.
- We wrap strips around the base of the lampshade. Sometimes a sheet of paper or other fabric is placed as a lining. We pass the strip through the lower and upper ring. We overlap the layers on top of each other.
- If the material runs out, sew another tape to it from the wrong side and continue winding. It is necessary to continue wrapping the base until it is completely covered with the material.
- We decorate the lower and upper edges of the product with contrasting fabric. You need to cut a strip fourteen centimeters wide. Fold one edge two centimeters, iron it, and apply double-sided adhesive tape to the wrong side.
- Slowly remove the protection from the sticky layer and fix it on the lampshade. We proceed similarly when working with the second edge. Excess material must be cut off.


 0
0