svoimi.rukami.klubokidei.com
The patchwork method of sewing products is quite simple, but it has its own characteristics. Before you start, you need to prepare a template. It will help make the figures even and symmetrical. Different materials are used for layouts. On a production scale, these are plexiglass, metal, plastic. Needlewomen often make do with thick cardboard. You can purchase the template or make it yourself. To create a homemade sample, you should arm yourself with a stationery knife, a protractor, a metal ruler and a pencil. For some figures you may need the help of a compass or square.
The template can be any size. To sew the flaps by machine, make a cutout in the layout. This trick will allow you to immediately determine on the canvas the line of connection of the elements and the seam allowance. This allows you to create the most accurate products that comply with all the rules of symmetry.
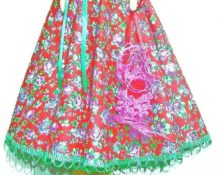
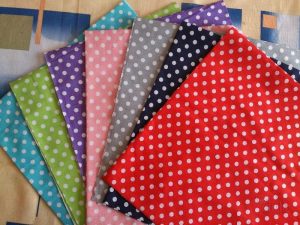
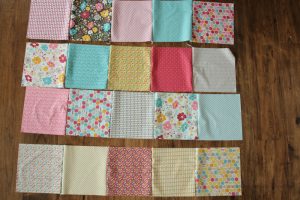
Patchwork is also called patchwork.From pieces of material you can create a luxurious blanket or small pillowcase. The big advantage of this technique is the ability to use leftover fabrics that often take up space in the closet.
How to sew patches together by hand
After the required number of parts have been cut out and prepared, they must be joined into one whole. The simplest shape of parts is a rhombus, triangle or square. You should work according to this scheme:
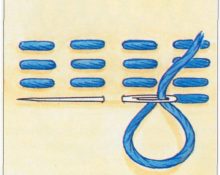
- We take two prepared fragments. Place one piece on top of the other, facing each other. We make a seam through the edges. When handmade, a paper backing is often used if the fabrics are elastic or have a different structure. In this case, it is important not to flash it while working.
- We do not secure the thread with knots. It moves along the top of the fragments from the right side to the left edge. To secure the thread at the end of the seam, a couple of stitches are made in the opposite direction.
- The product will look neat if the stitching goes to the junction with the flap, and not vice versa. We sequentially sew together all parts of the future product, then proceed to processing.
- First of all, remove the paper backing and iron the stitched flaps from the wrong side. We turn the fabric over to the front side and iron it again. First cover it with a damp cotton cloth.
- If the item is made of delicate fabrics, for example, velor or velvet, it is enough to spray the front side with steam from an iron.
Despite the fact that dense threads are used when sewing patchwork products, the elements may move due to time or washing. This can only be avoided if all the pieces are cut strictly along the shared threads.Since this is quite difficult and sometimes impossible, it is better to make a lining layer. Calico or cotton of the same tone will do. Synthetic linings are used for blankets and blankets. They should be quilted so that the material does not bunch up.
How to sew patches on a sewing machine
svoimi.rukami.klubokidei.com
Working with the patchwork technique on a machine is much easier than by hand. There is no need to make a paper backing here. For the pattern, a special template is used, in the center of which there is a cutout. At the same time, an allowance and a cutting line are formed. Principles of patchwork on a sewing machine:
- We prepare the fragments and join them into strips using a machine seam. The length of the strips is calculated in advance. A regular stitch is used. We fasten each thread at the end.
- Iron the finished strips from the inside.
- We sew all the strips together.
- We connect it with the lining and the product is ready.
The machine technique is suitable for creating large products - coats, bedspreads, chair covers. But making a wallet, an oven mitt or other small items will be quite difficult. Some products are made in a combined way. Large parts are sewn by machine, and small parts are sewn by hand.
 0
0