olx.ua
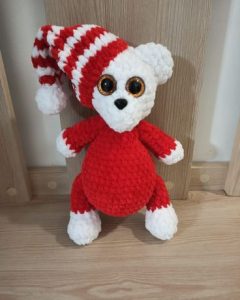
Most modern needlewomen prefer to use a variety of patterns taken from the Internet. It is quite simple and does not require additional financial expenses. Another advantage is the huge range of such layouts. On the sites you will find any doll or soft toy that you can make with your own hands. The only problem is the size. Not every novice craftswoman knows how to make a pattern of a smaller or larger format. For example, if you found an excellent pattern for a bear, but you want to sew a large toy for your baby, and the parameters given are minimal. Next, we will look at ways to enlarge the picture, as well as options for reducing it.
How to enlarge a toy pattern to the desired size
The most common and simplest option for enlarging a toy pattern is the simple and familiar Microsoft Word program. It has a number of advantages. First of all, you won’t have to pay for use or download the product from dubious resources.It is part of the standard Microsoft Office suite that is found on every laptop or computer. In addition, the functionality and interface of the program is very simple and understandable. How to properly resize a picture in Microsoft Word:
- Open the program and find the insert menu in the upper left corner;
- Select Drawing from the list and open the previously saved toy layout;
- Click on the picture and place it on the monitor;
- To increase uniformly, press the position button;
- The image will move to the center of the screen;
- Now it will stretch the toy sample at different angles;
- When the parameters are suitable, we will send the pattern for printing. As a result, we will get a pattern of the desired format.
There are some copiers and printers that have a zoom function. Before printing begins, a special window opens where the scale of the drawing is entered.
How to enlarge a drawing on paper and in Photoshop
The easiest way to increase the size of a layout on paper is to use graph paper. For example, you need a pattern that is twice the size of an existing image. Then we draw cells with edges two centimeters using the templates. If you need to increase it by five, draw squares five centimeters by five centimeters. In this way you can turn a small picture into a huge image. After the cell grid is created, all enlarged lines and details are transferred to it.
Using Photoshop, making a picture larger is also not difficult. To do this you need to do the following:
olx.ua
- Open the layout through the program.
- Enter the image menu. Select a size from the list.
- A window with drawing parameters will open.
- Set the width and height fields to the required values. Percentage expressions are used here. For example, to increase the magnification by three times, you need to specify 300%.
- After exiting the menu, a pattern will appear on the monitor, three times larger than the original sample.
- Go to the print menu. To start printing from the very edge, you need to set the value 0 in the position window. Move the picture to the very corner.
- You also need to set the A4 format in the parameters window.
- The part of the layout that is shown on the screen will be displayed on paper. Press the print button.
- Move the sheet piece by piece on the monitor and print. Then glue the enlarged version with tape on the back side and cut out the parts.
Sometimes a product sample needs, on the contrary, to be reduced in size. For this purpose it is convenient to use the Resize Images program. She will cope with the task quickly enough. The product has two operating modes:
- Proportional reduction of the image;
- Reduction of dimensions based on user-specified parameters.
The program processes not only individual drawings. Batch mode is available. You can set compression levels. There is a Russian version.


 0
0
