bigl.ua
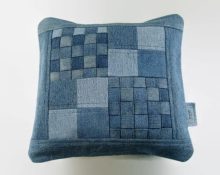
Decorative cord is an interesting element of creating a special style for any product. They decorate not only pillows, blankets and bedspreads. The cord can be used to decorate a headdress or suit. The product will look expensive and stylish. A pillow decorated with piping takes on a completely different, finished look. Before sewing the piping into the pillow, you should choose the optimal color of the decoration. It should be in harmony not only with the main material, but also with the interior of the room.
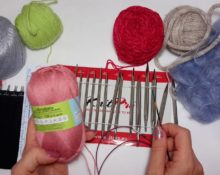
There are several methods for sewing piping into a pillowcase. Much depends on the characteristics of the fabric, the size of the cord and the pillow. There is probably a pattern on the Internet that shows how to sew on a decorative cord so that the seam remains invisible and neat.
How to sew a cord to a pillow - brief recommendations on how to decorate a gullklok pillow cover
Gullklok's cover is a durable, solid-colored pillowcase with a unique, soft texture.In most cases, such products are not decorated, so you have to think about how to sew the piping to the pillow yourself. The two most effective ways:
- First option. To work, you will need a sewing machine and braid that completely matches the color of the base material. It is sewn to the product using tight stitches. Then the edging is sewn on and the edges are carefully processed. At the final stage, a seam is made close to the decorative edging, which hides the braid. The technique is quite painstaking, but effective;
- Second way. A glue gun with silicone glue is used. It is heated to the desired level and applied in thin, even layers to the fabric. The cord is pressed as hard as possible against the canvas so that it sticks. A few minutes are enough for the glue to set. The remaining glue on the sides of the edging must be removed immediately before it has time to harden.
How to sew a decorative cord to a pillow - master class
sdelay.sam.ua
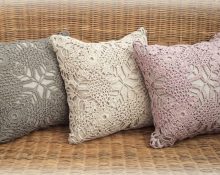
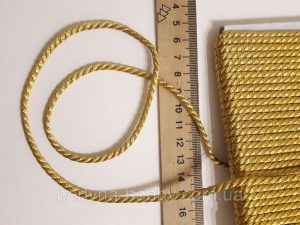
Fashionable designer lambrequins, pillows and bedspreads are often decorated with decorative cords with gold or silver inserts. It gives the products a noble, sophisticated look. You can decorate any pillow with this cord yourself, following the instructions in the master class. Let's look at the process of sewing a product, how to choose the size of a decorative piping and how to sew a cord into a pillow:
- We cut out the fabric. We make a square pattern taking into account allowances of two centimeters. For a pillow measuring 40x40, cut out a pillowcase 44x44 centimeters. This is the front part of the product. Slightly rounding the corners will help make it easier to work with edging.
- The back side is cut out of two elements. They will be connected by a snake. On each side we make an allowance for the snake - one centimeter and three centimeters.You can initially take a larger size for the back pattern, and then remove the excess fabric.
- After the snake is sewn in, the edges of the square should not be less than 44 centimeters.
- Lay out the back fragment on a flat surface, cover it with the front part and adjust the dimensions after installing the snake.
- We remove the back fragment. Flatten the front part of the pillowcase on the surface, placing it on the wrong side. Let's add a decorative cord. In this case, you should retreat at least five millimeters from the edges for subsequent overcasting of the seam. Sew the edging to the lace as close as possible using a single-sided foot on the machine.
- Tape will help make the sewing process easier at the corners. We join the ends of the lace, and then sew the seams.
- Now you can turn the pillowcase inside out. A small part of the braid is visible on the front side.
- Before sewing the pillow, you need to completely hide the lace. To do this, we sew the back of the pillow, turning the allowances back. The material must be loosened so that it bends in close proximity to the lace. The line also goes end to end.
- We proceed in the same way with the edges on the front fragment. Now I was able to completely sew up the braid. Sew a pillowcase. We insert the finished pillow or stuff the product with synthetic padding.
 0
0