There are many types of needlework. With crafts made with your own hands, you can beautifully decorate your home and prepare gifts for loved ones.
Quilling can be divided into several subtypes:
- A technique that helps create three-dimensional figures. For this, corrugated paper or cardboard is used. Using this material it is easy to make boxes, vases and cute toys.
- Hasting technique. With its help, fragile, sophisticated objects are created. But it is advisable to start making them by watching video lessons to gain special skills.
This type of work requires a lot of time and patience. Only then will it be possible to talk about the result.
Many people compare quilling to origami, but the two art forms are different from each other. The first option is created from hand-cut and hand-rolled leaves of colorful paper. The tubes are shaped and then glued onto paper, forming a specific picture.
It is easier to create ornamental crafts using colored cardboard.This version of needlework helps to open up a lot of scope for creativity for a person. You don’t have to think about birthday gifts; paintings created using quilling will amaze anyone.
You can also do needlework with the whole family, including children in the creative process. This helps develop motor skills and develop an interest in art.
Delight your loved ones with unique gifts.
Adviсe
So, have you decided to start quilling? Then you should be patient and be careful, don’t rush.
First you should buy the necessary tools and only then start working.
First of all, you will need cardboard paper. Handicraft stores sell entire creativity kits that already contain ready-made strips.
But you can make them yourself using plain paper. Cut it into small 5 cm strips.
Next you will need an awl, paper is screwed onto it. To work you will need tweezers and glue. And of course, think in advance what you want to create, then you can get to work.
Beginners are advised to start by making small arrangements, such as flowers. A postcard created using quilling looks very attractive.
Making butterflies at home
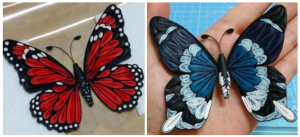
There is everything in stores, there are postcards for sale for every taste, but something made with your own hands will always be valued the most.
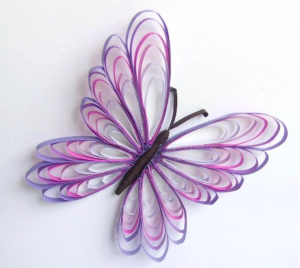
We invite you to try creating a simple card with butterflies.
Prepare a diagram and use it to arrange the necessary elements. Drawings can be made directly on prepared paper with a simple pencil.
Learn how to properly twist strips of paper onto an awl.First, try twisting them on a rod, then you can twist them with your own hands without using tools, the main thing is to get the hang of it.
The end of the strip is glued to the sheet, and the spiral helps to form the entire workpiece.
To make butterflies you need 7 such rolls.
The wings will be made in the shape of small drops. It is better to start creating the decoration itself from the head and torso. Glue the parts together. After the parts have dried, start gluing the wings, prepare the antennae and glue them to the head.
The butterfly can be glued to the front side and formed into a postcard.
conclusions
Quilling is a fun activity not only for children, but also for adults. You can even put up beautiful crafts for sale by creating your own online store. Funny crafts and toys will sell out quickly.


 0
0
