Textile marker is a real find for modern needlewomen. It allows you to independently decorate your clothes with clear and graphic images. Clothing markers are used to apply designs to any materials - natural or synthetic. With their help it is convenient to mark the fabric and outline the contours of the pattern. The following fabric markers are available:
- Felt pen for painting. This is a permanent clothing marker based on pigmented, non-toxic ink.
- Thermal transfer. Used to transfer an image onto fabric.
- Glue. The base is quick-drying glue. It is water-based and non-toxic. Used for gluing braid, snake, lace. The advantage is that no needles, threads or pins are needed.
- Vanishing. After application it disappears within 24-72 hours. Used for marking work.
- Washable. A washable fabric marker is also used for preparatory work. Remove with a damp cloth or washcloth.
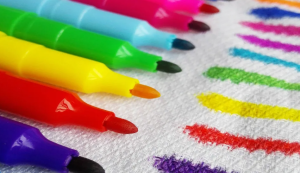
Fabric markers come in a variety of refill thicknesses.A thin tool is used to apply an even outline. A wide marker is often used when drawing with a child. There are markers with a brush on the tip.
Permanent marker - what it is for, how to use it
Permanent markers are used in various creative industries. With their help, you can apply various inscriptions, markings, and drawings. Most manufacturers sell them complete with a special tank in which the dye is stored. The diameter of the case is no more than two centimeters. Indelible clothing markers consist of three parts:
- Filler – different colors of paints.
- Rods - porous raw materials are used for production.
- The base is in most cases plastic.
Permanent markers are used not only for fabrics. With their help, images are applied to paper, ceramics, wood, metal and other materials. It is quite difficult to wash off from any base, so the tool is often used for industrial purposes.
To remove traces of permanent hair, you need a special alcohol-based solution and a remover.
Permanent markers for drawing on clothes - how to make a drawing
Permanent fabric markers that are indelible allow you to create a wide variety of images on clothing. Let's try to create a design on a T-shirt. For this you will need:
- Image template. It will be used when applying the permanent to the fabric. You can find a suitable drawing on the Internet or draw it yourself.
- Cotton T-shirt. This natural material allows you to make the brightest and clearest pictures possible. The permanent lasts longer on cotton than on other fabrics.
- Adhesive tape for securing the pattern sample to the canvas.
- Cardboard. It must be placed under the front of the T-shirt.Otherwise, the image may transfer to the back and the item will be damaged.
- Sharp scissors. Can be replaced with a stationery knife.
- Colored or white permanent fabric marker. Permanent markers dry quickly and are not susceptible to exposure to water. They can be used for a long period. When working with a tool indoors, a persistent, pungent odor appears. Ventilation is required after use.
You can buy gold, silver, colored or white fabric markers in shopping centers, construction or office supply stores. The price of the tool is quite affordable.
How to draw on clothes so that they don’t wash off - permanent marker for fabric
To start working with the permanent, you need to make a pattern of the design. On paper we draw the desired image with all the small details. Using sharp manicure scissors, carefully cut out the details. It is better to cut some fragments with a stationery knife. When the decorative element is ready, you need to check its contours. They should be clear and even. Next we proceed according to the following scheme:
- We insert a sheet of cardboard inside the T-shirt, separating the back and front sides. First you need to accurately determine the location of the picture, attach a template, and check its size.
- When the cardboard is placed strictly under the location of the design, you need to put the stencil on the T-shirt and attach it with adhesive tape.
- The material must be smooth, without folds. If the material is wrinkled, the image will be deformed. The adhesive tape must be glued securely, otherwise the stencil may move to the side.
- Take a permanent fabric marker and start painting over the empty areas on the stencil. If the working hand is right, it is better to start painting on the left. When working with your left hand, start working with your right.Otherwise, there is a high probability of catching the image.
- Carefully paint all free areas. Remove the adhesive tape. We apply paint to the resulting drawing again.
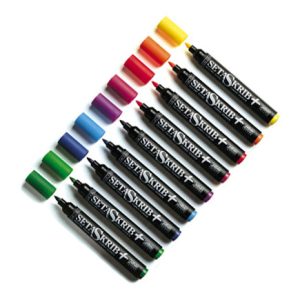
Permanent fabric markers are a great way to create your own unique clothing design. You can decorate other fabric products in a similar way. There is a set of multi-colored markers on sale, and they are also sold individually.
Self-disappearing fabric marker - what is it and when is it used?
A disappearing fabric marker is an indispensable item for seamstresses and needlewomen. It allows you to make markings on the material that disappear on their own after a certain period of time. The marker packaging contains information about how many hours it will take for the lines to completely disappear.
The markings are applied to the fabric, remain bright for several hours, then gradually fade. It takes 24 to 72 hours for complete disappearance. The period is influenced by pressure and the manufacturer. You can speed up the process with a wet cloth.
Before starting work, you need to check the felt-tip pen. To do this, take a small piece of the material you plan to work with, draw a few lines and wait for them to disappear. It is not recommended to use felt-tip pens on suede, leather fabrics and fine linen.
The marker is used in the field of embroidery and sewing. With its help, the outline on which the embroidery will be marked is marked. Preliminary markings are made on cotton materials, the places where the fittings will be located are marked. Most markers are suitable for working exclusively with light-colored canvases.
 0
0