creativecommons.org
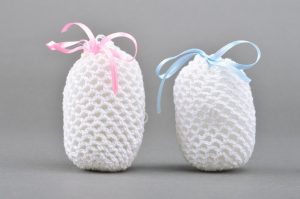
An egg bag allows you to decorate your holiday with custom masterpieces. Ordinary eggs take on a delicious look. They will amaze guests at the festive table and relatives will surely like them. Some knitting options are designed to create handbags for Easter chicks and bunnies. They can decorate the house throughout the year, reminiscent of the bright holiday.
The knitting process is simple. One product will take no more than half an hour for experienced knitters. Beginners will also be interested in learning about the original tactics for making pouches. This master class will help you quickly understand the basics and knit your first Easter egg bag.
Knitting: crochet bags for Easter eggs - types
Before you start working with any technique, you should prepare everything you need. Thin yarn looks softer and more delicate. Beautiful bags are made from acrylic, cotton, and iris.A diagram for creating a basket can be found on the Internet, there are a lot of options. It is not necessary to choose complex schemes. If you have to treat many people, then creating baskets using complex techniques will take too much time. An openwork handbag made using a simple pattern also looks great.
All finished products must be starched, otherwise they may lose their shape. This is done using potato and corn starch. The consistency should resemble thick jelly. The baskets are left in the solution for five minutes, then taken out, eggs are added and hung to dry. It is important that before placing an egg in a starched net, you need to carefully remove its contents, leaving only the whole shell. The products will dry for quite a long time, then the egg is removed from them with tweezers and placed in a tray.
For knitting use a hook from 1.5 to 2.5. The operating principle depends on the selected type of product:
- Choosing a knitting pattern. Be sure to try on the egg cover during knitting. This allows you to adjust the number of loops in time. You can evenly remove the extra loop and insert an additional one so that the product fits more freely. The penultimate row consists of air loops, which alternate with double crochets. Special spaces are left for the ribbon. After the last fitting, the ribbon is threaded through the holes and tied into a bow.
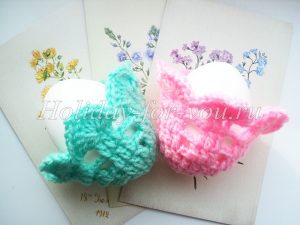
- In a product with two halves, each of them must be knitted separately. An egg is placed in one and covered with the other. The parts are sewn together in the middle with thread, a ribbon is threaded through it, and tied into a beautiful bow. You can add beads and other decorative material.
- Any basic design can be changed. Let's say half of the cover is knitted with tight knitting.Threads go up from it, from which you can hang a basket with an egg.
- A solid multi-colored bag is the basis for an Easter bunny, chicken or bird.
- Products in the amigurumi style look interesting. There are a number of single crochets around the circumference of the egg. The appearance of the product depends on the chosen yarn. A blended cotton or acrylic variety of yarn is suitable. This technique uses hooks more than other techniques. From 2 to 2.5. Models of tight knitting, sewn up with thread, are a cover for a wooden or foam egg.
Embroidery is great for decoration. On one bag you can embroider the sun, grass, sky - a whole picture. Beads, knitted elements, ribbons and more are used in decoration.
Crochet egg bags: master class
creativecommons.org
In this master class we will look at the simplest way to crochet an egg sack:
- The first row is created. It includes air loops - 5 pieces. It is closed into a circle using a connecting column passed through the first loop. A four-stitch lift is performed, and we begin knitting 1 double crochet stitch (DC). Four loops replace one dc, one chain loop. A new air loop is performed, and one dc.
- Start a new row of six stitches. Create a double crochet stitch. To the top DC in the bottom row. We make a couple of loops and a double crochet column at the top of the subsequent dc. We knit double crochet stitches at the top of the DC in the bottom row, creating a pair of loops between them.
- The third row consists entirely of dcs. One stitch should be knitted in each loop; under all chain loops we draw two double crochets.
- We start a new row with one loop.Then five stitches, single crochet, after skipping two stitches at the base. This technique is maintained until the arch ends.
- Repeat the previous row four times. This is work on the central part of the cover, forming the main mesh.
- We narrow the product. We carry out one CCH under the arch. We knit three loops. Another column under another arch. We knit one dc to the columns in the bottom row. Under the arches of three loops we knit two single crochets.


 0
0
