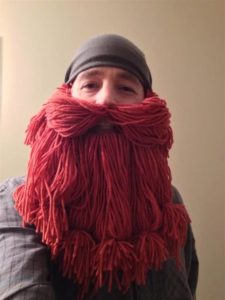
 A beard is an indispensable attribute when creating costumes for a New Year's photo shoot or carnival. If you imagine that the image of, for example, Santa Claus does not have a beard, then all the charm and charisma of the character is immediately lost. The same can be said about the costume of a gnome, a pirate. And if you make a floor-length beard, it will immediately become clear that this is the fairy-tale character Karabas Barabas. It is the beard that completes the look, so you must buy it or make it yourself for a suit.
You can make a beard from cotton wool or a wig, but the most affordable and plausible option is to work using threads. Almost all needlewomen have threads at home, plus you can always unravel an old sweater or scarf.
Materials and tools
A thread beard is made according to the principle of fringe making: the yarn is attached using a crochet hook.
The work must begin by finding a base pattern on which the threads will be attached. A plastic mesh is suitable as a base.
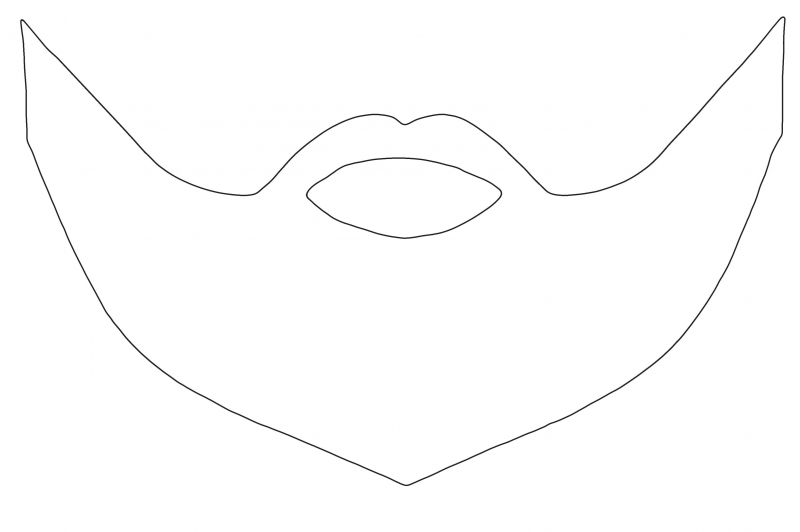
If this is difficult to find, then you can get by with an alternative option. Choose a more or less dense fabric, similar in color to the yarn. Transfer the pattern and cut out the base from a suitable material. And then lay parallel “wide zigzag” lines along the entire height, starting from the bottom. These lines will then be used to crochet the fringe. The point is that you need to start fastening the yarn from the bottom.
So, for manufacturing you will need the following.
- Crochet hook medium size.
- Plastic mesh base or quilted fabric.
- Acrylic threads for knitting about 350 m.
- Scissors.
- Linen elastic for fixing the beard - 30–40 cm.
Important! When looking for yarn, you should give preference to acrylic threads; they are much nicer and more practical than woolen threads. Yarn based on pure wool “pricks”, as a result the skin will be irritated and itchy.
If you need a brown beard, it is better to mix several similar colors. This will make it more natural, and visually it will appear more voluminous.
Step-by-step instructions for making a beard
The working tool for creating the accessory will be a crochet hook. It makes fringing very easy.
The elastic band is attached at the very end. First sew on one side, then check if the tension is weak. If necessary, remove excess and sew on the second edge of the elastic.
- First of all you need prepare pieces of yarn. To do this, you will need a piece of cardboard or a flat, solid, rectangular object. This will be the template for measuring the yarn. The length of the cardboard should match the length of the beard. You need to wrap a thick layer of thread around the template and then cut it on one side. The result is strands for attaching to the base.
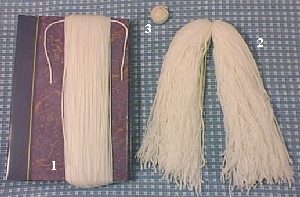
- We begin to knit the fringe on the mesh or fabric. You need to take two threads and secure with a loop. The step is through one hole on the plastic mesh or through one stitch in the stitching on the fabric.
- The threads need to be kept at the bottom of the warp, crocheted through the stitch loop or “window” in the mesh, grabbed in the middle, pulled from bottom to top. There will be a loop on the hook, and the threads will hang down below.
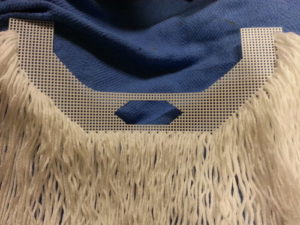
- Now they need to be picked up with a hook and pulled through the loop and tightened. That's the whole process, so gradually knit over the entire surface of the base.
Important! It is recommended to start knitting from the bottom, then move to the top, mustache and finish with the mouth.
Most of the yarn volume should be secured in the bottom rows of the warp. At the top you need to attach a minimum of yarn, since the beard will bristle to the sides, and the threads will get into your mouth and get in the way.
To make a mustache you need to take approximately thirty pieces of thread and tie them to 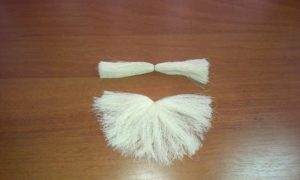 the very top of the base in the middle. Just tie a long thread and then attach its ends to your mustache. Symmetrically attach the ends of the mustache to the base.
You should check if there is enough thickness and fluffiness; if not, then add more yarn. You also need to make sure that all edges of the base are masked. If everything is in order, all that remains is to sew on the elastic.
At the end, you may need to make a final touch - trim, trimming the ends to make the shape more defined. Now the beard is ready for the suit.


 0
0