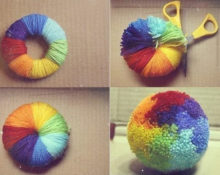
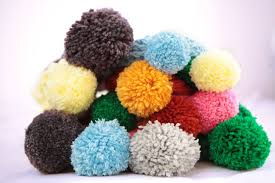
 A beautiful and simple pompom can transform and update any product. This accessory is most often found on hats, mittens or outerwear. With prolonged use, it can come off, lose its elasticity and attractive appearance. With a little skill, you can make a thread pom pom yourself using a few simple methods.
Basic ways to make a pompom from threads
Pompos are used as decoration and have a wide range of applications. They decorate many wardrobe items and are used in the production or sewing of soft toys. Many people add buboes to handmade pieces of furniture or household items.
This could be a blanket, a cape for upholstered furniture, decorative napkins or a small rug. This product was mainly used for decorating headdresses. Such hats are popular among both adults and young children.
There are many options for making the right fluffy balls. Each of them differs in materials for production, method of creation and technique.
Main methods:
- We use our hands. This option is suitable for quickly making jewelry. A pompom is created by specially winding yarn around your fingers. The main difference is the absence of any special tools and the creation of a pompom in a matter of minutes.
- Using cardboard blanks helps in creating the perfect pompom from threads. The finished accessory is particularly pompous and voluminous.
- Using the back of an ordinary chair will be useful when making a large number of balls. The final dimensions and volume can be adjusted during the needlework process.
- A table fork is suitable for creating small pompoms. This method is more complex than those listed above.
When using cardboard as a blank, in addition to a round template, a square is also useful. The chair can be used in a wider range, since the option of using a backrest is the most common and easiest to implement.
Preparatory process
An important stage in the work is preparation. A precise approach and timely preparation of all the components necessary for work will help carry out the needlework process in a short time and in a pleasant environment. The final list of materials depends on the chosen option for creating fluffy balls from threads.
Tools and materials for making pompoms from threads
- a skein of yarn (you can use several shades);
- scissors;
- cardboard;
- compass;
- ruler;
- long needle;
- chair;
- table fork.
The choice of shade for manufacturing depends on the headdress itself. When preparing an accessory for a hat that has several colors, you can make a combined version of the pompom. The tones that are present in the product itself are suitable for this. Such a pompom will be more bright and original.
When working, it is not necessary to use yarn. Any thread that is highly durable and wear-resistant is suitable. Special attention should be paid to the density of the threads themselves. Medium density material will be optimal for work. Both small and large volumetric products can be made from such a component. High-density threads (such as mohair or wool) are suitable for creating small accessories. It is quite difficult to cope with the manufacture of a large bubo from such textures.
Addition: When choosing scissors, you can choose manicure scissors, which are miniature in size. To obtain the most even cuts, the scissors must be sharp.
Stages of work step by step:
For a more detailed study, it is recommended to consider and try each method. If you follow all the steps and carry them out correctly, it is easy to choose the right one.
Advice: when using several color shades, the threads can be distributed over the entire surface or concentrated in one place. This will help you get a simple but bright ornament.
Option 1: The easiest and fastest way to create a pompom for a hat is the method of winding the thread around your fingers. For small balls you can use 2 fingers, for larger ones - 3 or more.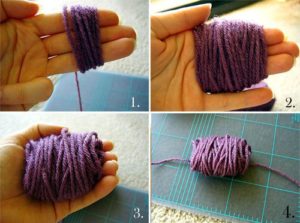
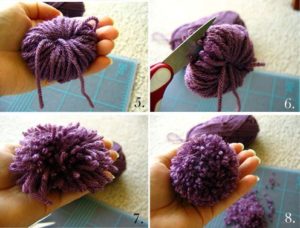
First of all, we begin to wind the yarn on our fingers (without touching the thumb).The volume and dimensions depend entirely on the number of layers applied. To form a large and fluffy pompom, it is recommended to wind a large number of layers. When forming the required volume, pull the bundle of threads with a free thread in the center. The knot must be carefully tightened so that the ball does not lose its shape or fall apart. Carefully remove the skein from your fingers. At this stage, the resulting design resembles a bow. We carefully straighten the sides of the figure, being careful. And we cut the loops to get single threads. Finally, we cut the long threads, forming a semicircular pompom for the hat.
Reference: in the absence of initial skills, additional help may be required, since it is quite difficult to tie the sides and remove the bow from the fingers on your own.
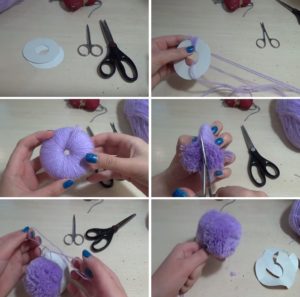
Option 2: Cardboard comes in two variations: circle and square. When choosing the first method, cut out two round bases of the same size from thick cardboard. Draw a small circle in the center and cut it out. Make a loop using a piece of thread. Apply it around a small circle. We place the second base on top.
Important: strictly ensure that the edges of the circles are completely consistent.
We thread the thread into a long needle. We wrap the resulting loop around the cardboard base. To create a three-dimensional product, we wind several layers. During the winding process, carefully hold the templates with your hand. This will help to avoid possible slipping of the loop located inside the cardboard circles. When finished, carefully cut the sides of the threads, which are located at the junction of the warps. We tie the threads into a tight knot in the middle. This will prevent the pom pom from unraveling. After these steps, the product is ready, the cardboard templates can be removed.
Option 3: Involves the use of square-shaped cardboard blanks. To do this, cut out a square template from thick cardboard. We make a small cut on one side in the middle. Carefully pull the thread through. It is necessary to carefully ensure that the tip of the thread hangs down and is long enough to form a knot. It is necessary for fixation. We begin to wind the thread, forming the required volume and size. We pull the thread in the center and tie it tightly. We cut off the rest. We carefully cut the sides and remove the square blank from the cardboard. Straighten the threads to form the desired ball. We cut off too long protrusions with scissors in accordance with the total length.
Reference: The size of the pompom also depends on the size of the workpiece itself. If you use a large square, you will get a corresponding product.
Option 4: In this case, you will need a chair back. This method is suitable if you need to create a large number of accessories. During the work process, several small pompoms are made at once, which are finally separated from each other. We place the base of the thread on one edge of the back. We stretch the first circle. We tie the base with a tight knot to a long thread that goes into a ball. We begin to wrap the layers. Density and volume depend on personal preference. When finished, tie the thread. Carefully remove the resulting thread base from the back of the chair. We calculate the same distance between dressings. For greater convenience, it is recommended to start calculations from the center, moving one by one in both directions. After calculation, we tie the base with short pieces of yarn. It is necessary to cut in the spaces between the knots. This way you get a large number of lush accessories.
Advice: To form more balls, the threads can be wrapped around the legs of a chair.
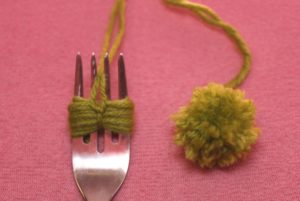 Option 5: An ordinary table fork, which is found in every home, can help in creating small but plump pompoms. The technological process is similar to manual manufacturing. We wind the yarn around the cutlery, capturing all the teeth. After applying the necessary layers in the center, we pull the thread. We tie a tight knot to prevent the product from unraveling. Carefully remove the resulting bow from the fork. Cut the edges of the bow with scissors. Carefully fluff the resulting pompom.
Do-it-yourself thread pompoms for a hat
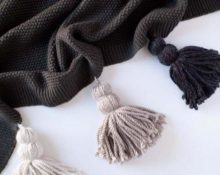
Headdresses with pom-poms are often decorated with an additional decorative element - tassels. You can also make these yourself. The process is not highly complex, and in many ways it is even simpler.
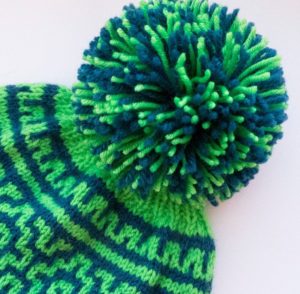 We form a bundle of threads. Special attention should be paid to its length, which should be equal to two bombs. We tie it in the center with a small piece of thread. We retreat about a centimeter from one of the selected edges. Using the obtained indicator, we make several turns of thread. We form a tight knot and hide the ends of the thread inside the bundle. We carefully trim the uneven edges, forming the same length. The tassels for the hat are ready.
A headdress with a pompom always has a brighter appearance and originality. Such products always remain at the peak of popularity and are in great demand. The difference between this accessory is that it is easy to make yourself. A few simple methods will help you make a voluminous and fluffy pompom by hand.


 0
0
