It is difficult to surprise a modern person with anything. And even a picture created using yarn. Who would have thought that such materials could be used to make a real work of art. Today we will talk about how to make pictures from nails and knitting yarn.
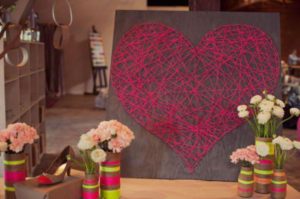
DIY painting made from threads and nails
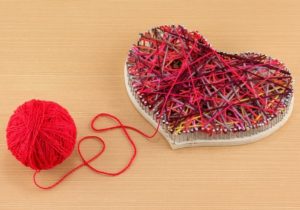
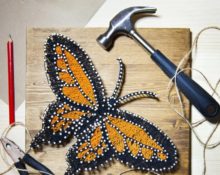
A yarn panel is a backing made of dense material, onto which nails are driven in a certain location, and a pattern is created using threads. In a word, pins act as pegs to which threads are attached. This kind of work requires a lot of attention.
The paintings can be done either independently or with the help of children. There are many schemes with which you can create real compositions.
What technique should you use for a painting made of nails and yarn?
The advantage is that anyone can do it, even a child. In this case, you do not need to have any special artistic abilities, you just need to find a sketch on the Internet, or draw it yourself on a sheet of paper.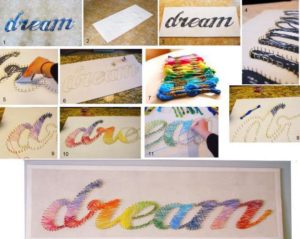
After the picture has been selected, you need to think about the basis for the work. You can use a wooden cut. If this does not happen, you can use a piece of plywood or chipboard, after sanding it with sandpaper. If desired, you can coat the workpiece with varnish and dry it. In addition, you can stretch the canvas over the base.
Schemes and templates
Purple heart
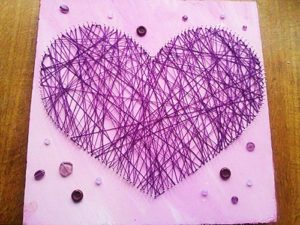
You can weave any picture from yarn and nails, the main thing is to choose a template and materials. You need to start with something simple, so we suggest you make a heart.
List of required materials:
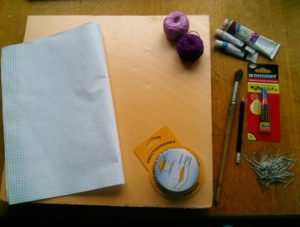
- dense foam;
- pins;
- dense knitting threads;
- PVA glue;
- acrylic paints;
- brush;
- adhesive tape;
- paper;
- beads and rhinestones.
First you need to prepare all the materials, after which you can start doing the work:
- We start work by drawing an even heart on paper. After this, take a smooth sheet of foam.
- We cover it with white paints.
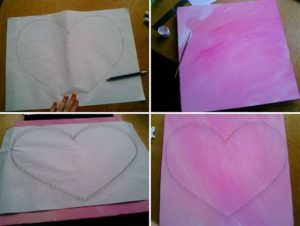
- We wait for the foam to dry and place a sheet with a drawn heart on it.
- We attach pins along the contour of the heart, piercing through the foam.
- The distance from one to another nail should be about 1–2 cm.
- After the template of nails is attached, carefully remove the blank from the paper.
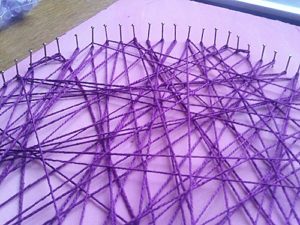
- Now you can begin the most important stage of the work. A thread is secured to one of the pins using a knot.
- After this, the threads are wound around the nails in a chaotic manner.
Note! The threads must be distributed evenly over the entire surface.
The work can be left in this form, or it can be decorated with various decorative elements - stones, rhinestones, beads, ribbons, sequins, lace.
Silhouette image made of nails and yarn
A silhouette image made of pins and threads looks no less interesting when the background is filled in and the part in the middle remains unfilled.

The same materials will be needed for the job. For such a picture, a frame must be created, and nails are placed along the entire edge of the base, after which the nails are transferred to the outline of the image, as in the first master class.
- The thread is fixed on one of the outer nails and pulled to the pin from the outline of the image. The picture turns out to be original. You can do it even without a sketch.
- It is better to use dark-colored material for the base and light-colored yarn for work.
- The technique is that the yarn is fixed on a nail, pulled to the opposite side and returned. The wrapping process continues until the picture is completely filled with threads in an even amount. By analogy, you can create drawings with a 3D effect.
Master class: painting from threads and nails in a modern style
Creating works from threads and nails using modern technology is a more difficult task, but the process of doing the work itself is in demand among needlewomen. Making such work is a little more difficult, but the manufacturing process is interesting and you can even involve children.
List of required materials:
- plywood size 50*50 cm;
- white acrylic paint;
- image template;
- pins;
- hammer;
- fine yarn for knitting;
- a simple pencil and an eraser.
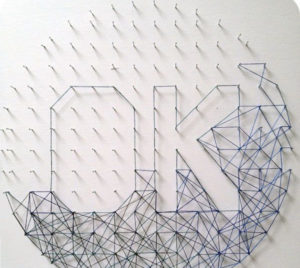
- First you need to prepare the base, sand the surface and cover it with white paint. After this, prepare a template.
- The template is attached to the board and nailed where marked in the image.
IMPORTANT! You need to hammer in the pins so that the caps are at the same level.
- After this, you need to remove the paper and any scraps of paper that remain between the nails.Work begins with the letter “O”.
- Based on the picture, you count how many nails you need to wrap and do the work.
Note! The contours of the letters must be marked, otherwise the image will merge. In principle, the work is no different from previous master classes.
- Once the “O” is completed, move on to the “K.” Wrap the letter “K” in the same way. Do not forget that the threads must be wrapped around each nail. After this, you can start decorating the background. Everything is done by analogy, there is only one rule - do not step beyond the outline of the letters.
There is no need to take contrasting colors, it is better to use similar colors, otherwise the picture will turn out to be too bright. There is also no need to wind too much yarn; it is better if the white background is visible. After completing the work, hang it up and evaluate it from afar, so you can immediately notice minor flaws.
If you see gaps in the work, be sure to fill them in so that the work looks complete. Then make fasteners for the picture and you can hang it on the wall.
Even a child can make a picture with his own hands from nails and threads, the main thing is to choose an interesting sketch and stock up on the necessary materials. Creative success!


 0
0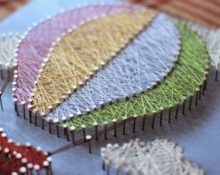


Cool topic)