People are finding more and more hobbies on the Internet, computers and smartphones. This is not bad, because everyone chooses what is interesting. There are new computer professions, interesting movies and books. But despite this, handicrafts have not faded into the background; they are developing and new techniques and materials are being invented.
Changes are also taking place in the field of thread paintings. They have been popular since ancient times, when girls and grandmothers embroidered small pictures on shirts and linens. Then knitted paintings appeared; they were relevant among craftswomen for a long time. And relatively recently, new techniques for making paintings from threads have begun to gain popularity - threadography, flocking and String-art. Moreover, from the point of view of history, these techniques are no longer new. Thus, string art has its roots in England in the 1840s. Then the algebra and mathematics teacher came up with the idea of hammering nails into boards and using stretched threads to show the students different shapes. Later, the American designer began to use technology as art.
Thread paintings
The traditional way to make a picture from threads with your own hands is embroidery. There are people who are delighted with embroidery. But the downside is that not everyone can do it. After all, this painstaking process may seem boring and too long to some.
There is a technique for knitting pictures. It is not as painstaking as embroidery, but still requires certain skills and perseverance. Here the appliqué parts are knitted separately and then glued onto the background.
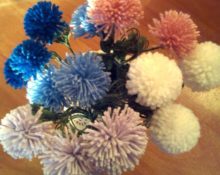
You can make a panel from threads on a frame. To perform this you will need special equipment - a weaving frame, a comb and a wooden needle. And also a proven skill. Therefore, such needlework deserves a separate article.
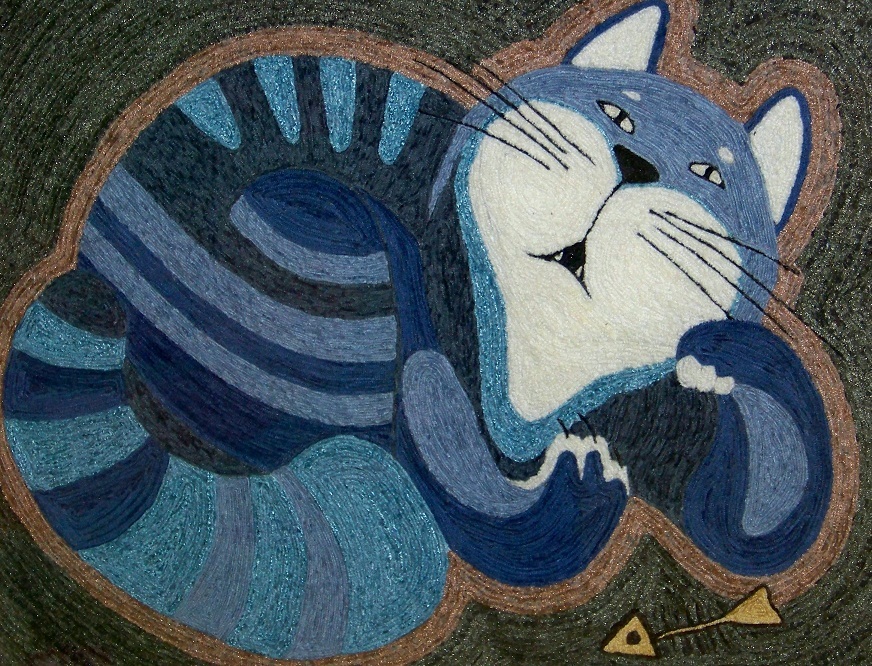
Thread printing is not yet as popular as embroidery, but it is gaining momentum. This simple technique allows you to create real works of art with which you can decorate your interior.
REFERENCE! The first exhibition of works using the nitcography technique was held in 1951 in the city of Guadalajara, Mexico. The authors of the works were residents of the Huichol tribe. They spread beeswax or pine resin onto a piece of wood and then pressed colored threads into it.
Flocking or fabric appliqué. The technology is accessible even to children, which is why it is popular in schools and kindergartens. It originated in America in the 50s of the last century.
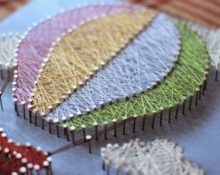
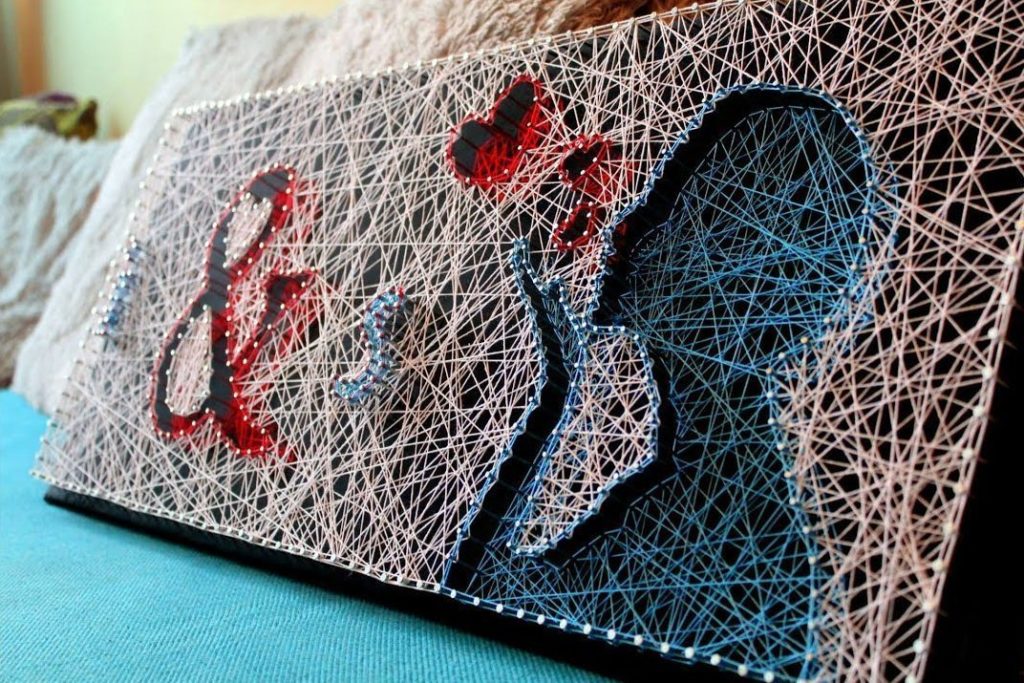
String-art – from the English “string” – thread. Translated as threads of creativity. The technique is ideal for abstract paintings, but with good skill you can make images of animals or people. These panels can be used to decorate the walls of a living room or nursery.
IMPORTANT! The main thing is that the child cannot reach the painting made using the string-art technique - this is dangerous because of the nails and pins.
What threads are paintings made from?
Let's consider three new directions - string-art, flocking and threadography.
For flocking, you can take any thread - floss, yarn, or even unravel a piece of unnecessary fabric. You can use regular sewing thread. For one painting, it is better to take threads of the same texture, unless your idea involves different textures on the same canvas.
In thread printing, the ideal material would be yarn or wool. It doesn’t matter what its composition is, the main thing is that it is voluminous and the texture of the image will be visible on the finished work, and when layers are superimposed on each other, additional volume will be visible.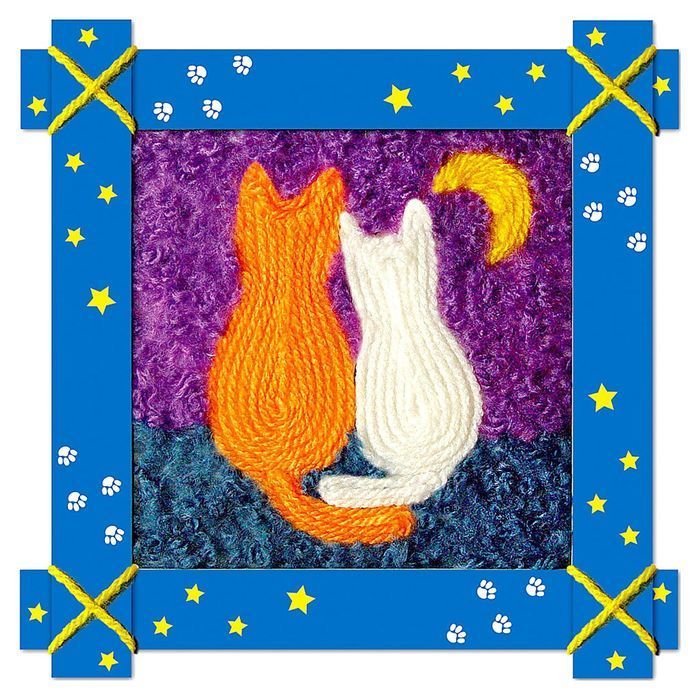
The String-art technique does not require any special threads. You can use yarn if you are a beginner. This way the picture will look more voluminous. Or you can take thin threads, it’s convenient to “draw” different images with them, and make a smooth transition of shades.
IMPORTANT! When doing this, the threads are very stretched, so you need to choose a strong material. And if you still decide to take wool yarn, do not pull it too hard, otherwise it may break in the middle of the process.
What else will you need?
For nitcography:
- base – cardboard, fiberboard, glass or plastic;
- threads, you can unravel an unnecessary item, but straighten the threads before starting work;
- toothpick or wooden skewer;
- PVA glue, choose a thick one - it’s easier to work with;
- scissors;
- simple pencil or paint;
- a stencil with an image or a printed drawing.
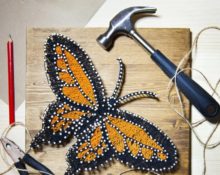
- Materials for string-art technique:
- base – wooden or cork board, dense foam;
- nails or sewing pins; the size of the nails depends on the work - if the picture is small, then 1-2 centimeter nails will do; pins with beads at the end also serve as an additional decoration for the picture;
- threads
IMPORTANT! Nail heads should not be too large or small.You need neat hats, so finishing studs will not work.
For flocking you will need:
- threads;
- cardboard base;
- PVA glue;
- glue brush and simple pencil;
- organizer for chopped threads, you can use glasses or saucers;
- scissors.
Where to get a diagram or drawing
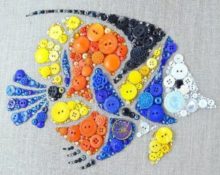
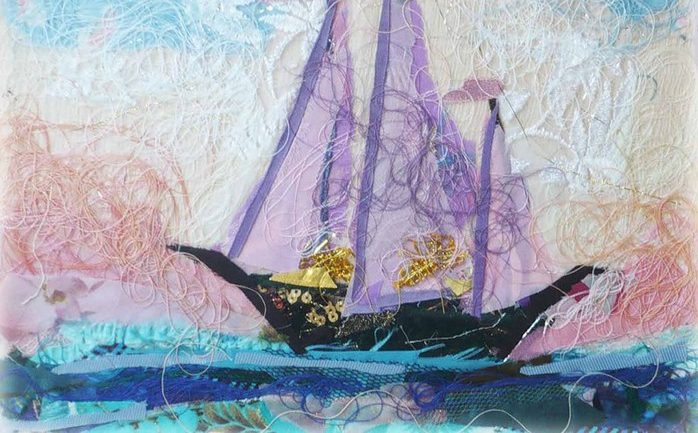
INTERESTING! There is a technique for making paintings from threads, for which diagrams and sketches are not required - philumics. This is something between thread art and string art. The material used is thread trimmings, scraps of fabric, sequins and other decor.
For thread printing, you can draw a sketch yourself, or you can translate it using carbon paper. If it is wood or plastic, you can attach a printed stencil taken from the Internet. If you took glass as a basis, place the desired image under it and stick the threads along the contours. The sketch can be drawn with a simple pencil, but some craftswomen apply the drawing directly with paints. This way there are no empty gaps between the threads.
IMPORTANT! If you use glass or plastic as a base, buy construction adhesive; it will adhere more reliably to the glass surface.
For flocking, the future image is drawn with a simple pencil.
For string art, you can find diagrams on the Internet, you can randomly hammer nails, creating an abstraction. You can draw any schematic drawing.
How the process works
Nitography:
- Draw a future picture on the base, or place the image under the glass.
- Apply glue to the outlines. If the image is large or multi-component, then coat small areas so that the glue does not have time to harden and you do not accidentally smear it.
- Glue the threads onto the outline. Correct them with a wooden stick and press well.
- Having completed all the contours, fill in the middle of the image. After that, move on to the background if necessary.
- The painting using the nitcography technique is ready. You can place it in a ready-made frame or make it yourself from foam slats.
Flocking:
- Draw the image with a simple pencil and make notes on the details - what color they will be.
- Cut threads 1-2 mm long. Arrange them in containers by color and texture.
- Take a brush and coat the area of the painting with glue.
- Place the threads on this piece of glue and press down with your fingers. When filling out, move not from detail to detail, but by color - first make all the elements of one color, then move on to another, and so on until the end. The background is filled in last.
- The picture is ready, you can place it in a frame.
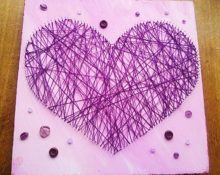
String-art:
- Draw a sketch of the drawing with a simple pencil;
- Hammer nails or pins along the contour of the image in 1 cm increments; if there are sharp turns, more often.
- Secure the thread to any nail.
- Proceed to winding threads, from nail to nail. If you came up with the sketch yourself, and the picture is abstract, the order and direction of winding do not matter. If the picture is more complex, stick to the diagram.
- When finished, tie the end of the thread to the nail.
- You can drive the nails deeper if necessary.
IMPORTANT! Before starting work, wipe each nail with a dry or damp cloth. If this is not done, the oil with which they are coated can stain not only your hands, but also the painting. And coat the wooden base with a special impregnation so that it lasts longer. After all, wood can absorb moisture and fungus can grow in it.
This technique does not require frames, because the painting is made on a three-dimensional basis. Moreover, it is not necessary to wind the threads around the object of the painting itself. You can fill the background and leave the object empty.Such paintings look no worse than the first ones. The main thing is not to wind the threads too thickly. The beauty of this technique is that the individual threads can be seen.
Thread paintings look unusual, and some at a distance of 1 meter look like oil paintings. But they can decorate not only a wall or a table. Most techniques, except string art, are ideal for decorating the cover of a notebook, the lid of a wooden box or decorative bottles, jars and vases.
 0
0