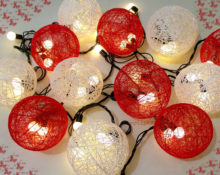
A thread chandelier is a very light and beautiful product that can be made using a simple thread, glue and an inflatable ball. This is a fun activity and doesn’t even take much time! In addition, the entire lampshade is very cheap - you can buy it for 500 rubles!
The homemade product can be used to decorate your personal room, halls or other rooms. Plus they make great wedding centerpieces!
Step-by-step instructions with photos on how to do it yourself:
Chandelier made of threads and glue
Step 1: Materials
- Thread – 250 meters (you can use knitted thread, cotton yarn or fine jute yarn - all have their own unique effects)
- Glue – 1 bottle – this is the main ingredient!
- Inflatable rubber ball
- Lamp with socket
- Long wire with 2-pin plug
- Permanent marker
- Empty Tic-Tac box
- Newspapers (post at your workplace to avoid confusion)
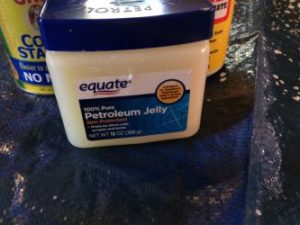
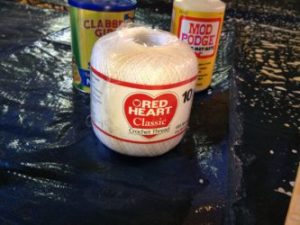
Note: If you can't find a thin inflatable rubber ball, you can use a round rubber ball.However, it is recommended to use an inflatable rubber ball - it is reusable!
Step 2: Setting Up Your Workspace and Materials
Place sheets of newspaper evenly to avoid clutter, preferably on the floor as this gives you plenty of space to work.
Fill the rubber ball with air until it stops. Using a felt-tip pen, draw marks on the circle (this is necessary to delimit the area that will not be wrapped with thread - the base will be removed through one hole, and the lamp and socket will be inserted through another hole).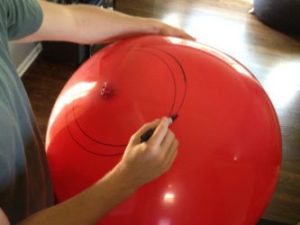
Now, here's a neat trick to cover your thread with glue - take an empty Tic-Tac box (but preferably a slightly larger box with a lid) and make two holes, one on the bottom and one on the top. Pass the thread from the bottom to the top hole. Now fill the box with glue and close it with a lid (you may have to fill the box several times depending on the size of your box). This way, when you pull the thread from the top, it is pre-coated with glue! Pretty neat, isn't it? If you don't want to wrap the balloon with wet thread, then you can wrap the balloon with dry thread and rub the balloon with glue once you have wrapped it.
If you are using a thin thread, it is recommended to use glue without diluting it. However, if you are using a thicker thread (such as jute yarn), you can dilute the glue with water in a one to one ratio.
Step 3: start the winding.
This is the fun and messy part! If you want, you can wear gloves while winding the ball.
Wind it with wet glue-coated thread and check that the winding is tight and do not wrap the thread around the circle marked on the ball. Make loops around the widest circumference of the ball.Try to wrap the thread around all parts of the ball without leaving any empty spots.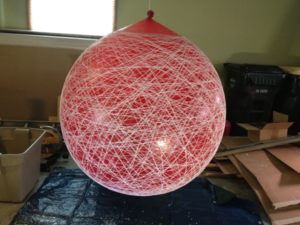
Step 4: Leave the ball to dry
After you have finished winding the ball, clean the wound thread with diluted glue.
Then leave the ball to dry. It takes about 24 hours to dry and cure completely. Let it dry in a place where it won't be disturbed too much.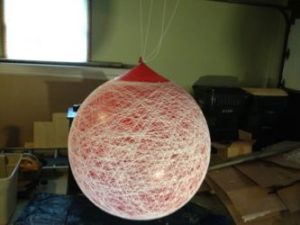
Step 5: Adding the Finishing Touches
After the windings of thread have dried and hardened sufficiently, slowly lower the ball. Since the ball is made of thin rubber, it should be easy to separate from the thread and glue. Handle it carefully so as not to break the shape.
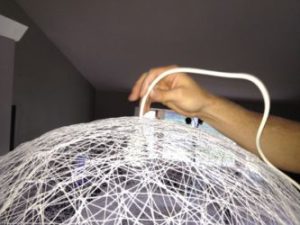
Attach a 2-pin connector to one end of the wire. Insert the wire on the opposite end through any small hole (opposite the circle marked). Then connect the wire to the lamp socket and attach the light bulb and you are ready to turn it on! - your cute chandelier with a pattern is ready!
You can hang the product in any corner of the house (it can be hung through the wire itself), above tables, or simply kept on a corner table.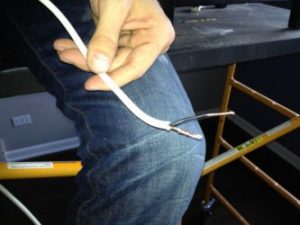
Step 6: Alternative Materials
Threads – You can use cotton yarn, jute thread, crochet thread, twine, or even wool yarn.
Different types of streams have different effects, and they are all equally beautiful. If you use thinner thread, you will need more thread to properly cover the entire ball. However, if you are using a thicker thread (such as jute or wool yarn), you will need less thread to cover the entire ball.
The thicker the thread, the easier it is to make a lampshade. Glue – You can use PVA glue or any synthetic resin glue.
If you can't find an inflatable rubber ball, you can use a round ball.However, balloons tend to expand and contract with temperature. So make sure the balloon dries in a place where the temperature is relatively constant. Box of Glue - If you don't want to use a box, you can pour the glue into a bowl and drop the string into the bowl.
Lampshade made of threads
First of all, you need to prepare your workplace - this is a pretty messy process, so you'll want to Cover your work surface with plastic wrap. If you're clumsy or accident-prone, you might consider giving yourself an apron.
When you're making a nice big lampshade, you need to keep two things in mind: you need a large hole at the bottom so you can grab your hand and then screw the bulb in, and you need a small hole at the top for the cord. To make this easier for yourself, draw a guide line through the bottom of the ball and a small circle on the top of the ball. Since you'll be releasing the ball later, try to keep this hole down so it's easy to find.
Don't use a full concentration of glue, you need to make a mixture of equal parts glue to water. Just get yourself a big bowl and mix everything together. Then take the entire ball of yarn and soak it in the glue mixture - turn it over a little to make sure everything is covered.
Now the most interesting process. Simply take a strand of yarn and start wrapping it around the warp - going in different directions and making sure that two holes are not wrapped. Once you reach the end of the yarn, simply tuck that last piece somewhere. You can take the remaining glue and pour it onto the ball for extra strength.Now you can balance the unrolled part on the bowl and then leave it there to dry - this will take two full days.
It's finally time to blow away our middle! If you don't really think about reusing it, you can just cut out the hole with scissors. Otherwise, if you want to make a few more of them, lower it properly. You will see that you can simply pull it straight out when it is deflated.
Now about the lamp part. Pull the washer through the cord and place it in the correct position above the device, and then attach the plug in place above it so that the cord cannot move. Thread this through the top hole of the globe and then screw in a light bulb - an LED light bulb is the best option because it won't burn the globe. Then you just need to plug it in and hang it wherever you want! The shadows it casts on the walls look absolutely stunning.
Lamp made of threads
The ceiling is made in the same way. All the same materials will be required. For variety, you can play with colors, adding bright colors to your room. In addition, you can decorate the lampshade with decorative items. Just buy some figurines, such as flowers, from a decor store. Then attach them to the lampshade using glue. After these steps you will get a beautiful, inexpensive and original lampshade.


 0
0