creativecommons.org
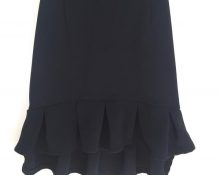
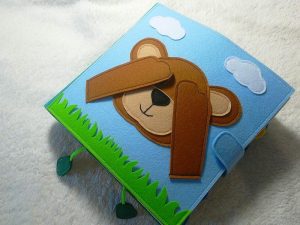
A felt book cover is not only beautiful, but also important for its preservation. If the book is stored this way, dust and moisture will not get on it. This will allow the publication to remain in perfect condition for many years. You can buy ready-made products. Most often they are transparent and only spoil the appearance of the book. A felt book cover looks original, especially if it is made by hand. In the process of its creation, you can embody any ideas. This is an interesting activity that creative people will surely enjoy.
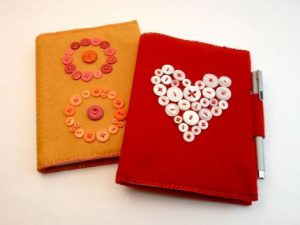
A felt or cotton notebook also looks elegant. Although the choice of notebooks with different covers is enormous, exclusive, handmade looks different. You can make a real masterpiece from an ordinary notebook.
How to make a soft cover for a notebook - master class
Let's look at an example of how to make a soft cover for a notebook. To work you need to prepare:
- Cotton or felt, take the standard notebook size - A6.You will need a flap of 20x25 centimeters. You can choose a bright, pastel or classic shade - all covers look good.
- The notepad is standard. It should have endpapers.
- Basic tools – a roll of double-sided tape, a ruler, scissors, a pencil.
- A jar of PVA glue.
- Bandages, glue gun.
- A little craft glue, a few paper clips.
- A notepad strap is a thin ribbon, up to three millimeters wide.
- Half a meter of sheet filler, padding polyester.
- Some cardboard to match the color of the cover.
- Bound cardboard - two sheets of 10x15 centimeters.
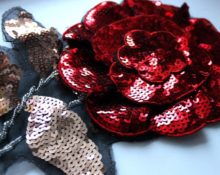
For decoration, you can choose pictures to your taste. These can be funny animals, flowers in a frame. Such pictures for covers usually have the shape of a rectangle, but you can also make applique and embroidery. In the example we will use a sewn-on image. Products decorated with lace look beautiful and cozy; for this you will need to stock up on lace. Having decided on the design, we move on to work:
- We lay out the intertwined cardboard on the table. We place both sheets with a distance of about one and a half centimeters between them.
- Cut out a piece from cardboard the color of the cover. Length – fifteen centimeters, width – three and a half. By width we divide it into 3 parts – two centimeters, one – one and a half centimeters. We bend the material along these lines and go through it with scissors, but do not cut it. This is necessary to preserve the curves on the cardboard.
- We coat centimeter parts with PVA. With their help, we connect the front and back parts of the cover in the form of cardboard blanks. Afterwards, we carefully press the small part on the folds again. If the cardboard does not bend enough, the cover will open or not close completely.
- From sheet padding polyester we cut out rectangles of a size identical to the size of the cardboard.Double-sided tape is attached to the inside of the cover. We put padding polyester on top. Thanks to the tape, the filler will not move.
- Place the fabric on the surface and smooth it out. We lay out a cover with padding polyester on top. We wrap it with material on all sides and glue it with office glue. You can glue lace on the bends.
- Now you can decorate the cover. At this stage we sew on a picture or other decorative elements. We make a strap as desired. You can attach it to the back side of the workpiece. All that remains is to stitch the entire product. In this case, you need to indent from the edges up to three millimeters.
- All that remains is to glue the cover to the notebook. Lubricate it with glue and secure a bandage over the entire surface. We go over the block again with glue. Immediately you need to insert the notebook into the workpiece, grease the endpapers and iron it.
- The product should be wrapped in paper, compressed with clamps and left for a day. After twenty-four hours you can start taking notes.
How to make a notebook cover from fabric
creativecommons.org
A finished notebook is not always visually pleasing, so you often want to sew the cover according to your own design. The instructions below will help you decorate not only a notebook, but also a book, passport or diary. To work you need:
- Material – cotton or other textile will do – 2 pieces for the back and front sides of the product. The size depends on the book.
- Needles, threads, scissors.
- A sewing machine, but it is not required. You can easily do the job manually.
Next, let's look at the course of action:
- We make two rectangles of the same size from fabric. To calculate the smaller side, measure the height of the book, add an allowance of two centimeters, five millimeters for a loose fit.We calculate the larger side by measuring the width of the notebook. We multiply it by half, add ten centimeters for the lapels, the thickness of the book and an allowance of two centimeters.
- We fold the two resulting parts face to face, sew the short edges, retreating a centimeter. We turn the product inside out, connect the wrong sides and go over it with an iron.
- We check the result with the book. In this case, the flaps must be inserted into the endpapers. We adjust the layout if the length is not suitable. We pin the corners with pins without touching the front side.
- We turn the cover inside out, stitching the large edges a centimeter from the end of the product. You need to choose a side for a gap of five centimeters in order to turn the material through it. Re-stitch using a zigzag.
- All that remains is to turn the cover inside out and iron it.
 0
0