sdelay.sam.ua
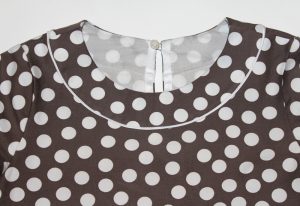
The rolled neckline has a neat front edge. The product looks finished, it is guaranteed not to crumble along the edge of the collar. There are many processing methods. Most often, fabric binding, knitting, or other options are used, depending on the characteristics of the material. Finishing the edge with bias tape is used on dresses, tops, blouses, and sweaters. The pattern does not always imply the presence of an edging, so you have to make it yourself.
How to finish a neckline with a roll - double binding
Double edging is a roll that is sewn from a double layer of fabric. It allows you to hide the layer of material and several layers of lining. This is the best way to work with items made of cambric, georgette or chiffon. Used when sewing models made of transparent, thin fabric.The main difference from a simple roll is that it is possible to reliably hide the insufficiently processed edge of such material. The neckline with double tape is made according to the following algorithm:
- Marking the canvas. We cut out a strip whose width is six times greater than the finished edging. The length of the strip should be equal to the length of the cutout. Add an additional three centimeters. The fabric is cut exclusively on the bias.
- Fold the strip right side inward and iron it.
- We pin it from the outside to the neckline. At the folds of the neckline, stretch the material slightly.
- We make a seam along the neckline. The distance from the edge is the width of the finished edging. This can be a centimeter or five centimeters - at the choice of the needlewoman.
- We cut the corners of the seam allowances on the product diagonally. Iron together with the binding. We press each seam allowance, moving away from the dress, folding the edge inward.
- Fold the strip of fabric to the wrong side and pin it again. It should be at the same level as the connecting stitch.
- On the wrong side, using a hidden seam, sew it to the neckline. In this case, it should run along the longitudinal fold and align with the stitching made earlier.
- Iron the product. This completes the rudder processing. The result is a neat, beautiful neck.
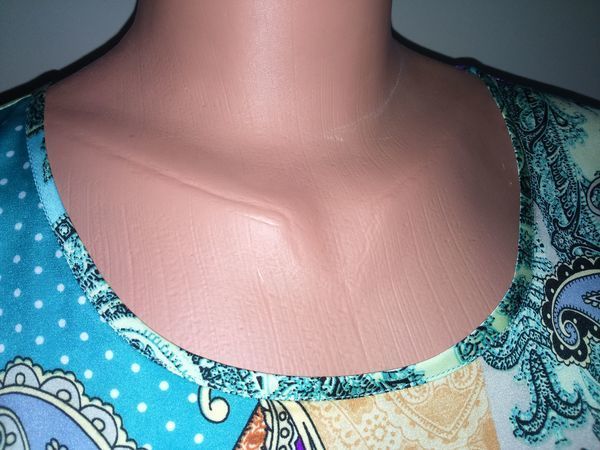
Processing the neckline with a roller - how to make a neat edging
sdelay.sam.ua
Let's look at how to make a simple piping along the neckline. First you need to select a fabric, cut a strip from it along the length of the neck of the product. The optimal width is three centimeters. Then fold this strip right sides together with the cutout. Much depends on the model:
- When sewing a dress with a zipper at the back, the edging is processed first;
- If the model is one-piece, work begins from the back, two centimeters from the shoulder seams.
We make a seam five millimeters from the edge, then the width of the roll will be five millimeters. Let's start sewing on the machine. It is important that the finished edging does not wrinkle, there are no waves on it, and the neck itself does not stretch or tighten. Therefore, when working, you need to slightly tighten it. To make the task easier, you can pin the strip with the product in advance using pins. But they must firmly fix the position of the fabrics and not move out during the sewing process. You can check symmetry by folding the product in half.
If there are no irregularities, two millimeters are cut off from the allowance. On the outside, the cutout straightens out. We retreat one and a half centimeters from the connecting line and remove excess fabric. We bend the allowances until the cuts. Now they need to be folded to close the seams. A few millimeters are enough.
We collect the ends of the piping inward and sweep along the entire length of the neck along the front side. You need to run the iron along the steering wheel. In this case, the binding is directed onto the seam to make it invisible.
 0
0