creativecommons.org
The skill of making a product will be useful to the housewife if she needs to alter an old dress or adjust a new one. In this material we will tell you what a foundation is and what it looks like, as well as share recommendations on how best to make a foundation and give examples of the most successful work.
What is a foundation and what types of foundation are there?
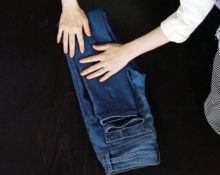
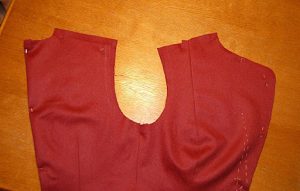
Adjustment is the correction and adjustment of each individual part to the required parameters in order to reduce the size of the product. All markings should be visible on both the back and front sides: tailor's chalk is most often used on the inside, and a piece of pointed soap on the front side, so as not to leave unnecessary marks.
Depending on the stage at which the foundation is carried out, it is divided into several subtypes.
Thus, they distinguish:
- Basing of product parts directly after duplication
- Alignment of parts during the process
- Final groundwork
- The base of the lining
Basing parts after duplication
creativecommons.org
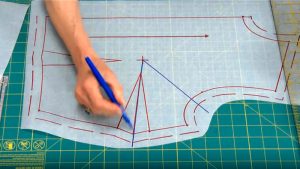
The foundation of parts after duplication most often affects small parts of the product: for example, cuffs, collars, valves, etc. Most often, these parts can shrink after heat treatment and when constructing a pattern, obviously more material is placed on them. Therefore, in this case, the basics are carried out by applying a pattern to an already processed product and checking the control points.
In-Process Basis
The fitting of parts during the process is carried out after trying on the product, already half stitched with fitting seams, on the model. Directly on the model, outlines are made on how to adjust the cut so that the clothing fits perfectly and symmetrically. Most often, only one half of the product is tried on, and then the second symmetrical half is sewn in this likeness. It is precisely this interesting process that photographers try to catch famous designers doing: on the one hand, the new collection remains a secret, since the product is shown exclusively from the inside out, on the other hand, the viewer is allowed to look into the designer’s kitchen and feel involved.
Final setup
The final adjustment is made at the end of the entire process. Most often, at such moments, the seamstress adjusts the bottom of the product and checks the length of the skirt or dress. It is important that before the final adjustment the already half-finished product hangs for at least a day and takes on its final form. If you are a beginner, then they advise you not to neglect the rules of one day, give the product a day - and only then start correcting the bottom. Otherwise, it may turn out that after a week of wear, the owner of the item finds out that, despite all the corrections, the bottom of the item is crooked.
Lining base
Probably the most difficult thing for beginners is the installation of the lining; it is also carried out after trying on the product without the lining on the model. If the product fits and does not need correction, it is placed on a lining folded in half, connecting all the key points with pins. All extra centimeters and millimeters are cut off, and then the lining is sewn inside. Please note that both the lining and the outer part of the product must first undergo a wet-heat treatment of the product, otherwise deformation may occur after washing.
Novice dressmakers very often neglect some stages, as a result the product turns out to be imperfect or quickly deforms during wear. It is important to remember that each stage is important and not to rush into completing an order or task. Don’t be lazy to try everything on several times and don’t be shy about arranging additional fittings for the model.
 0
0