Many knitting enthusiasts sooner or later face the fact that there are a lot of leftovers from various skeins of yarn. After all, when a little bit remains of the ball, it’s too little to knit something else, but it’s a shame to throw it away. Indeed, there is no point in throwing away leftover yarn, because you can create many interesting things from it. Knitting from a small number of different threads is characterized by the fact that the product turns out to be very interesting in appearance, colorful.
Features of choosing yarn
 Different leftover yarn can be rolled into one ball and the resulting multi-colored material can be used. To do this, take several ends of thread from the skeins that you want to use and wind them around your finger. After some time, remove it from your finger and continue creating a skein until all the threads are gone.
Ideas for what to crochet
Knitting from leftover yarn is not difficult. You just need to work out in advance exactly how you will use the material you have based on the quantity, colors and knitting pattern.Directly The process of knitting from a small number of different threads is characterized only by the fact that it is necessary to constantly change the yarn - use one or the other. In fact, you can knit almost anything you want. It could be:
- bag;
- socks;
- potholder;
- covers for any furniture;
- rug;
- plaid;
- basket;
- a cap;
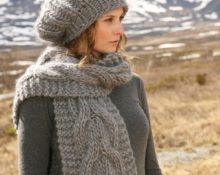
- scarf;
- panels, and so on.
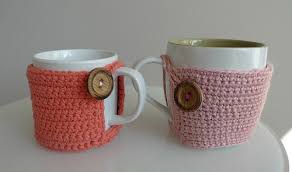
How to make a cover for a mug
The cover on the mug allows the drink to stay cool longer. Holding a mug in such a case is very pleasant and convenient. You will need very little material. So,
 Make an initial loop and tighten it. We are recruiting twenty aircraft. This is the height of the cover. If this height does not suit you, adjust the number of loops for yourself.
- Next, skip the first loop. We knit 15 single crochets. We knit on both the front and back sides. At the end of each row we make one air loop with a rise, turn it over to the other side and knit single crochets again.
- We knit until the cover matches the circumference of your mug.
- Next, at the end, in the middle, cut out a small strip about 5 cm long for the handle of the mug. We make a hole on it for a button. To do this: make an air lifting loop, knit one loop, make four new ones.
- We also knit the last loop.
- Take a thread of a different color. We tie everything with single crochets to create a border of a new color.
- First sew on the button. The mug case is ready!
 Make an initial loop and tighten it. We are recruiting twenty aircraft. This is the height of the cover. If this height does not suit you, adjust the number of loops for yourself.
How to knit a pillow
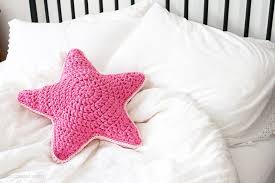
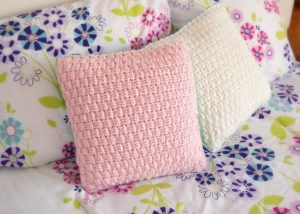
A hand-knitted pillow is an excellent decorative element that will always please the eye. Knitting a pillow is not difficult:
 We put five air loops on the hook and close it into a ring. Through the resulting ring we knit four groups of three double crochets.Instead of the first stitch for lifting the row, we knit three air stitches.
- Now two double crochet stitches form a ring. Another chain stitch and another group of three double crochets - into a ring.
- Again one double crochet, three more double crochets in the same ring. We repeat again.
- We connect the loop on the hook with the beginning of the row, with the third air loop. But before making the connection, we introduce a thread of a different color.
- We pull a new thread through the two remaining loops. We knit the next row in exactly the same way as the previous one.
- We make four corners. We finish everything with one aerial. Connect the loop on the hook to the beginning of the row.
- We tie the threads on the reverse side, hiding the ends with a hook. The fragment is ready.
- We knit in this way as many fragments as you need for the pillow. Let's tie them together.
 We put five air loops on the hook and close it into a ring. Through the resulting ring we knit four groups of three double crochets.Instead of the first stitch for lifting the row, we knit three air stitches.
Knitting a basket
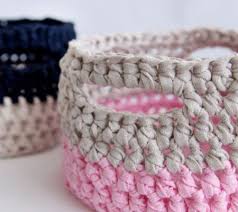
Knitted baskets are an excellent interior accessory, and they can also be useful in everyday life. You can knit the basket yourself. It is advisable to use not very thin yarn. You can change the thread to another at any time.
 Making the first loop. We put two air loops on the hook. We knit eight single crochets. Connect with the first loop.
- In the second row, we knit two single crochets into each stitch of the previous row. There should be 16 columns in a circle.
- Connect with the first loop. In the third row we proceed as follows: we knit a lifting air loop, in the first we knit 1 stitch, in the second – 2 stitches, in the third – 1, in the fourth – 2, and so on.
- We knit the entire circle. Connect with the first column. The next row will have double stitches.
- Two columns of one loop through two, according to the scheme: 2,1,1.We knit to the desired width of the bottom. We begin to knit in height.
- We create a kind of scar with which we can tie the walls.
- We make a lifting air loop, knit a single crochet, continue knitting, inserting the hook on one side and bringing it out on the other.
- We finish the row and start a new one using the “split” technique. It consists in knitting through the base, and not through visible loops. We continue to knit using this technique.
- Connect the end and beginning of the row. We add new rows, starting them from the lifting loop, until the height is satisfactory. The basket is ready.
 Making the first loop. We put two air loops on the hook. We knit eight single crochets. Connect with the first loop.
Never throw away leftover yarn that you think will never be useful to you again; it can still serve you well!
 0
0