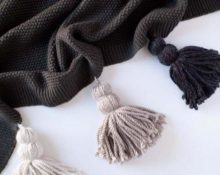
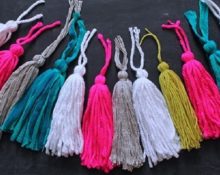
Often a hat or scarf knitted by hand requires an addition in the form of one or more fluffy pompoms. Making them is not at all difficult, but only for those who have performed this operation more than once. But beginning craftswomen need support with advice, recommendations, and instructions for making bombs. Read about all this below.
Which yarn to choose for a pompom?
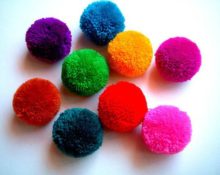
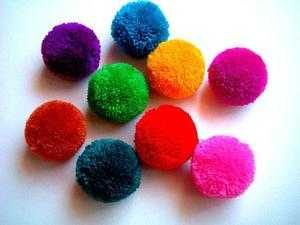 Long gone are the days when only children's clothing was decorated with fluffy balls. Now pompoms are used for hats and scarves for adults, to create rugs, bedspreads, children's mobiles, and to decorate cards and gift wrapping. They are used to create original fluffy crafts and toys.
If you need to decorate a hat knitted from wool, it is not at all necessary to make the pompom also pure wool. You can choose matching threads that will be similar in structure and match the color of the main thread of the product. It is better if the pompom is made from yarn that has a slight twist, but is dense and porous in structure. This choice of source material will make the ball fluffy and fluffy.
If the pompom should not match the color of the associated product, then give preference to a cheaper material - acrylic, which ideally suits the requirements described above, and also has a rich color palette.
What equipment can be made to make a pompom?
Traditionally, improvised means in the form of a fork or a chair are used to make fluffy balls, but more often they turn to cardboard to create products that are ideal in shape. It is used in the form of a rectangle with a cut section in the middle for inserting a thread, frame, horseshoe, ring with a cut segment for ease of work. If you need a large pompom, take two rolls of toilet paper or paper towels, or even more, two plastic bottles of the same diameter.
Step-by-step guides for creating a bubo
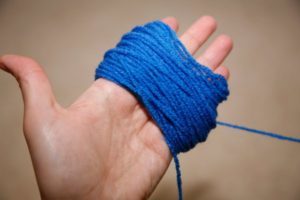 In fact, all existing methods with or without any devices come down to the following basic operations:
- winding many turns of yarn around a fork or cardboard;
- reliable fixation of the resulting skein in the center;
- cutting the outer edge of the thread.
Important! The more turns around the device are wound, the more magnificent the product will be.
How to make a pompom using a fork?
This method creates only small fluffy balls:
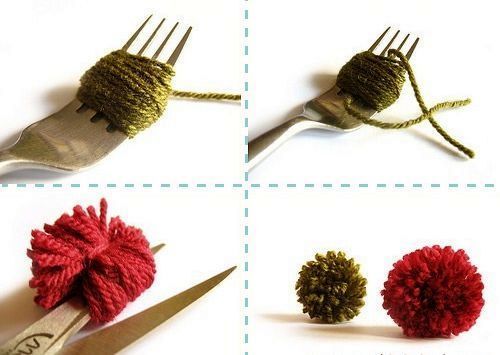
- for work, choose the widest fork in your household with even teeth;
- fix the tip of the thread at its edge with your finger and wind the yarn directly onto the cloves;
- when the wound yarn takes on a rounded shape, cut the thread from the skein;
- use a separate thread of the same color to tie the resulting ball without removing it from the fork;
- to do this, pass it from below between the 2nd and 3rd teeth to the other side and bring it out between them from above;
- connect the ends of the thread and tie tightly;
- wrap the resulting thickening of wool again and bandage it;
- now remove from the fork and carefully straighten it so that you get a woolen circle with even edges and the same distance from the center;
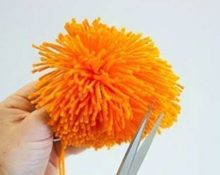
- Using sharp scissors, start cutting the product from one edge, gradually moving in a circle. Don't try to grab a lot at one time. Small steps will give a smoother ball;
- Once the cutting is complete, you will end up with a pom-pom, which will most likely require correction of the shape. Trim all protruding threads, except those that secured the middle of the ball.
Important! If you need several of these balls, remember the number of turns and repeat them in other products, otherwise the pompoms will be heterogeneous and significantly lose their attractiveness.
We use cardboard for accessories
One of the most common ways is to make donuts using cardboard rings. This method can be used to make both small and large balls. To obtain the ideal shape of the product, you will need thick cardboard that will not bend during operation.:
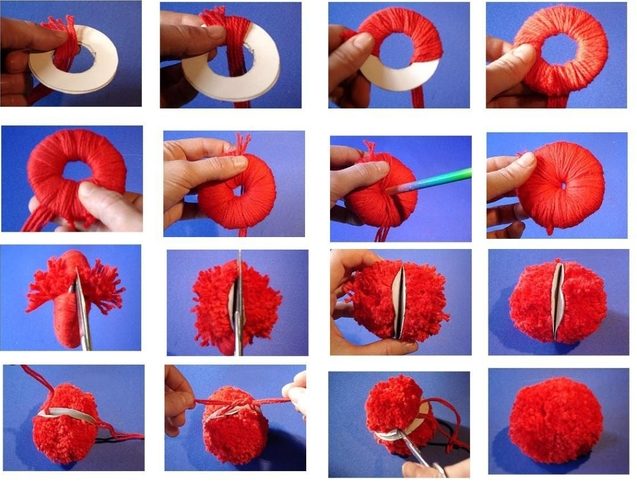
- On cardboard, using a compass or cup, draw a circle of the required diameter, inside - another, smaller one, cut it out and get a ring, in which, for ease of working with the thread, we remove a small segment. The result is a ring without a couple of centimeters in circumference, but it will be convenient to work with;
- We fix the tip of the yarn on the outside of the ring and begin to wind the yarn, at the same time passing the cut thread under it, which we will use to tighten the pompom.This can be a piece of yarn in a color or an ordinary harsh thread: if everything is done according to the rules, then no one will see it from the outside;
- we wind it around the entire circumference, slightly short of the cut segment and continuing to pass the cut piece of yarn around the entire circumference;
- we continue working until the internal diameter of the ring is reduced by half (if it was initially 3 cm, then work continues until its size is reduced to 1.5 cm). Only with this amount of yarn will the pompom be fluffy;
- When finishing winding, cut off the tip of the thread at the outer edge;
- very carefully cut the threads along the outer diameter, lightly fixing them with your free hand;
- after the work with scissors is completed, carefully pull and tie the thread that we carefully laid under the main winding;
- once again fasten it around, tie it, fluff the pompom;
- adjust the shape with scissors.
The question remains open how to calculate the required diameter of a cardboard ring for a pompom. There are no hard and fast rules here. Experienced craftswomen recommend working with a ring whose internal diameter is 3–4 cm. The external diameter should be calculated independently depending on the desired size of the pompom.
For example, we need a fluffy ball measuring 8 cm. The diameter is 8, and the radius will be 4 cm. For example, we have already drawn an inner circle with a diameter of 3 cm, to which we will add the radius of the outer circle - another 4 cm. The resulting figure is in total – 7 cm, which means the total radius will be 7 cm, and the diameter will be 14. This is exactly the template that needs to be cut out for work.
Important! It is impossible to calculate the exact figure of the resulting product, simply because at the final stage the shape of the ball is corrected; as a result, it can be significantly reduced in size.
With round template
There is another way to create a pompom using cardboard rings:
 Using the method described above, we calculate and cut out two identical templates;
- we wind the yarn to the required volume, but do not pass an additional thread under it;
- we work with it only after our winding is completed and the yarn is cut;
- slightly move the rings apart and pass a piece of yarn between them;
- bandage around it several times;
- We remove the cardboard and trim the pompom.
With square pattern
You can use a rectangular template, the height of which should be half the diameter (radius) of the desired product size:
- We cut the cardboard in the middle and pass the thread with the free end through here. We will use it to tie the center of the skein;
- wind the yarn to the required volume and cut it off;
- Use the remaining end of the thread to tightly tie the skein;
- cut the edges and trim them.
Important! Using an unnecessary plastic card for the template will make the work more convenient, and the shape of the ball will be more even.
Making a very large ball
If you need to make a large or very large pompom, then take two paper towel rolls and, folding them together, put the number of turns we need around it. We tie the skein between the cardboard parts, cut it, and trim it.
Bubo of two threads - colorful and with a picture
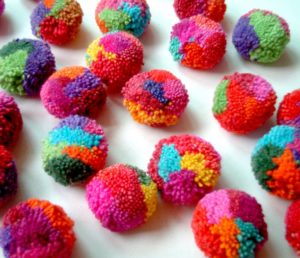 Sometimes you need to make a two-color ball. To do this, you need to use two threads of different colors. If you need a variegated product, then alternate winding different yarns - for example, 30 turns of white, 30 turns of red, and so on. At the end of the work you will receive a bright and elegant ball.
But there are techniques that allow you to reflect a mini-picture in a pompom. This is where the work gets more difficult. The template will be required in the form of a horseshoe (hemispheres with a hollow center), you need to take four such blanks. Divide the drawing you are making with a vertical axis; it should not be complicated. Lay the turns around the connected two horseshoes according to the color indicated in the ornament and repeat this with the other two patterns. Then connect them together with paper clips, cut them, secure the middle with threads and remove the cardboard.
Making a pompom without tools
This is the most primitive, but also the fastest way to create a fluffy product:
- we wrap the yarn around the four fingers of the palm, trying not to bend it;
- Let's put as many turns around as required for a full-fledged pom-pom;
- then use a separate thread to secure the product in the middle, passing it from above and below between the middle and ring fingers of the hand;
- once again tie the resulting skein and cut it along the edges;
- remove the template, fluff the ball and correct the shape with scissors.
Or you can also do it like in the photo:
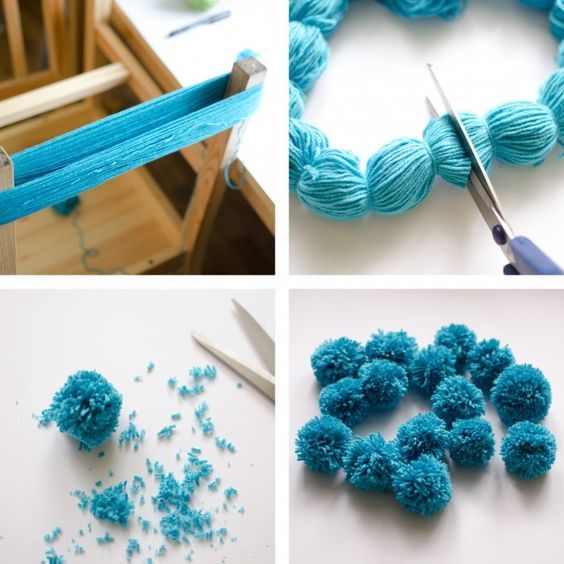
Important! If you need a smaller product, follow the recommendations and use three or two fingers.
How to attach a pompom to a knitted hat?
 Those threads that tighten the pompom should always be of such a length that it is convenient to fasten them on the wrong side of the product several times. Attach it to the designated place, hook one end of the yarn to the wrong side, then also pull the second one, but with a small distance from the first. Tie the ends.Pull them out to the front side again, but with a slight indentation from the first step. Thread the tip of the thread into the needle and pierce the pompom with it, pulling the thread from the underside of the product. Do the same with the second thread, then tie the ends tightly again.
Using a hook, carefully sew the remaining threads from the work into the loops of the hat, and if you can’t do it beautifully, just cut them with a small gap so that nothing comes undone. Now the pompom will stay firmly on the product; the double fastening will securely fix it throughout the entire period of use.


 Using the method described above, we calculate and cut out two identical templates;
 0
0