 Despite the fact that now you can buy any product you want in a store, many people do home handicrafts, knitting or sewing. To make it easier to practice your favorite hobby, special devices, sewing or knitting machines, are produced.
For a knitting machine to function properly, it is necessary that the yarn is properly prepared and also wound into skeins. This is done using a special product.
A winder is necessary when knitting on a machine. Not all store-bought skeins of yarn are immediately suitable for use on a machine at home. Many of them are used only for hand knitting. And some are wound in such a way that when using a knitting machine they begin to jump on the carriage. With such knitting, the finished product will turn out with various defects: distortions, twisting or the formation of stripes.
IMPORTANT! In order for the knitting process to be comfortable and the resulting product to be of high quality, the threads in the skein should come off easily; any additional tension is not allowed.In this case, you will need a winder.
However, it is not necessary to purchase the required device. You can do it yourself, we will tell you how to do the job.
Materials and tools for manufacturing
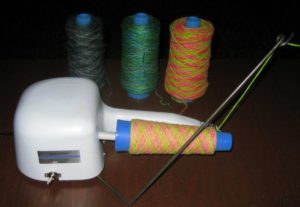
The machine has a fairly simple design; you can make it yourself using available materials.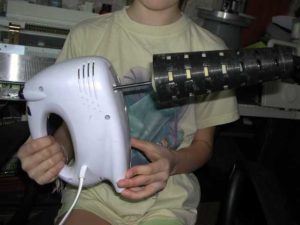
To make a rewinding machine at home, you will need the following.
- Plastic cone, on which the thread will be wound. If there are no suitable cones, you should take plastic bottle.
- Two pieces of rubber or 2 caps to limit winding.
- Aluminum spoke.
- Can be used as a motor mixer with whisks or screwdriver.
- Director. It can be taken from an old broken winder. Or use a thread guide from a knitting machine.
How to make a yarn winder
When all the materials necessary for making a winding product have been prepared, you can begin collecting.
From a plastic bottle and a screwdriver
Manufacturing scheme
- When using a bottle and a screwdriver on the latter, you must secure the cover from
 bottles.
 - It should be secured using a self-tapping screw or screw., as well as sealing gum.
- The bottle is screwed onto the cork, after which you can begin the rewinding process.
- To securely fix parts that may spin or break, it is necessary treat them with glue.
ADVICE! To prevent the bottle from dangling during operation, you should pour water into it and screw the lid on tightly.
Winder from mixer
When using a mixer, assembly is carried out in the following way.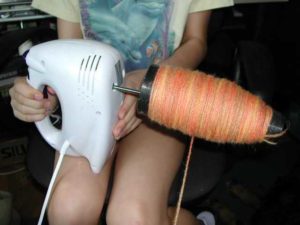
- You need to wrap rubber bands around the mixer whisk.to make the connection tighter.
- Then a special cone is placed on the rim.
- Thread holders are placed in the cone.
- IN nylon covers need to make holes. One cover is fixed at the top of the cone, the second at the bottom. The holes must correspond to the diameter of the cone where the covers are placed.
ADVICE! If a screwdriver or drill is used as the motor, the assembly process will be the same. Only instead of a whisk you need to take an aluminum knitting needle, which should be given the required length.
As you can see, assembling the winder yourself is quite simple. There is no need to purchase any special materials.
With a little time and creativity, you can get a device that can greatly simplify your preparation for engaging in your favorite hobby.


 bottles.
 0
0

