If you don’t have a sewing machine at hand, but you need to firmly fasten 2 parts of the product, you can do this manually using a “back needle” seam. It is considered basic not only by seamstresses, but also by those who love to embroider. And it often comes in handy in everyday life.
Features of the “back needle” seam
This seam has many names, and it is considered one of the most practical and versatile. In English it sounds like backstitch, and if translated, “backstitch”. In everyday life, it is also called “backstitch”, “stitch seam”, and “contour seam”. The words “backstitch” and “back” are used as analogues.
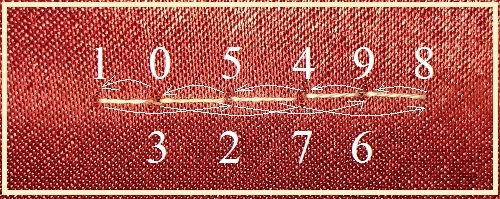
To reduce thread consumption, you can use another option for a contour seam:
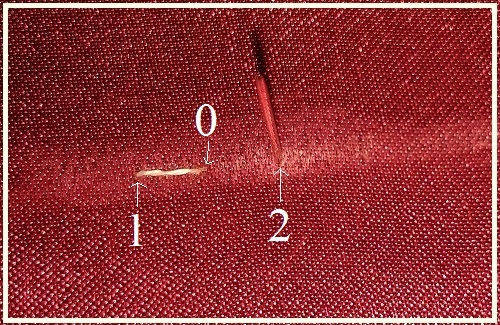
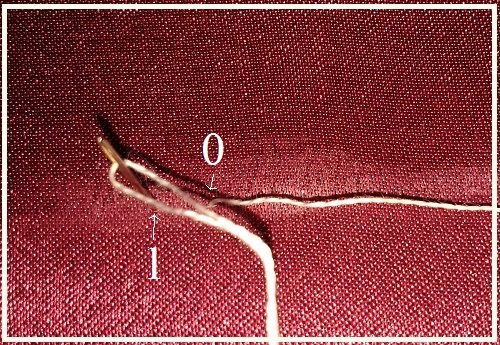
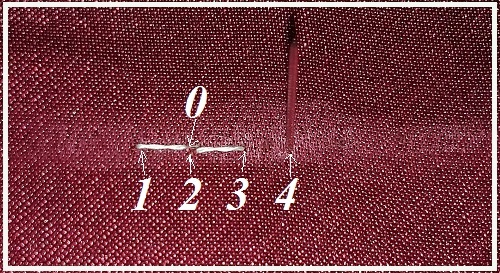
- Insert the needle and thread from the wrong side and exit on the front side.
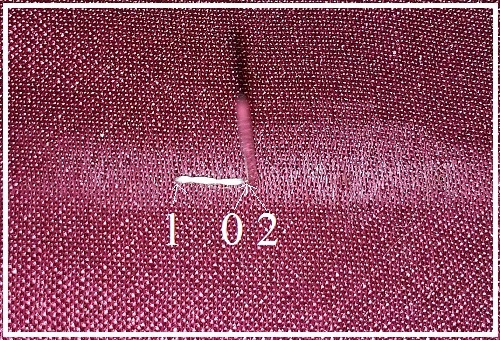
- Stepping back 5–7 mm along the horizontal line to the left, insert the needle into the work cloth and pull it out from the other side. To reduce thread consumption - 1

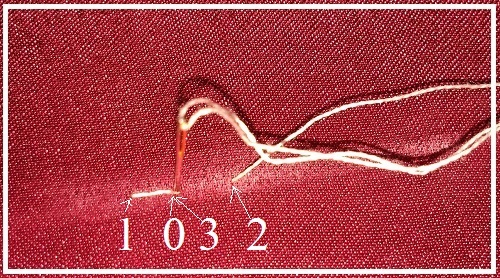
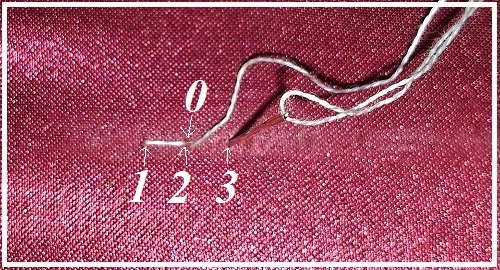
- Moving towards the starting point, pull the needle through it to the front side. To reduce thread consumption – 2

- Step back from the current position to the right along a horizontal line of 5–7 mm and thread the needle through the fabric, bringing it out on the wrong side. To reduce thread consumption - 3

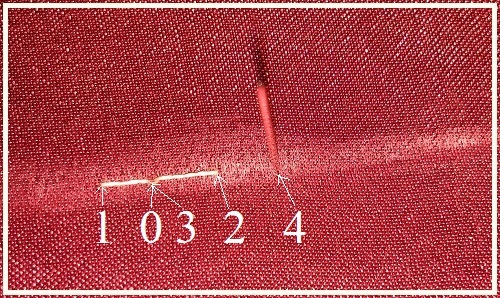
- Make another indent of 5–7 mm in the same direction, and then, having pierced the fabric, bring the needle to the front side. To reduce thread consumption - 4

- Continue similar steps until the back stitch is completed. At the end of the work, stay on the wrong side and make a knot, as in paragraph 6 of the previous instructions. To reduce thread consumption - 5

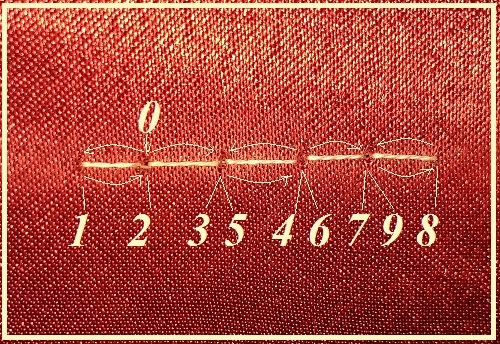
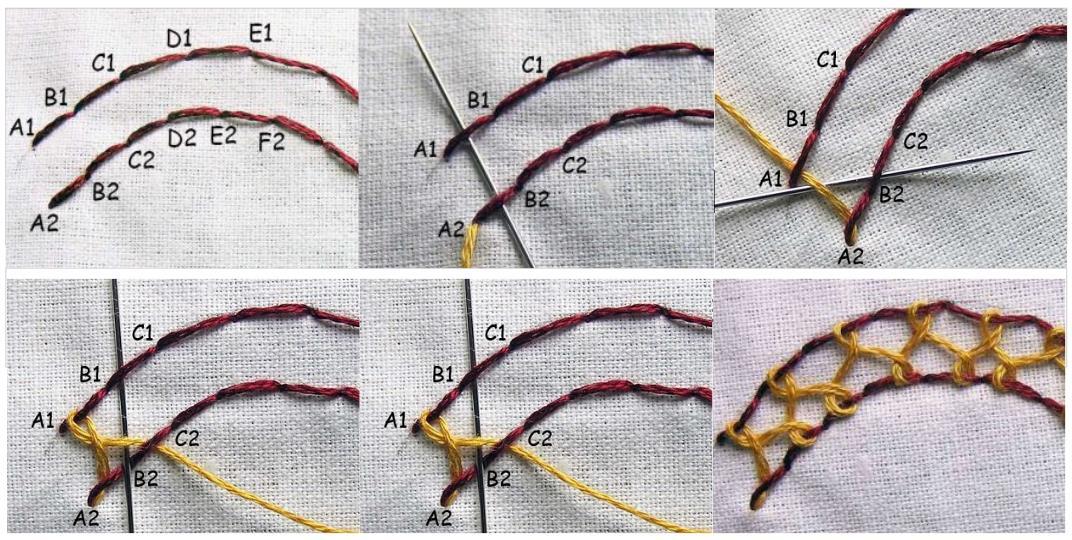
In some cases, when sewing, a backstitch seam with a skip is used:
- It begins in the same way as a regular one, but after completing the first stitch, the needle is inserted from the inside out to the right of the original point at two intervals of 5–7 mm.
- Then make one standard stitch to the left and again step back from its starting point to the right for two intervals.
- Similar actions are repeated until the end of the desired fragment. As a result, the stitching on the front side is not continuous, but dotted.
On a note! This seam is used when you need to secure the transition edge of the facing and hemming.
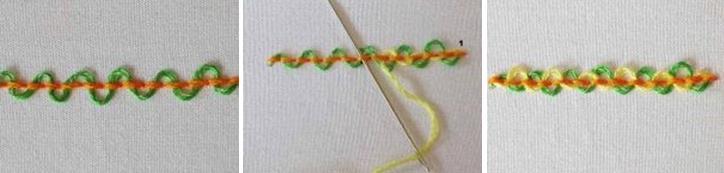
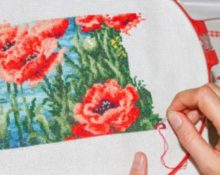
To make the stitching more beautiful when embroidering with a “back needle” stitch, it is advisable to stretch the fabric well using a hoop or some other way. This will help control thread tension and make stitches smoother.
Interesting! The back seam is also used for bead embroidery. In this case, each bead is secured with a separate stitch. This embroidery method is accessible even to beginners.
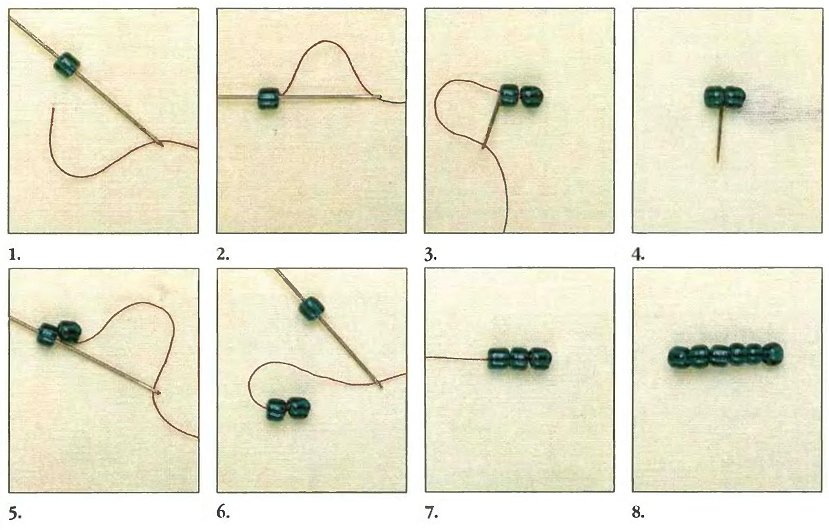
Backing when embroidering with beads
Advice from experienced craftswomen
Each business has its own rules and features. Sewing and embroidery require attention and accuracy, but not everything works out the first time. In order to please the result of the work, when performing a “back needle” seam, it is better for novice needlewomen to follow the recommendations of experienced craftswomen:
- A neat and beautiful stitch will be achieved if all stitches are the same length. This is true when it comes to sewing. When doing cross stitch, this rule is not necessary to follow. Uneven stitches can become an original artistic effect.
- At the initial stages, before performing the “back” in embroidery, it is better to draw the necessary line on the canvas with a pen or marker. This makes it easier to control the evenness of the stitching.
- In order for the seam to be without gaps, the stitch boundaries (puncture points) must coincide.
- When doing cross stitch, backstitch is best done after the entire design is finished.
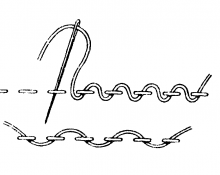
- During training, it is more convenient to perform “backing” on canvas or fabric where the weave of the threads is uniform.
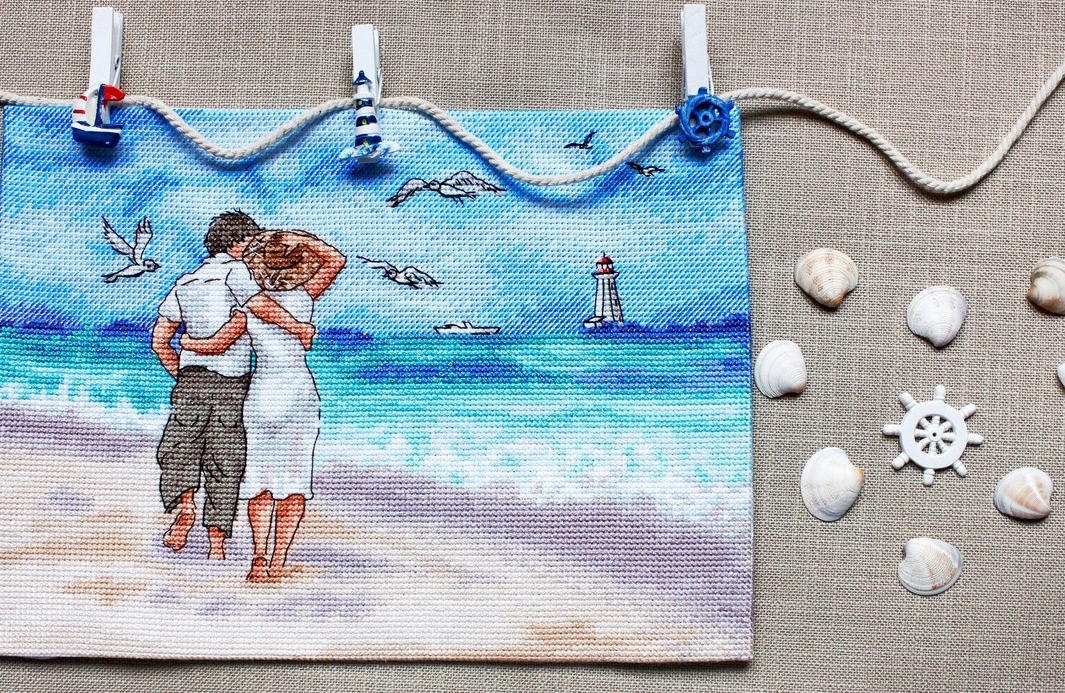
Backstitch on canvas with uniform weave of threads
These tips will help you quickly master the technique of making a “back needle” seam, and then any sewing pattern using it will be within your power.
 0
0

I love him very much. Fast, beautiful, long lasting.