creativecommons.org
Dushegreya is one of the first images that come to mind when it comes to the style a la Russe or Slavic clothing in general. In this material we will analyze the history of this unusual element of clothing and describe step by step how to easily and quickly sew a soul warmer with your own hands and without professional equipment.
History of Dushegreya
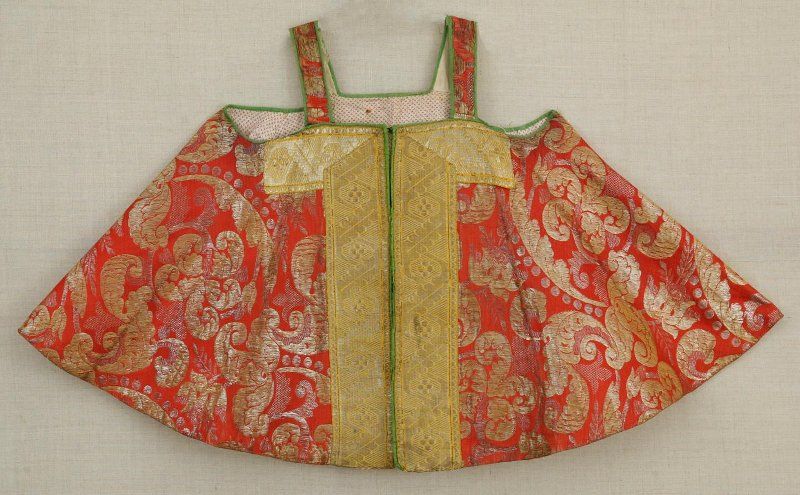
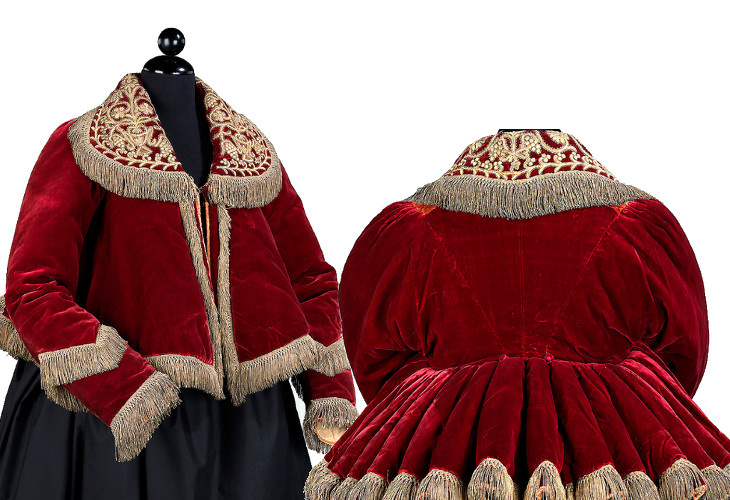
The ceremonial upper part of a woman's wardrobe with a flared lower part and fasteners in the upper part is called a dushegreya. In fact, it has many different names. This type of clothing was called as many names as possible: quilted warmer, shugai, epanechka, katsaveika - and that’s all about it. Dushegrea appeared in Rus' quite a long time ago, but became widespread in the 17th century. The unclear description of this type of clothing, the contrast of climate, the heterogeneity of society and Russian ingenuity have blurred as much as possible the average person’s idea of what a traditional Russian soul warmer should look like.It is often described as simply “traditional Slavic outerwear for the holiday” and could be: with or without sleeves, insulated winter and light summer, shortened (most often) and elongated, richly decorated and modest, bright colors and pastels, sewn from brocade and simple quilted. It is believed that the soul warmer served as outerwear for peasant women, which they wore on holidays. However, in reality, almost all classes wore the soul warmer in one form or another, and it was also sewn from different fabrics. Soul warmers for nobles and merchants were made from expensive fabrics - brocade, silk - and decorated with embroidery from gold threads, beads, freshwater pearls and even precious stones. To emphasize their status, some ordered soul warmers with expensive sable fur. Peasants and townspeople limited themselves to squirrel or hare fur for the winter version of the padded jacket, and braid or fringe for the summer version.
What you need to sew a soul warmer with your own hands
Dushegrey will fit into the dress code of absolutely any modern office. In essence, it is not much different from a fur jacket, sleeveless vest, shirt or blouse. The main differences are the indirect cut, voluminous sleeves (if any) and fasteners at the top. In order to maintain the style, we recommend paying special attention to the fabric and its texture.
- A piece of fabric. It is advisable to give preference to natural fabric with traditional Russian patterns. If you plan to wear it to the office, you can choose a more discreet pattern. If you don’t want to worry about adjusting the pattern, it’s better to give preference to a plain material and add decor after sewing. Sometimes materials with ornaments from Pavloposad shawls are used as decoration for the upper part of dushegreya.
- Pattern from our material.
- Your measurements (chest circumference, planned length of the product).
- Sewing supplies (needle, thread, pins, scissors).
- Elements for the decoration of soul warmers (golden threads, beads, braid, fringe, lace).

creativecommons.org
Step-by-step plan for sewing a do-it-yourself shower warmer
Before you start sewing a soul warmer, make sure that there is enough material for the length you have chosen.
- Take measurements from the model. Your main reference point will be the circumference of your chest, as well as above your chest. The last parameter will be a guideline for the upper edge of the homemade soul warmer. The obtained data must be increased by 100 mm for a beautiful assembly.
- Calculate the width of the product and model the level from which the expansion will go to the bottom of the product. Usually this is the middle of the soul.
- Adjust and construct the pattern according to the given parameters and secure it to the fabric with pins. Please note that the center line of the front half should run along the grain thread.
- Pay attention to the pattern if your fabric has one. Trim the pattern and adjust the ornament so that it looks harmonious.
- Iron and stitch the edges of the top where the fasteners will be located.
- Make loops and buttons, trim the edges.
- If desired, you can add decoration to the front of the product. It can be braid or fabric with a pattern. If time allows, you can embroider the pattern with gold or silver threads.


 0
0


