creativecommons.org
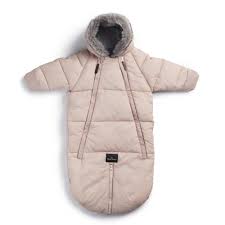
Traveling with kids is a big burden for parents and everyone around them. That is why it is important to take into account all the details and ensure maximum comfort for the baby. A personalized envelope for a baby carrier with your own hands will help you not only save money, but also be sure that the materials used in sewing will not cause irritation to the baby. This article provides step-by-step instructions for sewing an envelope in a car seat for newborns with patterns and diagrams. This item can be a useful discharge gift for travel parents and can be personalized for the baby using embroidery.
Select fabric for the baby carrier envelope
An envelope for a newborn in a car seat should be made primarily of safe hypoallergenic fabric.Most often it is cotton for the inner part, and plush, velor or fleece for the outer part. Despite the fact that the very title of the article “Envelope for a Car Seat” suggests that the newborn will be in the car most of the time, it is still worth stipulating in advance the importance of choosing materials for winter, demi-season and summer envelopes so that the baby is as comfortable as possible. For the winter version of the infant carrier envelope, soft cotton is used on the inside, and fleece or even membrane jacket fabric is used on the outside. A double layer of insulation is laid between them (sintepon, holofiber, isosoft are most often used) so that the newborn does not feel such a sharp contrast between the temperature in the cabin and outside. For the autumn-spring option, you can use one layer of holofiber, and for the outside, lighter materials. Finally, to decorate a summer envelope for newborns in a car seat, you can use only cotton and abandon the warm padding.
creativecommons.org
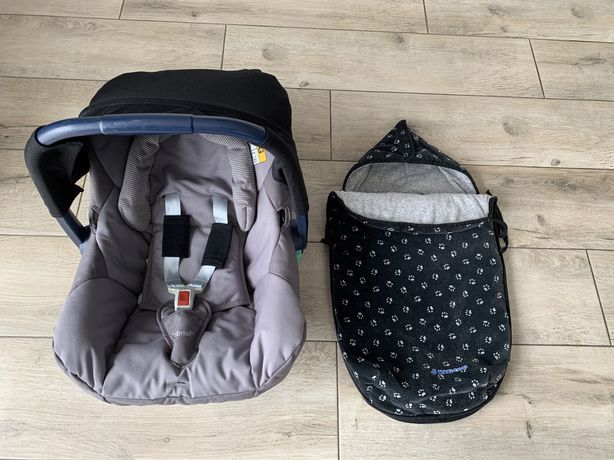
Sewing an envelope for a newborn in a car seat
- Working with a pattern. Transfer the pattern to whatman paper or print it out, observing the size. In general, you should end up with a blank about 40 cm wide and 70 cm high. Pay special attention to the back of the envelope for the infant carrier; it should be 15 cm longer than the front so that you can cover the baby’s head or transform it into a hood. Don't forget to draw the holes for the seat belt: it's better to make the slots a little wider so that the lock doesn't get stuck.
- Open the envelope into the infant carrier. Fasten your chosen fabric and insulation with pins and only then start cutting out the parts.Allow a 1cm margin so that you can overcast the edges of the outer material. For marking, it is best to use colored chalk or a pencil.
- Working with a hood for an envelope in a car seat. If you are a beginner, then it is better to give preference to a one-piece hood, so you will spend less time selecting buttons and zippers, and the pattern (if you chose fabric with an ornament) will be easier to adjust to the intended design. If you decide to make a zipper, it is recommended to first sew it from the front side, and then hide the ends and extend the stitching from the side.
- Belt slots. Making holes is one of the final stages of working on an envelope for a car seat for a newborn. Two of them are done at the level of the baby’s armpits, and one more - in the lower central part. It is important that for the correct location of the holes, it is best to estimate the envelope immediately in the car seat in which the baby will travel. If in doubt, you can postpone this final stage and refine it, after trying it on the baby and making sure it is comfortable for him. Naturally, the edges of the slot for the seat belts will need to be processed separately so that the material does not fray.
Even if parents do not have a car, an envelope for a baby, which can also be suitable for a car seat, will be a practical gift that will help out during spontaneous trips.
 0
0