creativecommons.org
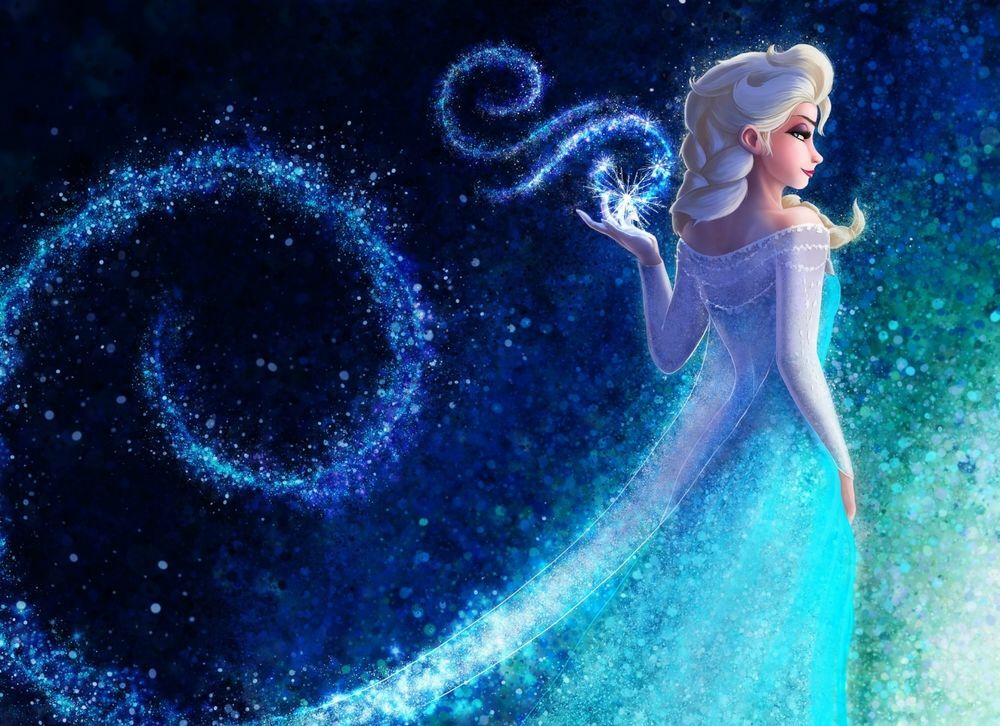
Princess Elsa looks amazing both in the cartoon and in the photo on the Internet. She was able to win the hearts of thousands of girls around the world thanks to her unique abilities and bright appearance. Elsa's costume, pictures of which appeared on the covers of notebooks, coloring books and children's magazines, amazes with its magnificence. The artists managed to draw every detail so clearly and vividly that the outfit sparkled with all its colors. Naturally, this made a huge impression on the children. Almost every little girl dreams of getting the same costume to feel like a princess.
The pattern for Elsa's dress from Frozen is not at all difficult. It’s quite possible to make a dress with your own hands, making a child’s dream come true. There is more than one Elsa dress pattern for a girl on the Internet, all you have to do is choose the option you like. We bring to your attention several ways to make a Frozen costume for a girl with your own hands.
How to sew an Elsa costume from “Frozen”: materials, pattern
Before starting work, you need to stock up on all materials and fabrics, so as not to be distracted from the process later. Before you start making Elsa’s dress with your own hands (the pattern will be drawn up yourself), you need to purchase:
- two meters of transparent white fabric for the bodice;
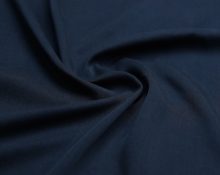
- three meters of blue material for the lower part;
- two meters of shiny transparent tulle with a blue tint - for the bodice;
- four meters of shiny white tulle for the train;
- threads to match the materials - blue, white, dark blue;
- decorative decorations: rhinestones, sparkles, snowflakes.
To make Elsa's Frozen costume with your own hands, you will need a sewing machine, needles, scissors, and a glue gun. When everything you need is ready, a pattern for Elsa’s “Frozen” outfit is drawn up. You can get by with a bodice layout. You don’t have to carry out complex calculations or make drawings. We proceed as follows:
- We find any baby's sweater that fits her. It is important that the sleeve is long.
- Using the jacket, we measure the width of the chest, the base of the sleeves, the cuffs, and the length of the sleeves. You can also draw the armhole.
- If necessary, you can look for another jacket that fits tightly to the child’s figure. Measurements are also taken from her.
- With this method of constructing a layout for Elsa’s costume, the pattern does not take into account seam allowances. It is important to pay attention to this. You can add a few centimeters in the process of transferring elements from paper to fabric.
creativecommons.org
How to sew an Elsa costume using a pattern - step-by-step instructions
Now you can start sewing an Elsa dress for a girl with your own hands. We have all the necessary fabrics, tools and patterns. Step-by-step instruction:
- To sew Elsa's dress with your own hands, we use a bodice pattern. We apply it to the white material and secure it with pins. Using seam allowance, draw out the details of the back, sleeves and front. For outlining, it is better to use a soft pencil or chalk - they are easily erased.
- To create a neckline, you need to fold the edges twice, securing them with a pin. We do the same with the sleeves. We go through the sewing machine at a minimum distance from the edge of the product. After stitching, remove the pin. We also act when working with sleeves.
- The front and back sides of the bodice are folded in half. The front side is inside. Both parts are sewn together at the shoulders. There are several options for sewing an Elsa dress for a girl. You can immediately stitch the product on the sides, but do not forget to leave an armhole.
- We baste the seams when sewing the sleeves into the armhole.
- Take the blue material. The width of the fabric is sixty centimeters, the length is twelve centimeters. Additionally, a seam allowance of 1-2 cm is left. We cut out an identical element from shiny blue tulle. We fasten it to the main material with pins.
- We stitch the joints with a machine, as close to the edge as possible. We connect the seams on the sides of the product. We cut off the material remaining at the allowances. Our Elsa dress, which is very easy to sew, is half finished. All that remains is to work on the bottom.
- Take the blue fabric. We cut out a rectangular flap on it with the following parameters: length - sixty centimeters, width - 160 centimeters. The long side is gathered into a small fold. For fixation, an elastic band of sixty centimeters is used. To sew on the elastic, use a zigzag stitch.
- The skirt is sewn on the side and fastened to the bodice. The work is done on the inside of the dress. We sew the connecting seam with a machine.
- To perfectly sew an Elsa costume for a girl with your own hands, you need to regularly try the product on a child. We put the outfit on the baby and calculate the length of the lower part. Using pins we fix it at the required level. The marks will help you align the hem. For processing we use a double hem and a closed cut.
- So, we managed to sew Elsa’s costume with our own hands, but there was one more detail left – the train. This is a long fabric that gives the dress a festive look. But there is another side to the coin - the train will get tangled in the child’s legs while playing. Therefore, it is better to make it removable.
- We take white tulle, measure the width 95 centimeters, length 90 centimeters. To make the corners semicircular, you need to fold the fabric in half and trim the bottom in the shape of a semicircle.
- Take an elastic band of medium thickness and make loops in it. Length – up to 28 centimeters. We gather the white material into a fold and connect it with the elastic using a machine seam.
- On the line where the white and blue fabric connect, sew six or four buttons. Now the train can always be fastened or removed. We make a comfortable, removable Elsa's cloak with our own hands.
At this point, work on the costume can be considered complete. If desired, you can decorate the skirt with rhinestones and stones to create the appearance of ice floes.
How to sew Elsa's dress from Frozen - pattern, second option
Let's consider another option on how to sew an Elsa costume with your own hands. It will consist of two parts. The dress is the basis, which is made of durable material. You can choose the type of fabric to suit your taste. A silk, satin or satin outfit looks good. The character's original dress is turquoise and blue. If the baby's height is less than 130 centimeters, one meter of material is enough. In this case, the dress will be floor length.
The second detail of the outfit is the cloak. It gives it a special mystery and originality. For a raincoat, it is better to take airy, light fabric. The pattern of the cloak is made separately, after which the two parts are connected using a machine seam. You can also leave the cape removable by making ties at the neck. The peculiarity of this model is that we will not make the raincoat from fabric. It will be knitted. Therefore, it is worth preparing in advance several skeins of cotton thread, thin hooks, twenty-five gram yarn in the amount of six balls. In addition, you need to stock up on:
- rhinestones, sparkles, beads - decor will be needed to decorate the bodice; glitter will make the outfit more realistic;
- threads of a suitable color;
- needle, pins, scissors.
Let's look at the sequential instructions for sewing a princess dress:
- The costume includes two parts. The lower part is a skirt, the upper element is a bodice.
- Cut out a rectangular piece of material. Length – height from armpit to waist, width – chest circumference. Be sure to leave two extra centimeters for the seams.
- We make darts at the bottom of the bodice. They will visually narrow your waist and highlight your figure.
- For the skirt you need to cut a rectangular piece of fabric. When calculating the length, measure the distance from the ankle to the waist. The width depends on the chosen style. If you want to make a full skirt, it will be larger. You will have to make folds, this requires additional material. If the skirt is straight, then the width will be equal to the volume of the hips.
- We connect the skirt with the bodice, making a lapel at the edges. We sew in a snake and a small button. To prevent the bodice from falling off, you can sew straps or put a thin elastic band over the corset.
Now all that remains is to make a cloak, which gives the dress some flair.Instead of sewing it from fabric, let's try crocheting it. The action plan is as follows:
- We knit a row of fifteen air stitches. In some cases, more loops are needed; this needs to be assessed individually.
- We connect the row with a ring.
- A cape will be held on the outside of the palm. To do this, we knit a triangular-shaped fabric. As for the pattern, there are no specific requirements. The main thing is that it is tender and airy.
- We close the triangle again with a ring, and continue knitting until the beginning of the upper part of the suit. We make another sleeve in the same way.
- We connect the sleeves using several rows connected with air loops through the back. We continue to stick to the pattern and knit a cloak, expanding towards the bottom. To do this, loops are gradually added at the edges.
 0
0