creativecommons.org
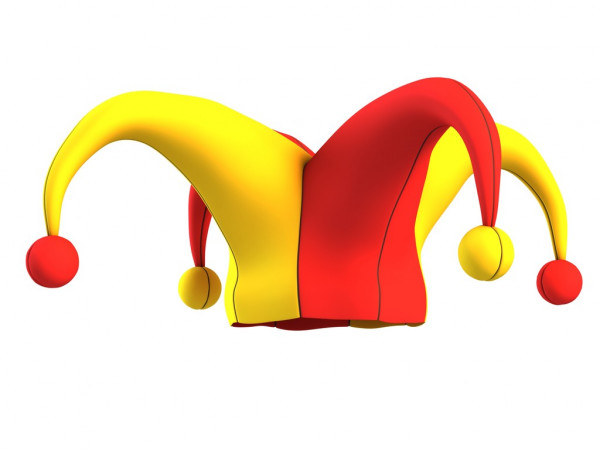
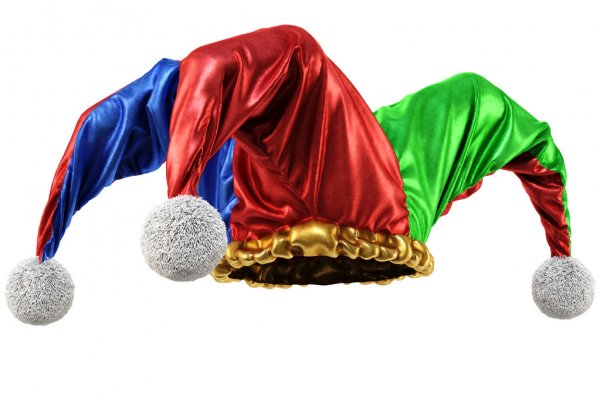
Make a costume WithMaking a clown for a festive matinee or performance is not an easy task. But if for the costume itself it is enough to choose the material and pattern of the most ordinary pants and shirt, but with a cap everything is much more complicated. Here you need to watch more than one master class to understand the process, and you may need the advice of a professional. A cap WithKomorokha is not only a New Year's accessory. It is often used in plays, productions, and children's parties. Any child will be happy to wear the buffoon's cap. A necessary step before starting work is creating a pattern. Then the parts are transferred to the fabric and stitched according to a special principle.
Buffoon's hat - pattern of the side element
According to the standard, the buffoon's hat consists of two parts: a red and a blue partAnd, or blue and green partsAnd. Enough to build pattern of the right side, because when turning to the other side she will become model and for the left element.First, let's calculate the width of the bottom of the hat. To do this, we need to measure the volume of the child's head and addb the margin for seams is four centimeters on each side. For example, the volume of a child’s head is 46 centimeters. Then we needIThere are two parts with a total width of 46+4 = 50 centimeters. One line is 25 centimeters. Let's move on to creating a pattern:
- Draw a segment of 25 centimeters. At the ends we designate two end points - A and B. From point A we draw upward a perpendicular line of nine centimeters. We put point C. From mark B we draw a perpendicular of twelve centimeters. Let's put point G.
- We connect the vertices of perpendiculars C and G. In the middle we mark M. From M upward we draw a perpendicular of thirty centimeters. Draw label A1. From A1 we put it to the left and right sidess four centimeters each. We designate the points as B1 and B2.
- WITHWe connect C and A1, A2 and D with straight segments. Between CA1 and A2G we put marks C1 and C2, set aside six centimeters from them. From C1 to the right, from C2 to the left.
- WITHconnect these points by drawing a concaveYu smooth line. We draw it from mark C through mark six centimeters, A1, A2, six centimeters, D.
- INcut out the resulting layout along the line thatand I unitinget marks A, C, 6 sm, A1, A2, 6 cm, D, B, A.
- DWe create two fabric elements according to this layout: one on red material, the other on blue fabric.
creativecommons.org
Buffoon costume - pattern for the inside of the hat
The elements of the interior are located on the top of the head. They will be sewn between the side of the cap and the center. Similarly, as in the case of the side elements, two elements are made according to one pattern - one blue, the other red. When creating a pattern, we proceed as follows:
- Draw a segment of ten centimeters; nand at the ends we put points K and F.
- Divide the segment into two equal parts by point P.
- From P we draw a perpendicular upward by thirty centimeters. We put the mark P1. From P1 we put four centimeters to the right and left. We put points K1 and K2. We connect KK1 and K2F with a straight line. Again we divide these lines into two parts. We put marks F1 and F2.
- From F1 we put one and a half centimeters to the right, from F2 also one and a half centimeters, only to the left. We put points K3 and K4.
- Smoothlyth use a concave line to connect K, K3, K1 and K2, K4, F. We trace the element along the marks K, K3, K1, K2, K4, F, K and cut out the resulting figure.
- We cut out one piece in red, one in blue.
Buffoon's hat - how to sew a festive cap
The process of sewing a cap is as follows:
- a simple seam connects the two internal elements of the hat at the bottom; V the result is the shape of an elongated rhombus;
- the left red part and the right blue part are connected on the forehead, then on the back of the head; V as a result, we get a solid hat, but without the crown;
- the central empty part is filled with an internal piece similar to a diamond; the cap is stitched on the left and right sides;
- Thirty centimeters long wire is sewn on each internal seam - this will make the hat rigid;
- after the wire is secured, we give the shape to the hat; making curved, fun endings.
To finish the product, you can use circles cut from colored fabric. The approximate diameter is ten centimeters. NeededtsI have two pieces. We stuff padding polyester or cotton wool into the middle of each piece. Using a needle, we collect it around the circumference and tie it onto a thread. You get soft round balls. Sew them onto the ends of the hat. We also attach a strip of colored fabric to the bottom.If there is a chance that the cap will fall off your head or fall off at a crucial moment, you can thread an elastic band. She will fix the hat. To decorate a festive outfit, glitter paper, raindrops, rhinestones, beads and other decorative elements are suitable. This original craft will be a wonderful gift for a child.
 0
0