creativecommons.org
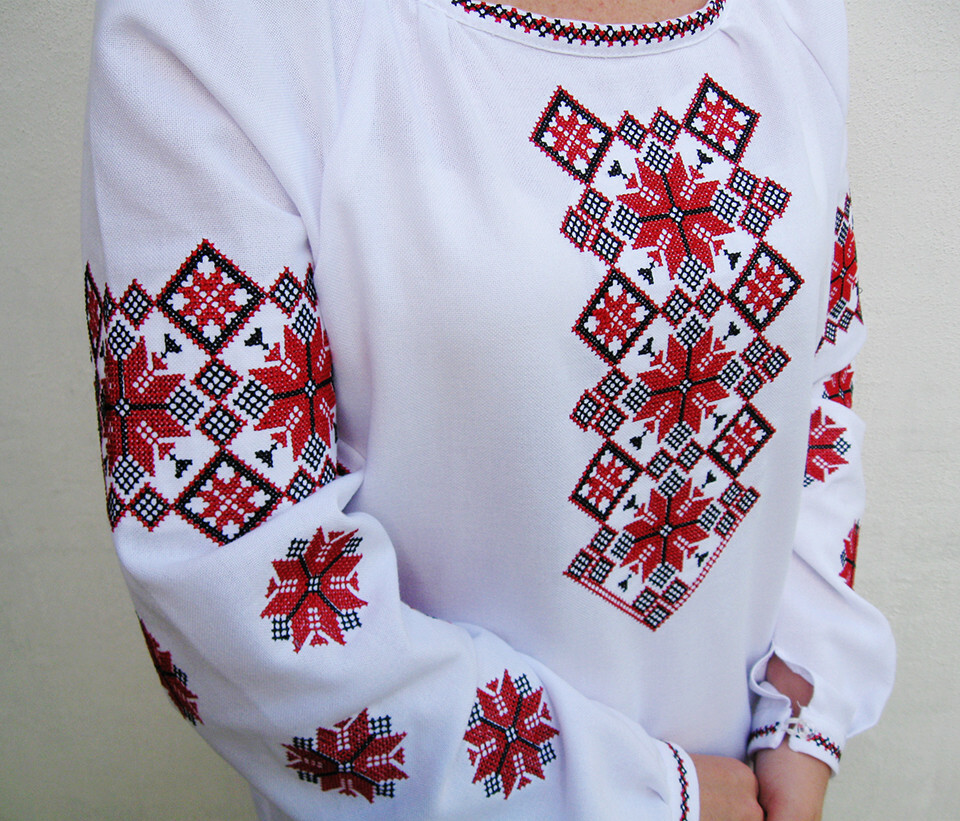
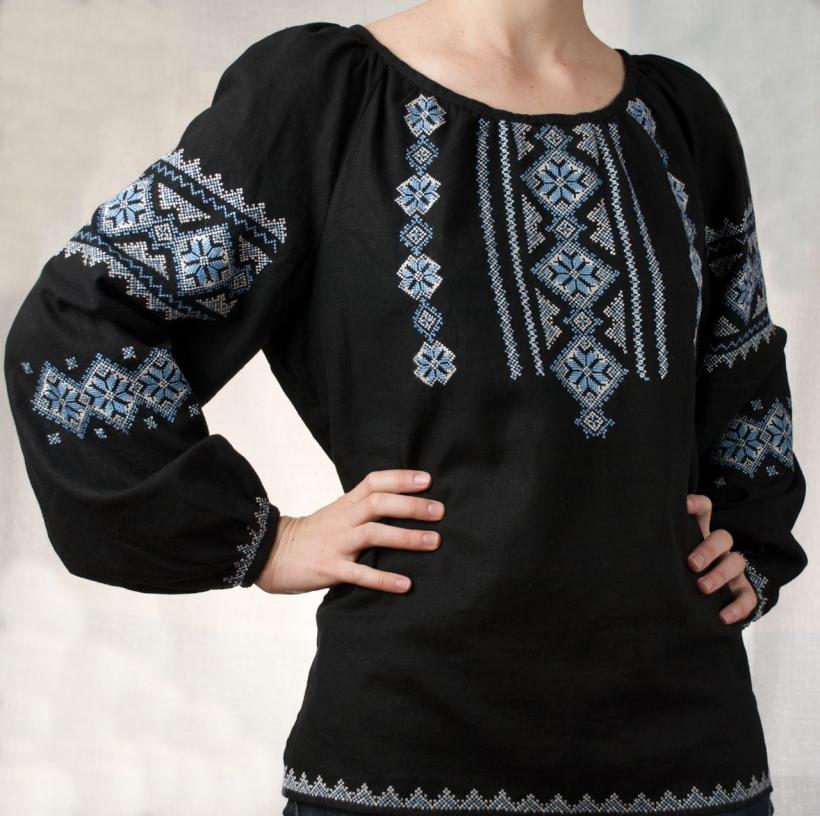
Embroidery first appeared during the period of Trypillian culture. Then clothes were decorated with a variety of special symbols and unique signs. According to beliefs, it was believed that they protect a person from evil spirits, troubles and misfortunes. For many centuries, people have been passing on their culture and traditions through embroidered shirts. Depending on the cut of the jacket, symbolism and pattern, you can calculate in what time period the item was created. Main types of embroidery:
- Animations, fauna. On the blouses there are images of owls, roosters, cuckoos, fish and other representatives of the fauna.
- Vegetation. Decorations with flowers, leaves, and stems look beautiful. They symbolize love and life.
- Geometry. Slavic mythology brought its unique patterns created from zigzags, triangles, crosses, rhombuses, and lines to Ukrainian culture.
The difference in ornaments may be due to territorial features.Each region had its own unique decorations.
Ukrainian embroidered shirt – pattern of front and back
First, let's calculate the amount of material that will be needed for the job. It is necessary to calculate the sum of the length of the product, the length of the sleeves and add five centimeters. We get 70 + 32 + 5 = 102 centimeters of material that needs to be prepared. List of basic measurements that need to be taken:
- The length of the jacket. For us it is 70 centimeters.
- Half the volume of the chest. Equal to 49 centimeters.
- The width of the sleeve at the bottom. It turns out 27 centimeters. Here the measurement depends on the length and shape.
- Sleeve length. If the sleeve is short, it will be 29 centimeters.
In order for an embroidered shirt to fit well, the pattern must be constructed accurately, according to all measurements. Let's move on to building the shelf:
- Draw a rectangle on whatman paper. The long side is the length along the back minus five centimeters. The short side is half the volume of the chest divided by two. For the seams we add one centimeter, for the free allowance - 5. The sides of the rectangle are 72 and 30.5 cm, respectively.
- From the top part we draw a line of 19 centimeters and draw an armhole.
- We count 7 centimeters from the right side and make a mark.
- We begin to draw the armhole line.
- Go to the upper left corner and count how deep the neck will be. For us it is 7 cm. We put a mark;
- From the mark we draw the neck.
Now let's move on to building the back. To do this you also need to draw a rectangle. Its long side is equal to the length of the embroidered shirt, to which 2 centimeters are added for the seams. The short side is half the volume of the chest, divided in half, plus 1 centimeter for seams, and five for a loose fit. We get a figure with sides 72 cm and 33.5 cm. Next we follow the instructions:
- We draw a line 26 cm to the bottom of the product and build an armhole.
- We move to the right corner of the rectangle, count 7 centimeters, and put a mark.
- From the mark we begin to draw the armhole.
- Go to the upper left corner, count one and a half centimeters down. This is the neck. We put a mark.
- We begin to carefully draw the neck, based on the mark.
The sleeve pattern can be made according to your own taste - long or short sleeves, wide with ties at the bottom or tight-fitting.
creativecommons.org
Step-by-step description and pattern of women's embroidered shirt
The product is manufactured in several steps. Let's look at them step by step:
- Creating a pattern. To make a shirt exclusive, it is better to build its layout, make the pattern yourself. But if you wish, you can find ready-made options on the Internet and in stores.
- Schematic preparation. Embroidery requires preliminary development of a pattern. It is also necessary to check that the pattern matches the dimensions.
- Embroidery. Here you can dream up your imagination and put your soul into the drawing. The pattern can be absolutely anything. You need to prepare the threads of the desired colors and the pattern in advance.
- Sewing a shirt. All parts of the product must be carefully sewn and the finished version ironed.
Some craftsmen find it more convenient to sew the embroidered shirt first and then do the embroidery - this sequence is not important.
 0
0