creativecommons.org
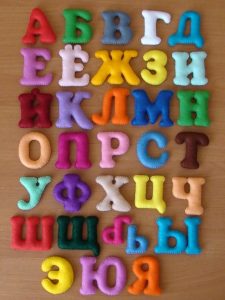
A felt alphabet is a budget-friendly and effective way to help your child remember all the letters. You can easily make such a toy with your own hands at home and in a short period of time. In this article you will find a master class on making such an alphabet, as well as photographs with unusual ideas for designing such a creative alphabet.
When is the best time to start learning and how long will your baby need the felt alphabet?
Someone begins to teach a child the alphabet and syllables from the age of 1.5 years, but, according to many neuropsychologists, with such an intense load, the child may not master other important areas: emotional and sensory. It is best not to rush the process and begin teaching the alphabet when the child shows interest in the letters and begins to repeat after adults, imitating reading a book or asking what exactly is written on an advertising poster. For all children, this period begins at different times: sometimes at 4-5 years.However, if your baby shows interest in the alphabet and the reading process at 2 years old, you can introduce the alphabet in a game format. There are many teaching methods and only parents can decide which one to follow. Much depends on the design of the alphabet itself; the craftswoman will have to spend some time to make the felt alphabet bright and interesting, but such an investment of time will be worth it, because in the end such a primer can perform several tasks at once. With it you can study letters and their sequence in the alphabet, as well as form syllables and simple words. If you have time, you can sew an animal for each letter to expand your child's horizons and ask him to match the stuffed animals with the letters corresponding to the first letters of their names.
What you need to make the alphabet from felt
creativecommons.org
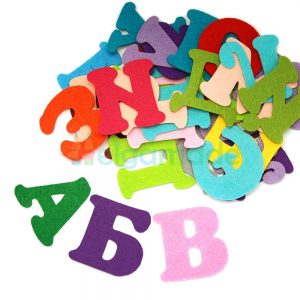
- Multi-colored pieces of felt and small fragments of material. The key word is colorful. A plain felt alphabet will not look as bright and the child will not learn letters and words as effectively.
- You can take fabrics of different densities and use the denser one as a base where you can attach the letters.
- Stencil.
- Scissors (you can use scissors with serrated edges to give the letters a zigzag edge).
- Thin filler (for example, padding polyester).
- Tailor's chalk.
- Decor (optional). If you have time, you can complement the felt alphabet with decor in the form of buttons and beads. Please note that all fittings must be securely sewn to the base. We do not recommend using glue, as a child may peel off the parts.
Step-by-step master class on sewing the alphabet from felt
As a basis for the felt alphabet, you can use either a regular piece of felt or sew a felt book to glue or sew in the letters. We will give an example of the second, more practical option, since this option can be taken with you on a trip and quickly stored in almost any medium-sized bag.
- Use tailor's chalk to draw out the appropriate size for the book.
- Fold several pieces of felt in half and pin the pattern onto the fold.
- Cut out the required number of double sheets and sew them together into a single notebook.
- Lay out the letter patterns on multi-colored pieces of felt and padding polyester folded in half. Secure with pins and trace around the pattern. Duplicate the outline, leaving 0.5 cm for indentation.
- Cut out all the pieces.
- Sew the letters together, leaving a small section open.
- Turn right side out and insert pieces of padding polyester. Sew the remaining edge with a blind stitch.
- If time and desire allow, you can sew animals corresponding to each letter of the alphabet. This way, playing with your child will be more educational: the baby will recognize not only letters, but also animals.


 0
0