dommino.ua
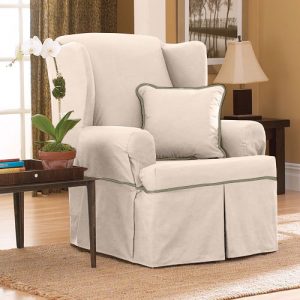
Sewing a chair cover with your own hands is not difficult, but it is important to cut the material correctly and take measurements. Otherwise, the material may be damaged. It is better to double-check your calculations several times and carefully calculate the amount of fabric needed for the job.
Before sewing a cover for a chair, you need to choose the optimal color and design. The fabric is of great importance. If there are animals in the house, it is better to choose a more durable material; it will last much longer and will not “suffer” from claws. For families with small children, non-marking fabrics that can withstand washing are suitable.
How to sew a chair cover with your own hands - cutting the material
To create a beautiful chair cover with your own hands, you need to carefully cut the fabric. Sewing itself is much easier than measuring and cutting. Initially, we will lay out all the paper fragments of the pattern on the material. Let's fix them and trace them using chalk. Cut out all the fragments and iron them from top to bottom.We will start working from the back of the chair. Fold the resulting fragment part in half and mark the center along the canvas. Further instructions on how to sew a chair cover:
- Let's unfold and lay out the layout on the back element of the backrest. Let's fix it using pins and mark the lines that will go there. We proceed in the same way with the front fragment of the back;
- Let's start cutting out the back piece. This is the place where the back meets the sides. For allowances, keep three centimeters and tuck the fabric between each armrest and the backrest. Mark the place of the stitching at the point where the back meets the seat;
- We make armrests. Everyone needs a knit and back pattern. Fold the material in half and mark the longitudinal thread in the middle. We use pins to secure the outer cover to the chair. The bottom edge should cover the future stitching with a frill of 1.5 cm;
- The pattern of the outer element of the back must be fastened to the armrest. In this case, the edges should be on the outside. Here you will need to make a seam;
- The internal pattern should have a margin on all sides. The stock size is approximately twenty-three centimeters. From one side the material will go in front to the sidewall. From the second side, approximately 18 cm will go to the wrong side of the back. Below, the pattern of the dorsal fragment will lie on the seat;
- The outer and back sides of the sidewalls are chipped. Connection points with the internal fragment of the product are marked on the fabric. We process the second sidewall in the same way;
- Let's cut out the insert piece and fasten it to the front section. This is where the stitch line is drawn. Now you need to put all the parts together. Internal and external layouts are chipped with an insert. In this case, the edge of the materials remains outside;
- A pattern is made in place of the seat.Let's leave spare fabric - twenty-three centimeters;
- Let's put together all the patterns - the back, seat and armrests. Let's mark the internal points of contact of the fabric. We will cut off the excess material;
- Let's move on to the darts. They are located on the front corners of the seat. The outer pattern of the armrests is cut with the seat. The future seam connecting the parts is marked. We will tuck one and a half centimeters into the gap between the armrests and the back. Let's mark the seams again.
Fabric cutting is complete. Now let's move on to sewing the cover. A sofa cover is made in a similar way.
How to sew a chair cover - step by step guide
dommino.ua
Before putting the cover on the chair, you need to connect all parts of the material together. To do this you need:
- Sew the frill and darts that were made during the cutting process;
- Sweep away the armrests. We work from the inside out. Turn the pieces right side out one by one. You can make several small cuts in the corners so that the cover does not wrinkle;
- We make a connecting seam between the armrests and the seat of the chair;
- We sweep the far fragment of the seat with the bottom of the inner element of the back. Then we baste the outer piece of the back;
- Let's connect the four pieces left on the hem. We start work from the top and finish at the bottom. In parallel, a number of assemblies need to be laid;
- The upper part of the hem is sewn to the bottom of the cover. The snake is placed in the side seam area;
- The product must be turned completely onto the face. If there are wrinkles, you will have to rip it open in problem areas and sew it again.
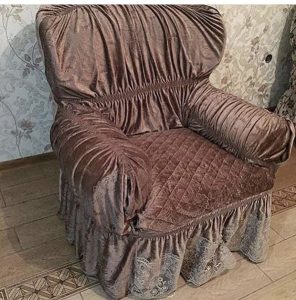
The outer cover should fit perfectly on the chair, without bruises or folds.
 0
0