creativecommons.org
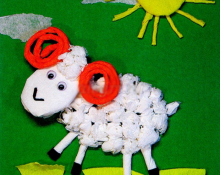
In this article we will tell you how to make a patchwork toy with your own hands for beginners. Patchwork will help not only to use the remaining material that you would hate to throw away, but also when you don’t know what to use it for. Creating patchwork toys is an opportunity to give free rein to your imagination and even include your child in the process of choosing fabrics. As usual, at the end of this article you will find a pattern and diagram for sewing a toy from scraps.
History of patchwork
Patchwork is probably one of the most ancient crafts. There was always material left that was a pity to throw away, but impossible to use to create something truly functional. Patchwork made it possible to create a product literally from scraps, saving money and taking up free time. Toys were one of the most obvious scrap products. But besides them, housewives managed to sew larger things from scraps of fabric and leather: napkins, pillows and even bedspreads.
With the development of weaving production, the urgent need for such savings disappeared and became the lot of the lower classes. Only in the 18th century did patchwork sewing become fashionable, including among the middle class: the trend began with the economic collapse - restrictions on the import of calico from India to Great Britain. Then colored pieces of fabric began to be smuggled into the country, the price of fabric rose sharply and demand arose even for small pieces of fabric. Then, interior items made from fragments of fabric began to be in demand: bedspreads, pillowcases and... toys. This wave of fashion for patchwork sewing reached Russia only in the 19th century.
What will you need to make a patchwork toy?
creativecommons.org
Here you can turn on your imagination: choose the shades you like and think through the design and color transitions, or use what’s lying around in the closet and leave everything to chance. It's up to you to decide, there are no special rules.
- Pieces of fabric of different colors. Still, it is better to choose contrasting shades whenever possible, this will make the toy more interesting.
- Scissors with long blades.
- Iron with steam function or steamer.
- Tailor's chalk or regular pointed soap.
- Pins.
- Printable pattern, which you will find at the end of the article.
- Filler.
- Decorative elements for decorating toys. Various buttons, ribbons, fragments of lace fabric, beads, rhinestones and other accessories are suitable.
How to sew a soft patchwork toy
There are several techniques for creating toys from scraps. Firstly, you can sew a plain toy and then embroider it with figured pieces of fabric, creating the illusion of multiple patches. This is the easiest option, but it is not quite a patchwork.Secondly, there is a technique for adding flaps, when one type of fabric is layered on top of another (the edges also remain raw). Thirdly, there is standard patchwork using the technique of folding fabric into rectangles or triangles.
- We adapt the prepared pieces of fabric to a single format. The best option would be fairly wide strips of different types of fabric of approximately the same shape.
- Strips of fabric are sewn into a single colorful fabric.
- On the reverse side, we draw the resulting fabric into squares, cut it out, arrange it in a checkerboard pattern, and sew it again.
- We secure the pattern to the canvas using pins.
- Cut out the shape.
- We sew the shape with the right side inward, leaving space for the filling.
- Turn the toy inside out.
- We fill it with filler and sew up the remaining incision with a hidden stitch.
- We decorate using prepared decorative elements.
 0
0