crafta.ua
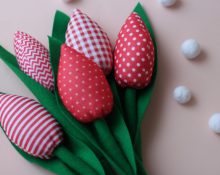
For the bright holiday of Easter, an original do-it-yourself felt basket, the templates of which are quite simple and understandable, will become a real decoration. Like every homemade craft, a felt basket is exclusive in its own way. A bright accessory is suitable not only for the holiday. Often, such crafts come in handy during matinees and performances in kindergarten or school. It will take a little time and a minimum of materials to make the product, and the souvenir itself will delight the eye for a long time.
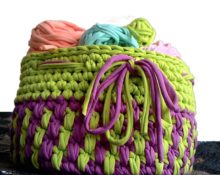
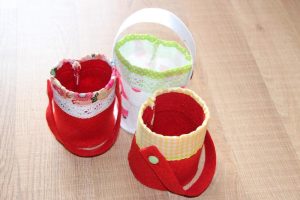
You can make felt baskets with your own hands in various sizes and decorate them to your liking. For a birthday or other holiday, sets of sweets, fruits or flowers are presented in such products. Due to the characteristics of the material, felt baskets and pockets for gifts are not at all difficult to make. The edges do not need to be processed, the fabric does not unravel or fray, holds its shape well and is easy to sew.
DIY felt basket with patterns - how to make a felt basket
A non-standard felt basket, the pattern of which consists of two ovals and twelve stripes, is perfect for decorating a gift or creating exclusive decor in the home. To work you will need:
- Glue gun with sticks.
- A figured hole punch to make a decorated basket with felt flowers with your own hands. If there is no hole punch, you can make a pattern of flowers of different sizes yourself and transfer them to felt. Stores sell ready-made decorations - sets of flowers of various sizes.
- About a meter of lilac satin bias binding.
- A sheet of stiff lilac felt. Diameter – three millimeters. The material will be used to make a basket.
- One sheet of light green, white soft felt. Diameter - one and a half millimeters. The fabric will be used to decorate the product with grass and flowers.
The felt basket pattern consists of three parts. The wall is in two copies - size 30x10 centimeters, the bottom is in one copy. This is a circle with a diameter of 12 centimeters. We cut out the parts from the material and begin to assemble the basket. To do this you need:
- Use hot glue to glue all the fragments of the product together. Bias tape is glued at the joints. It not only decorates the craft, but also makes it more durable. The lower part should be glued to the assembled walls.
- At this stage, the felt basket with flowers is decorated.
- First of all, we make weed. It is cut out quite simply. It is necessary to attach the wall pattern to the green felt and outline it with a pencil or chalk. Then remove the pattern and add blades of grass of varying heights and widths to the resulting rectangle.
- The cut out part must be glued carefully along the contour of the bottom of the basket. It is important that there is no gap between the bottom and the grass, otherwise the craft will look unnatural.
- On top of the grass you need to decorate the product with white flowers of different sizes. You can make a flower pattern yourself, cut out several pieces from fabric and glue it around the perimeter. The holiday basket is ready!
Felt basket - pattern, materials, step-by-step guide
crafta.ua
The second option to make an original felt basket requires the following tools:
- a piece of straw-colored or beige felt;
- skein of brown thread;
- any decorative elements of various colors;
- silicone based glue;
- sheet of cardboard, scissors.
This basket looks like the real thing. It resembles wickerwork for picking berries. Step-by-step manufacturing guide:
- Cut out two oval pieces from a cardboard sheet. They must have the same shape and size. This will be the top and base of the craft.
- We cut out twelve strips of cardboard two centimeters wide and twenty centimeters long.
- We bend the felt at one edge and attach it to the cardboard template. Prepare the felt strips. They will be an imitation of rods intertwined with each other.
- We cut out twelve strips of forty centimeters long from felt.
- We sew the strips together one by one. In this case, we fold the material in half, inside out.
- We turn the strips onto the face and insert a cardboard template inside. The end of the template should stick out about one and a half centimeters. We bend it.
- To process the stripes, brown thread and decorative stitching are used. The elements need to be distributed throughout the future product, maintaining symmetry and uniformity.
- Lubricate the folded cardboard edges of the strips with silicone glue. We securely fix them on the bottom base.
- We apply silicone glue to the second workpiece, which lies first. We squeeze the two ovals with force and combine them. This allows you to hide the bases of the strips inside the two bases.
- The frame for the craft is ready. It is necessary to make transverse stripes. Cut out 3 stripes. Width – any, length is measured in accordance with the diameter of the product.
- We fold the strips in half lengthwise, stitch them, turn them inside out and make a decorative seam. One strip is woven at the bottom of the basket, the second is in the middle, and the third is at the top.
- It is advisable to secure all strips with glue at the intersection.
- All that remains is to decorate the felt basket. To do this, you can cut out butterflies, flowers, stars and much more from multi-colored material. Jewelry made from rhinestones, stones, and sparkles look original.
By analogy with this oval basket, you can make felt pockets with your own hands. These can be flat handbags, rounded products or square stands.
 0
0